Invite people to your business, give them a role, hand a permission to someone for a while, and remove access when it is no longer needed.
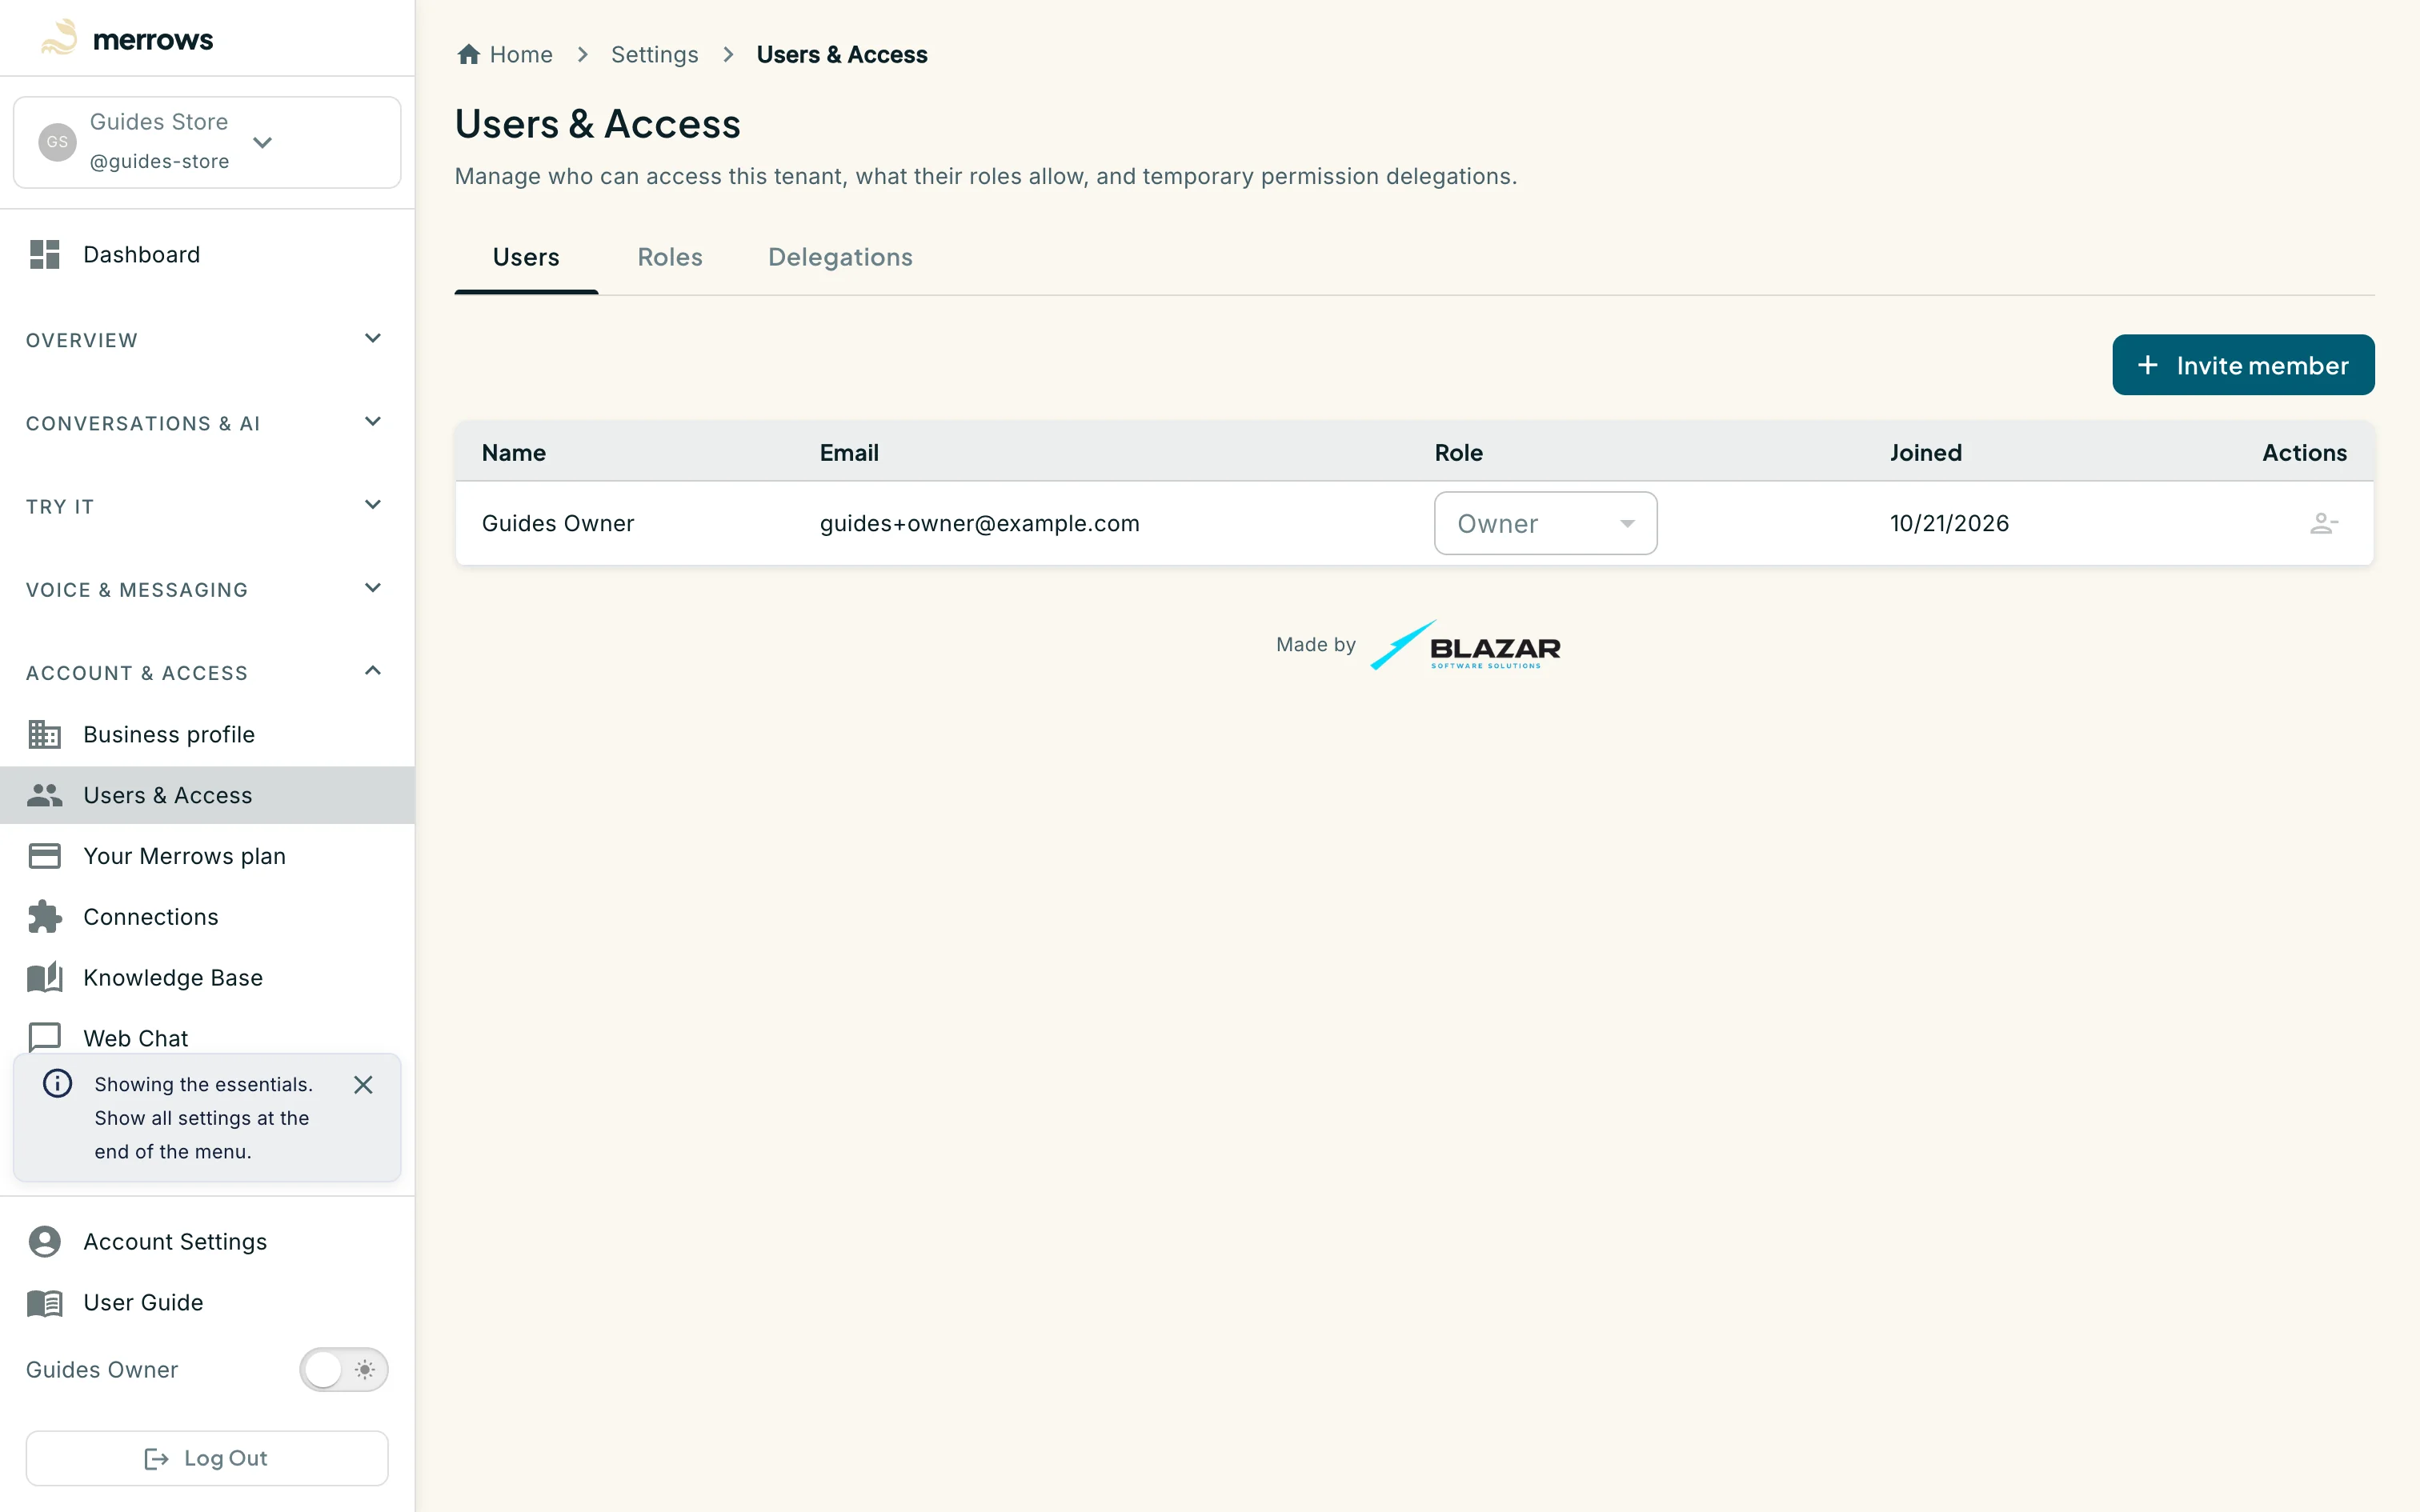
Action: Open Users & Access under Account & Access, or go to https://portal.merrows.ai/settings/users-access.
What you should see: Three tabs: Users, Roles and Delegations. Users lists each member with name, email, a Role selector, the date they joined and a Remove button. Your own row is read-only; nobody can change their own membership.
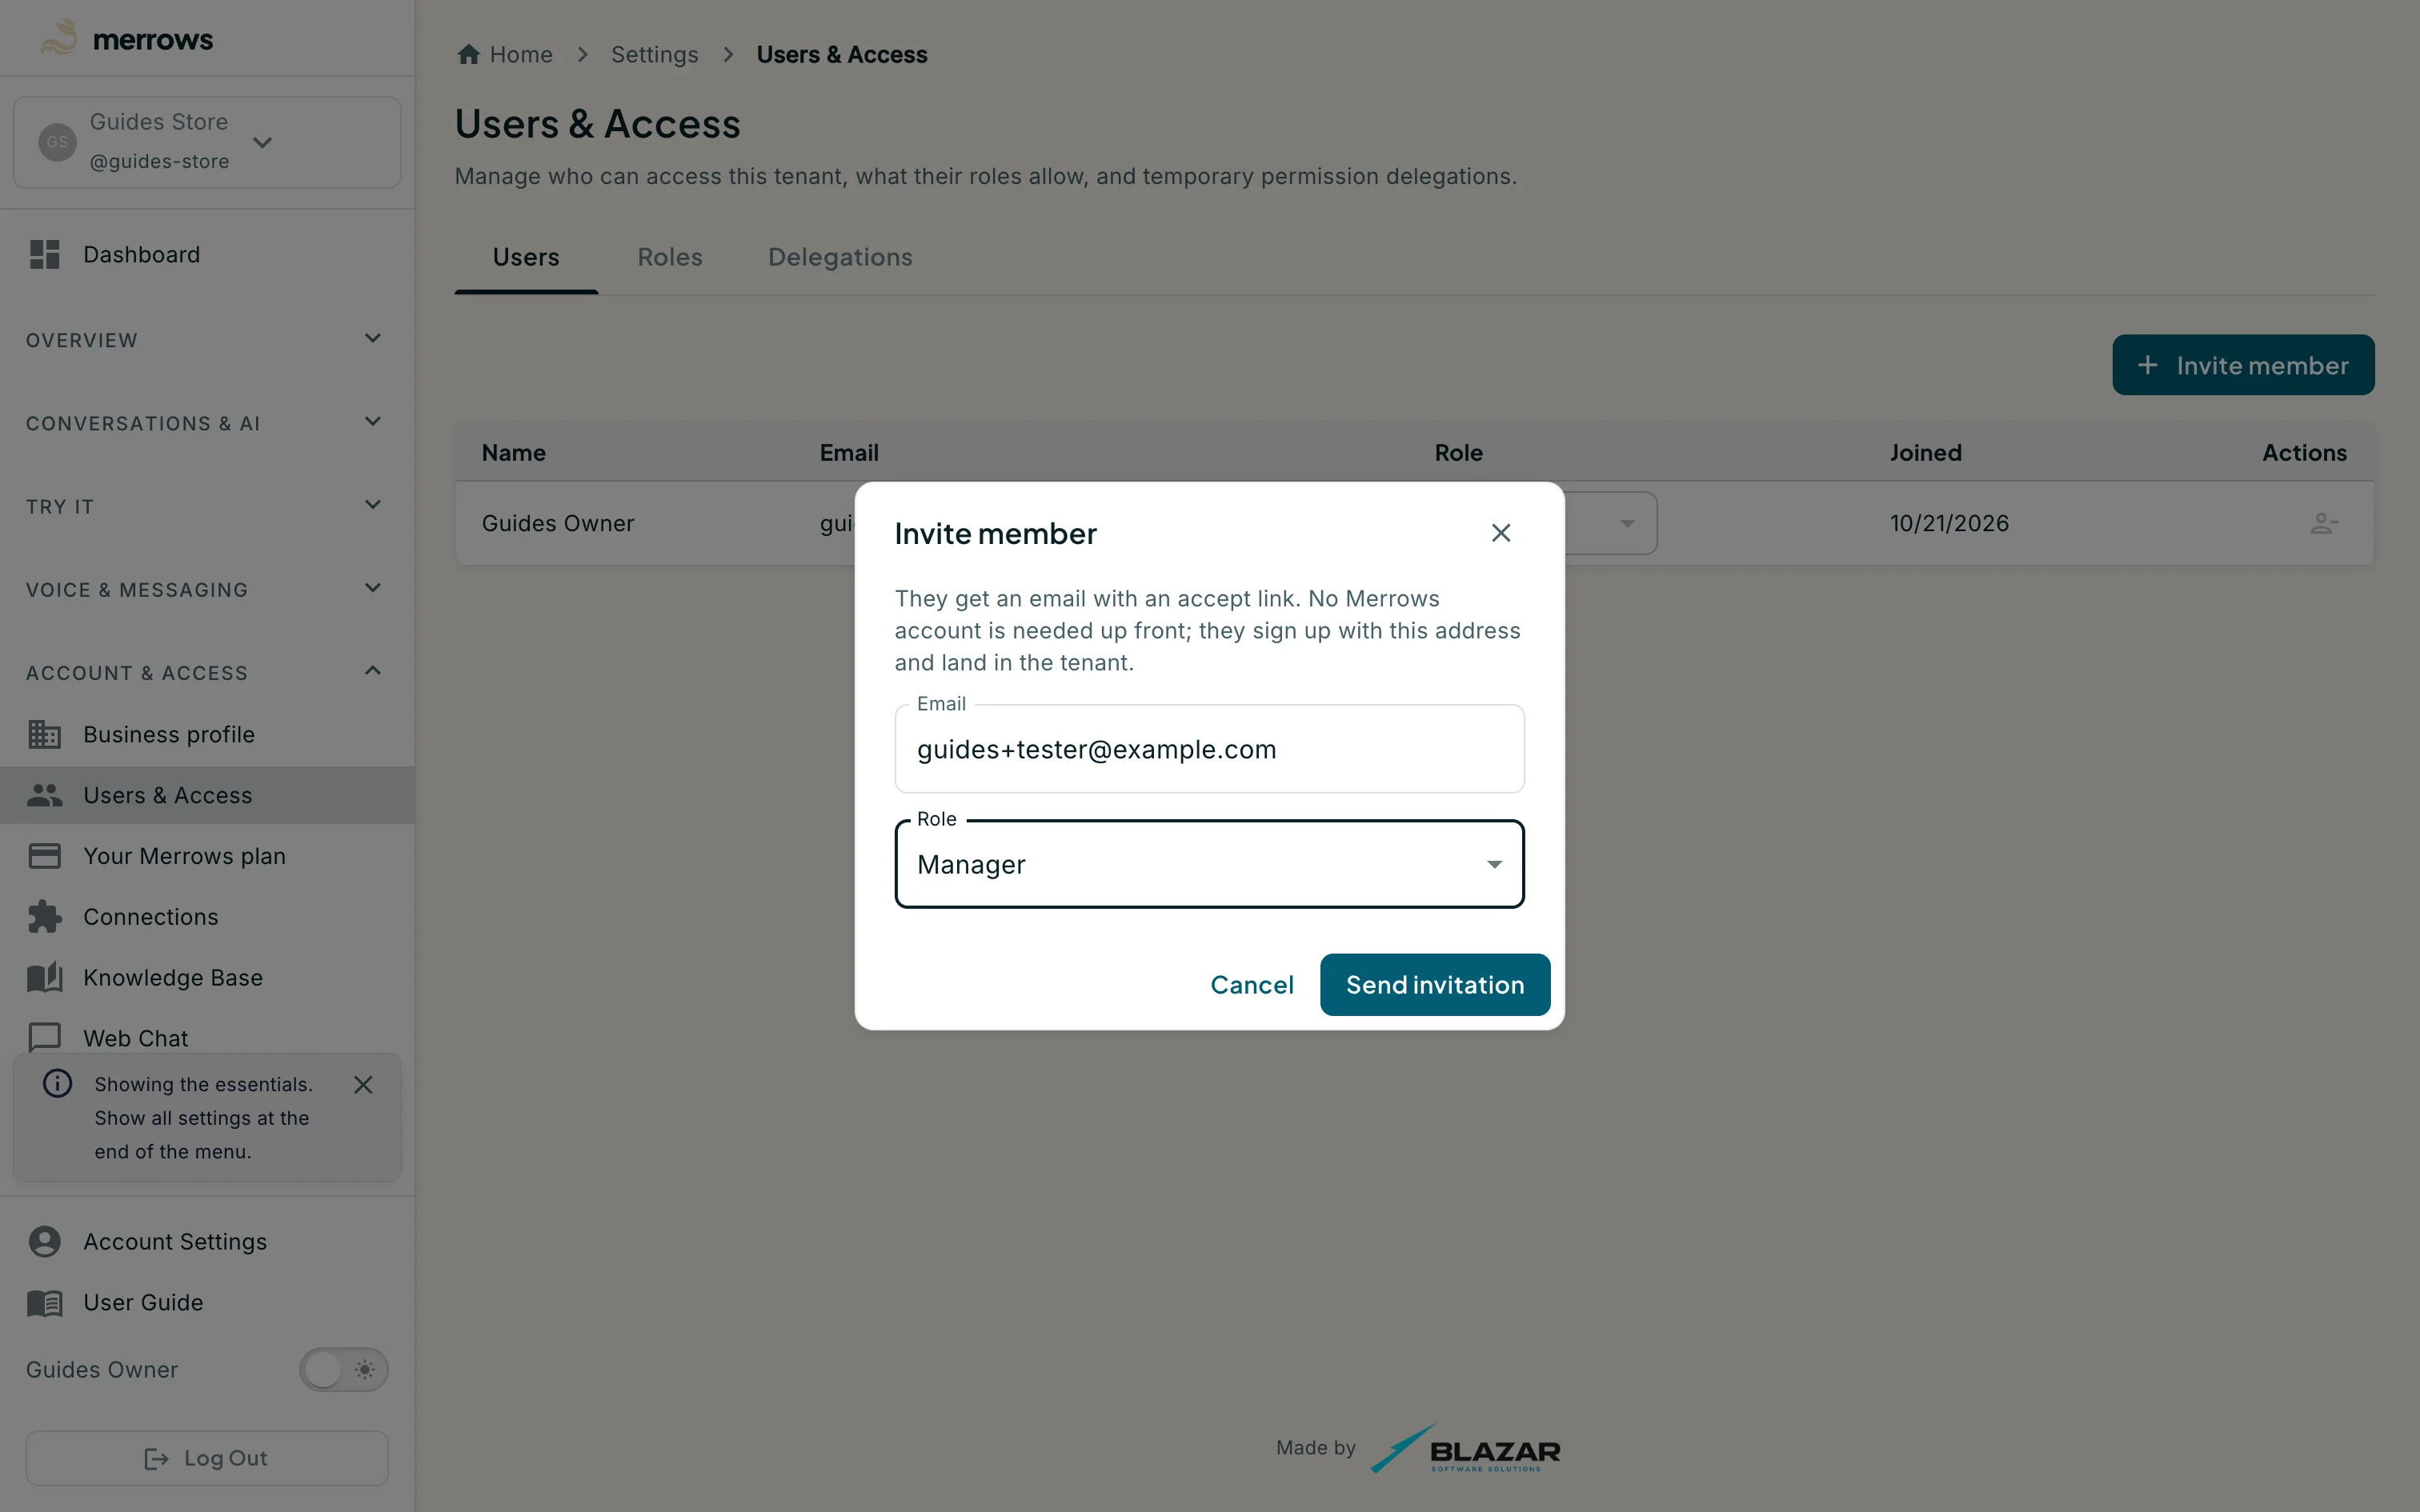
Action: Click Invite member, type the address, pick a role and click Send invitation.
What you should see: The dialog says the person gets an email with an accept link and needs no Merrows account up front: they sign up with this address and land in the business. Only the roles you are allowed to grant appear in the list. The invitation then sits in a Pending list with Resend and Revoke until it is accepted, and expires on its own after a while.
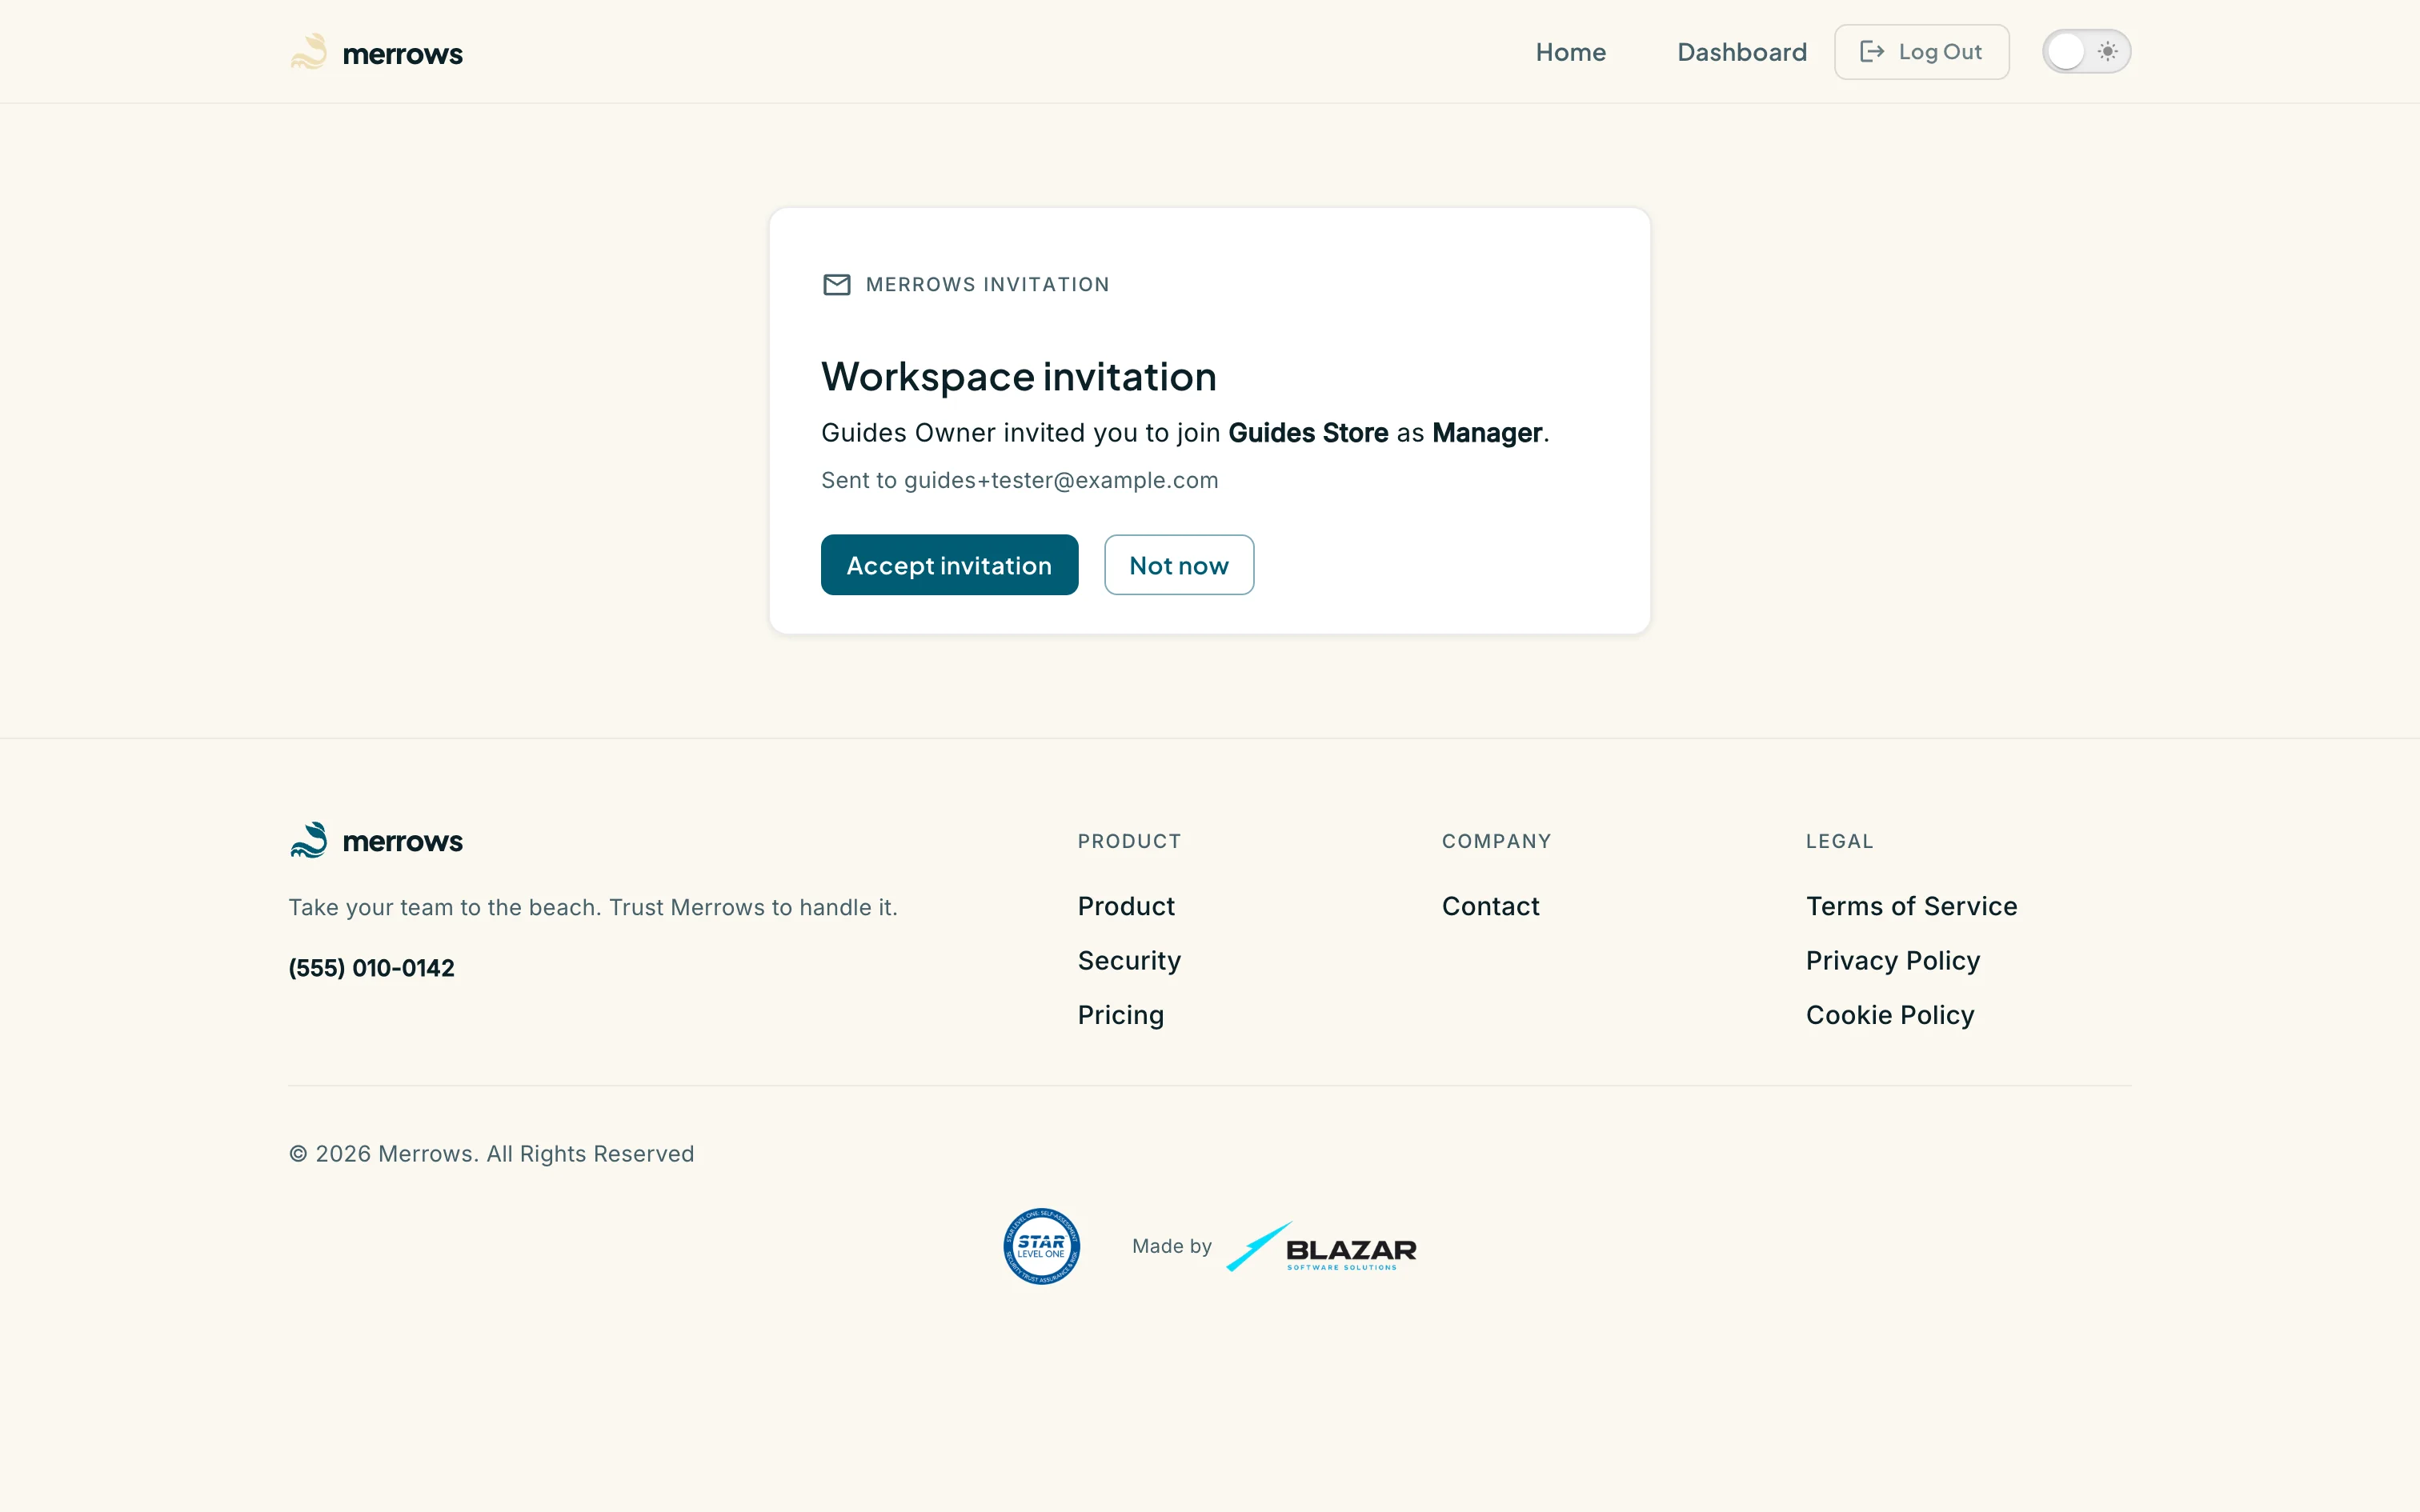
Action: As the invited person, open the link in the email. Sign in with the same address, or create an account with it first.
What you should see: The “Workspace invitation” page names who invited you, the business and the role, with Accept invitation and Not now. Accepting adds the business to your switcher at once; a link opened under a different address is refused.
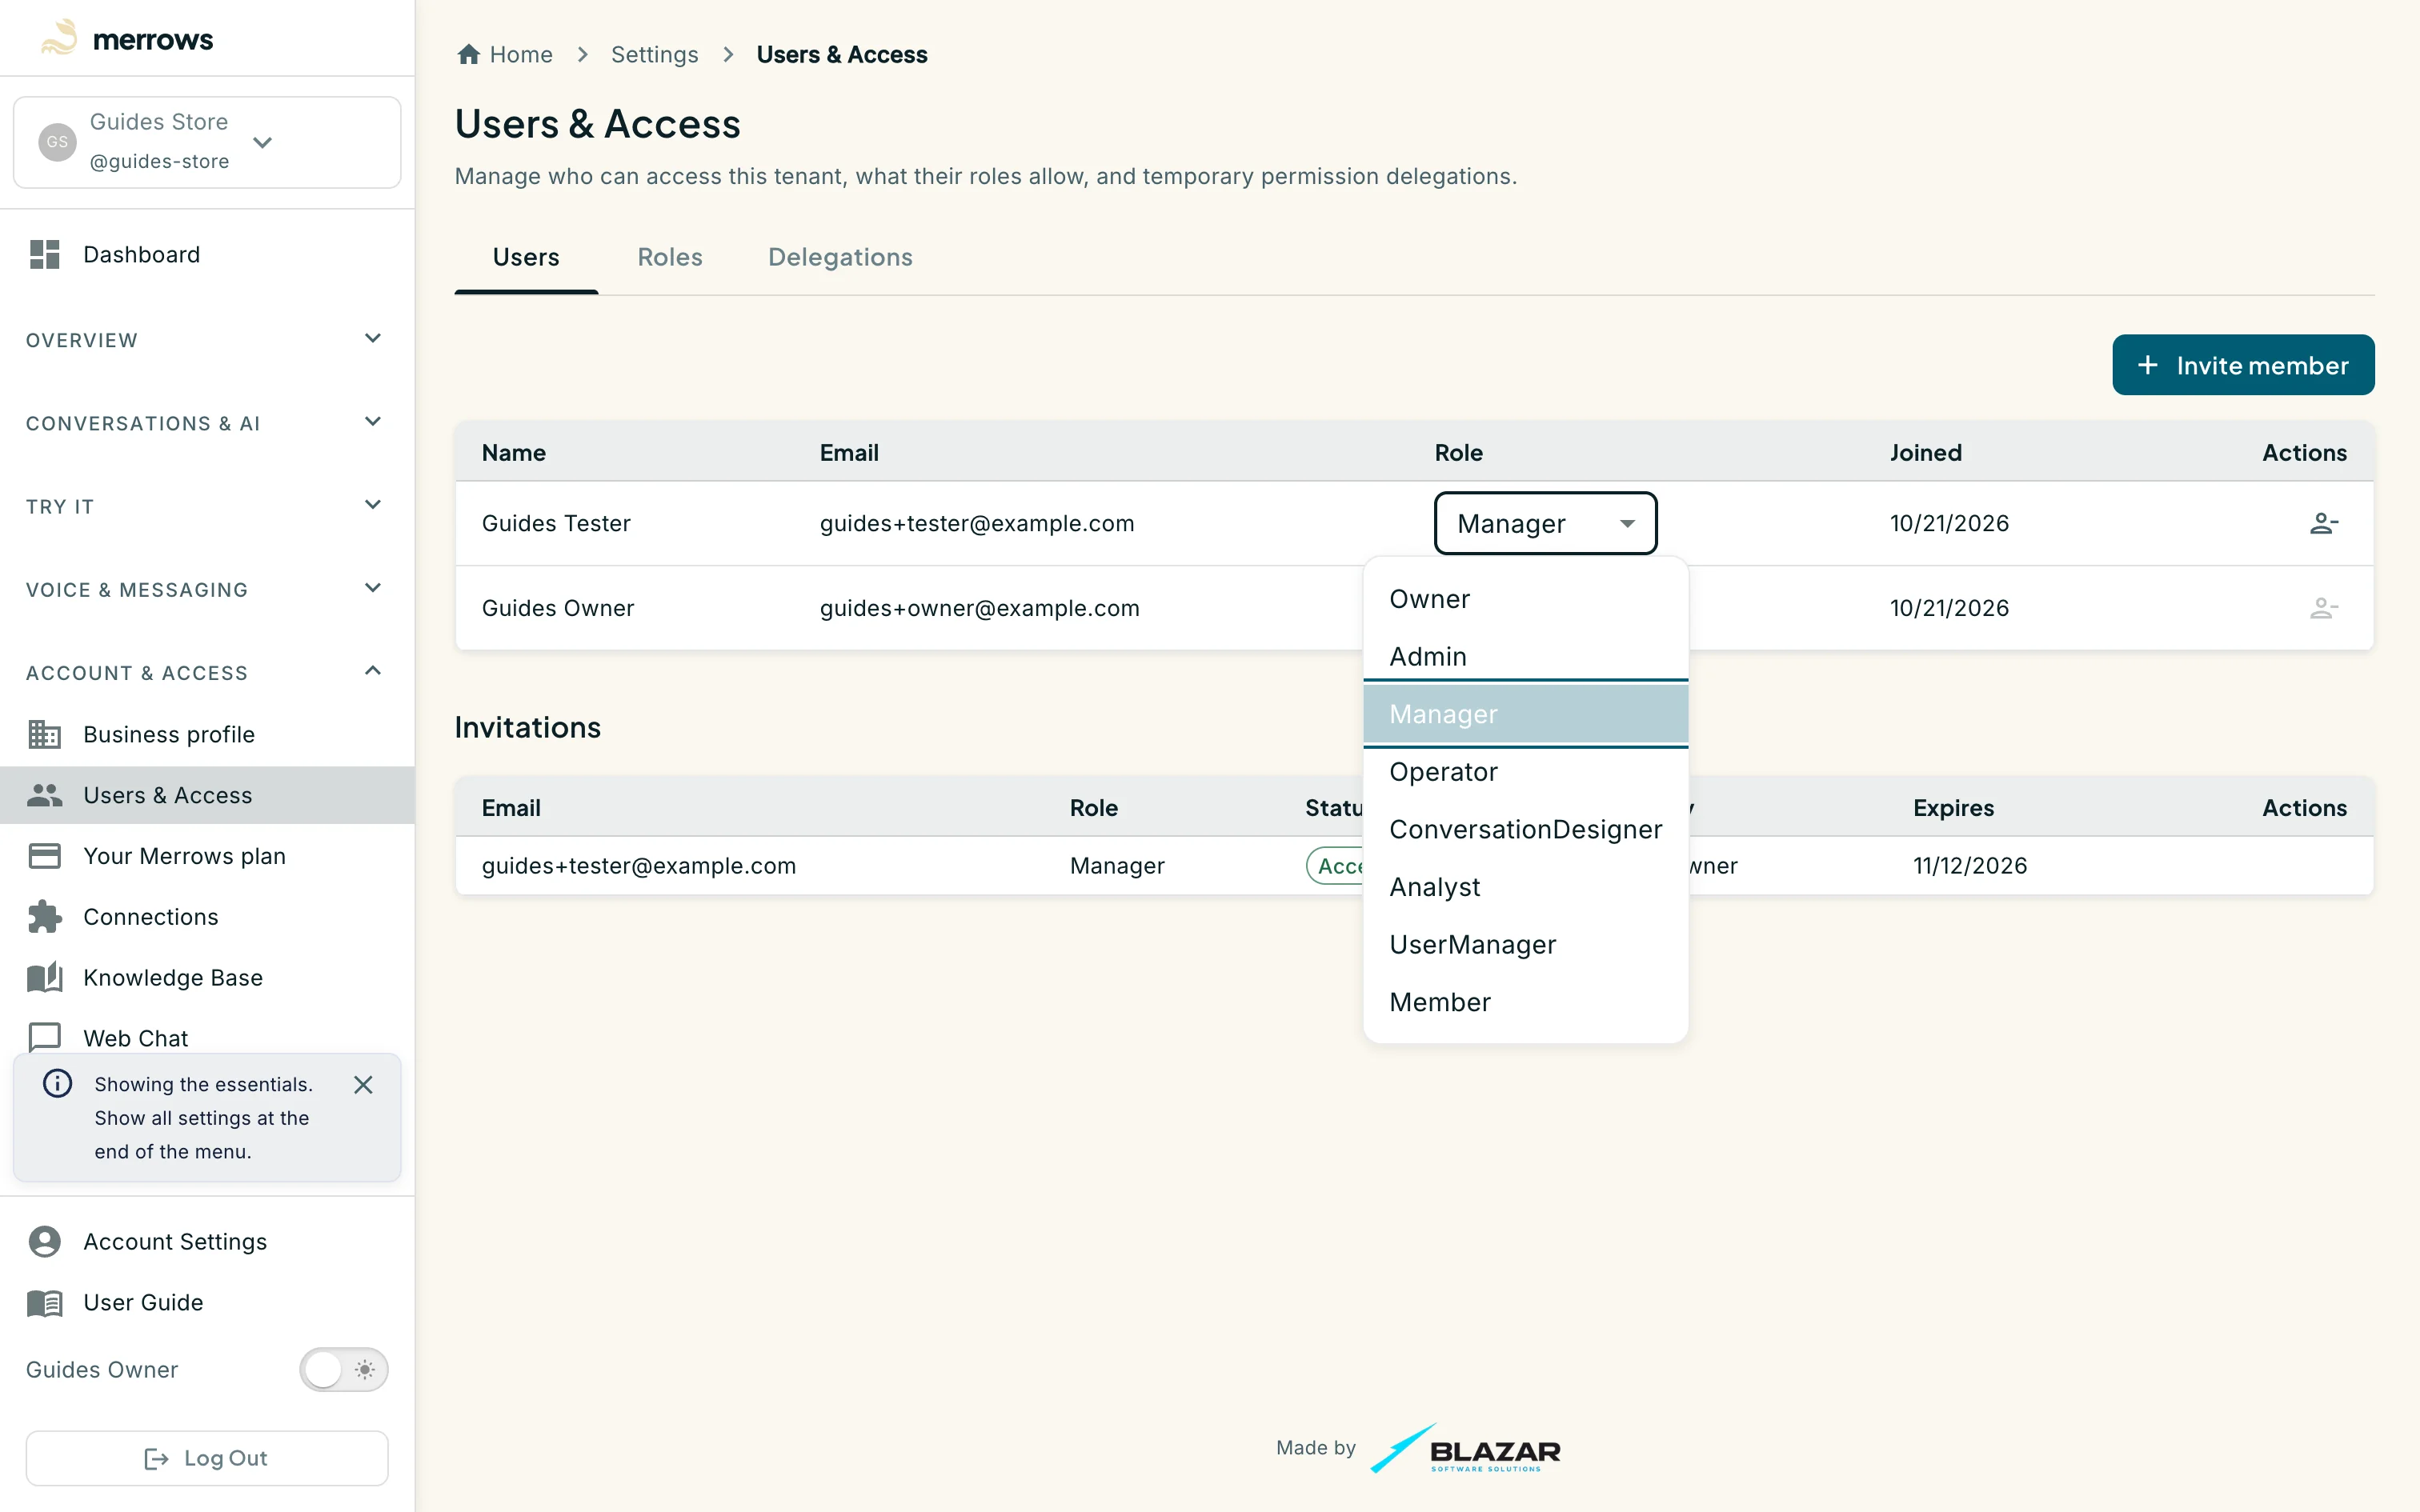
Action: Back on the Users tab, change a member’s role from the Role selector.
What you should see: The list offers Owner, Admin, Manager, Operator, ConversationDesigner, Analyst, UserManager and Member. The change applies at once; the member sees the new sidebar on their next page load. Below the members, an Invitations list shows each invitation with its role, status (pending or accepted), who sent it and when it expires.
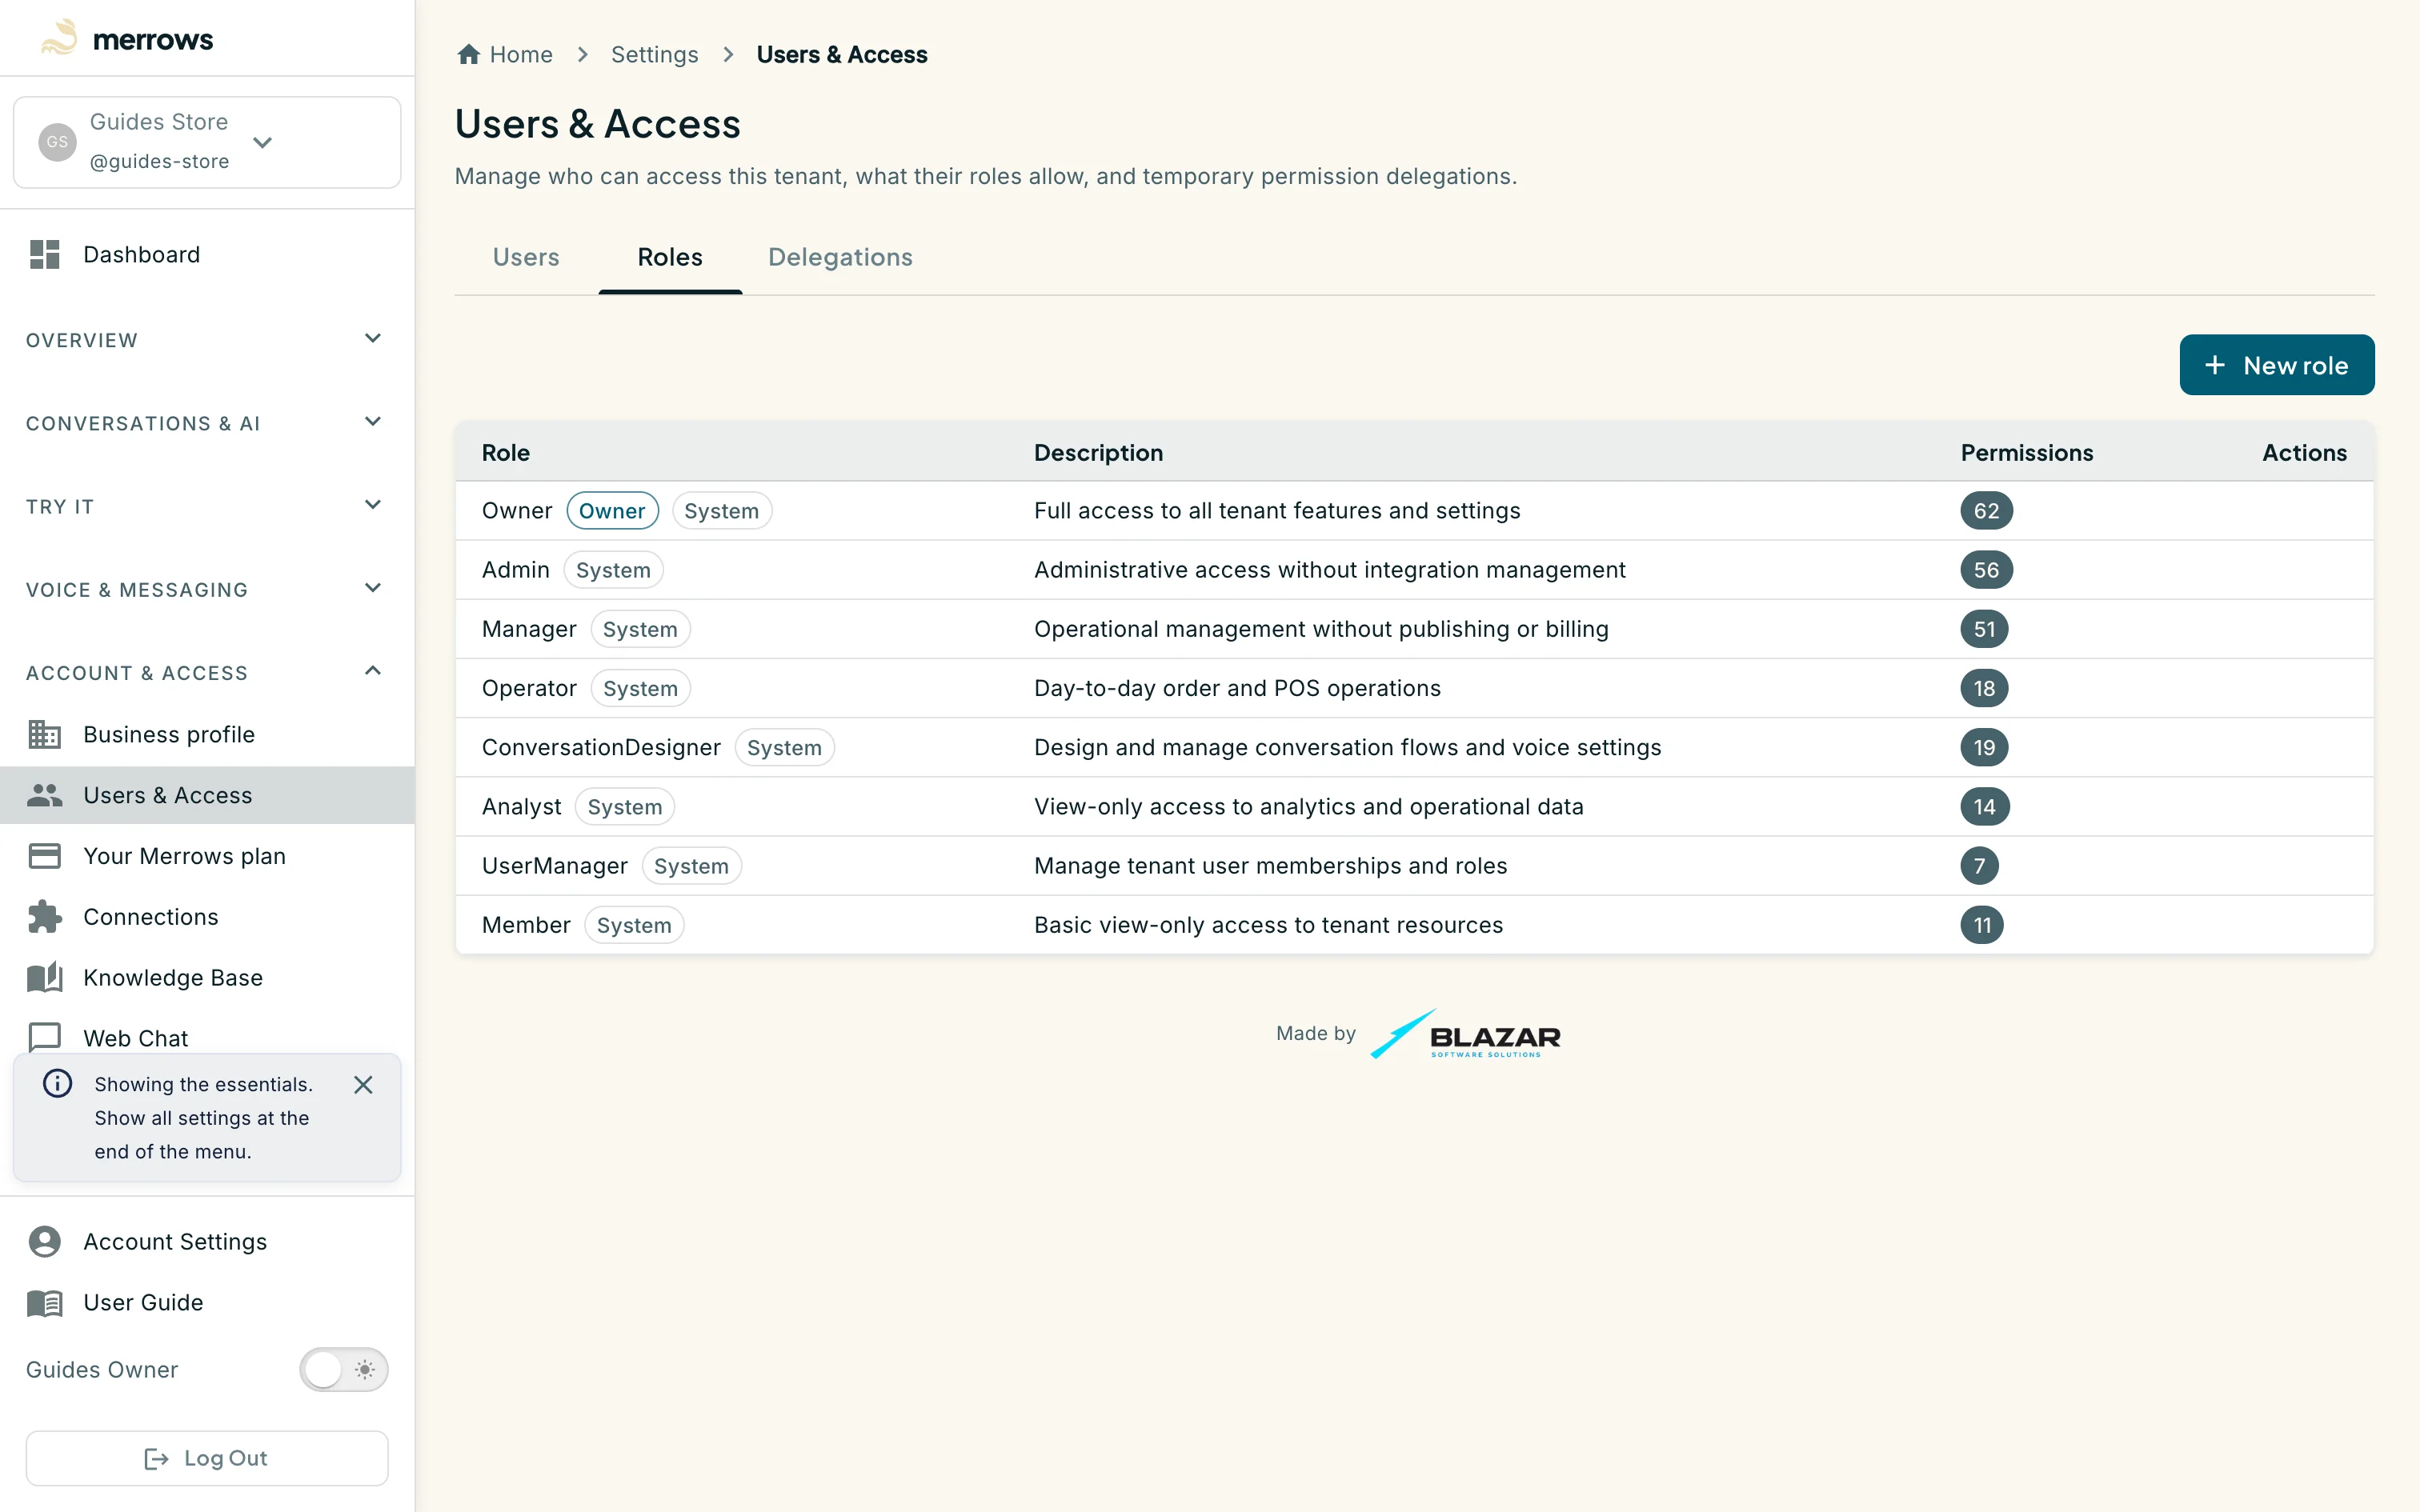
Action: Open the Roles tab.
What you should see: A table of the roles with a description and the number of permissions each carries: Owner has every feature and setting, Admin administers without integrations, Manager runs operations without publishing or billing, Operator handles day-to-day orders and POS, ConversationDesigner edits the conversations and voice settings, Analyst reads analytics and transcripts, UserManager manages people, Member reads only. New role adds one of your own.
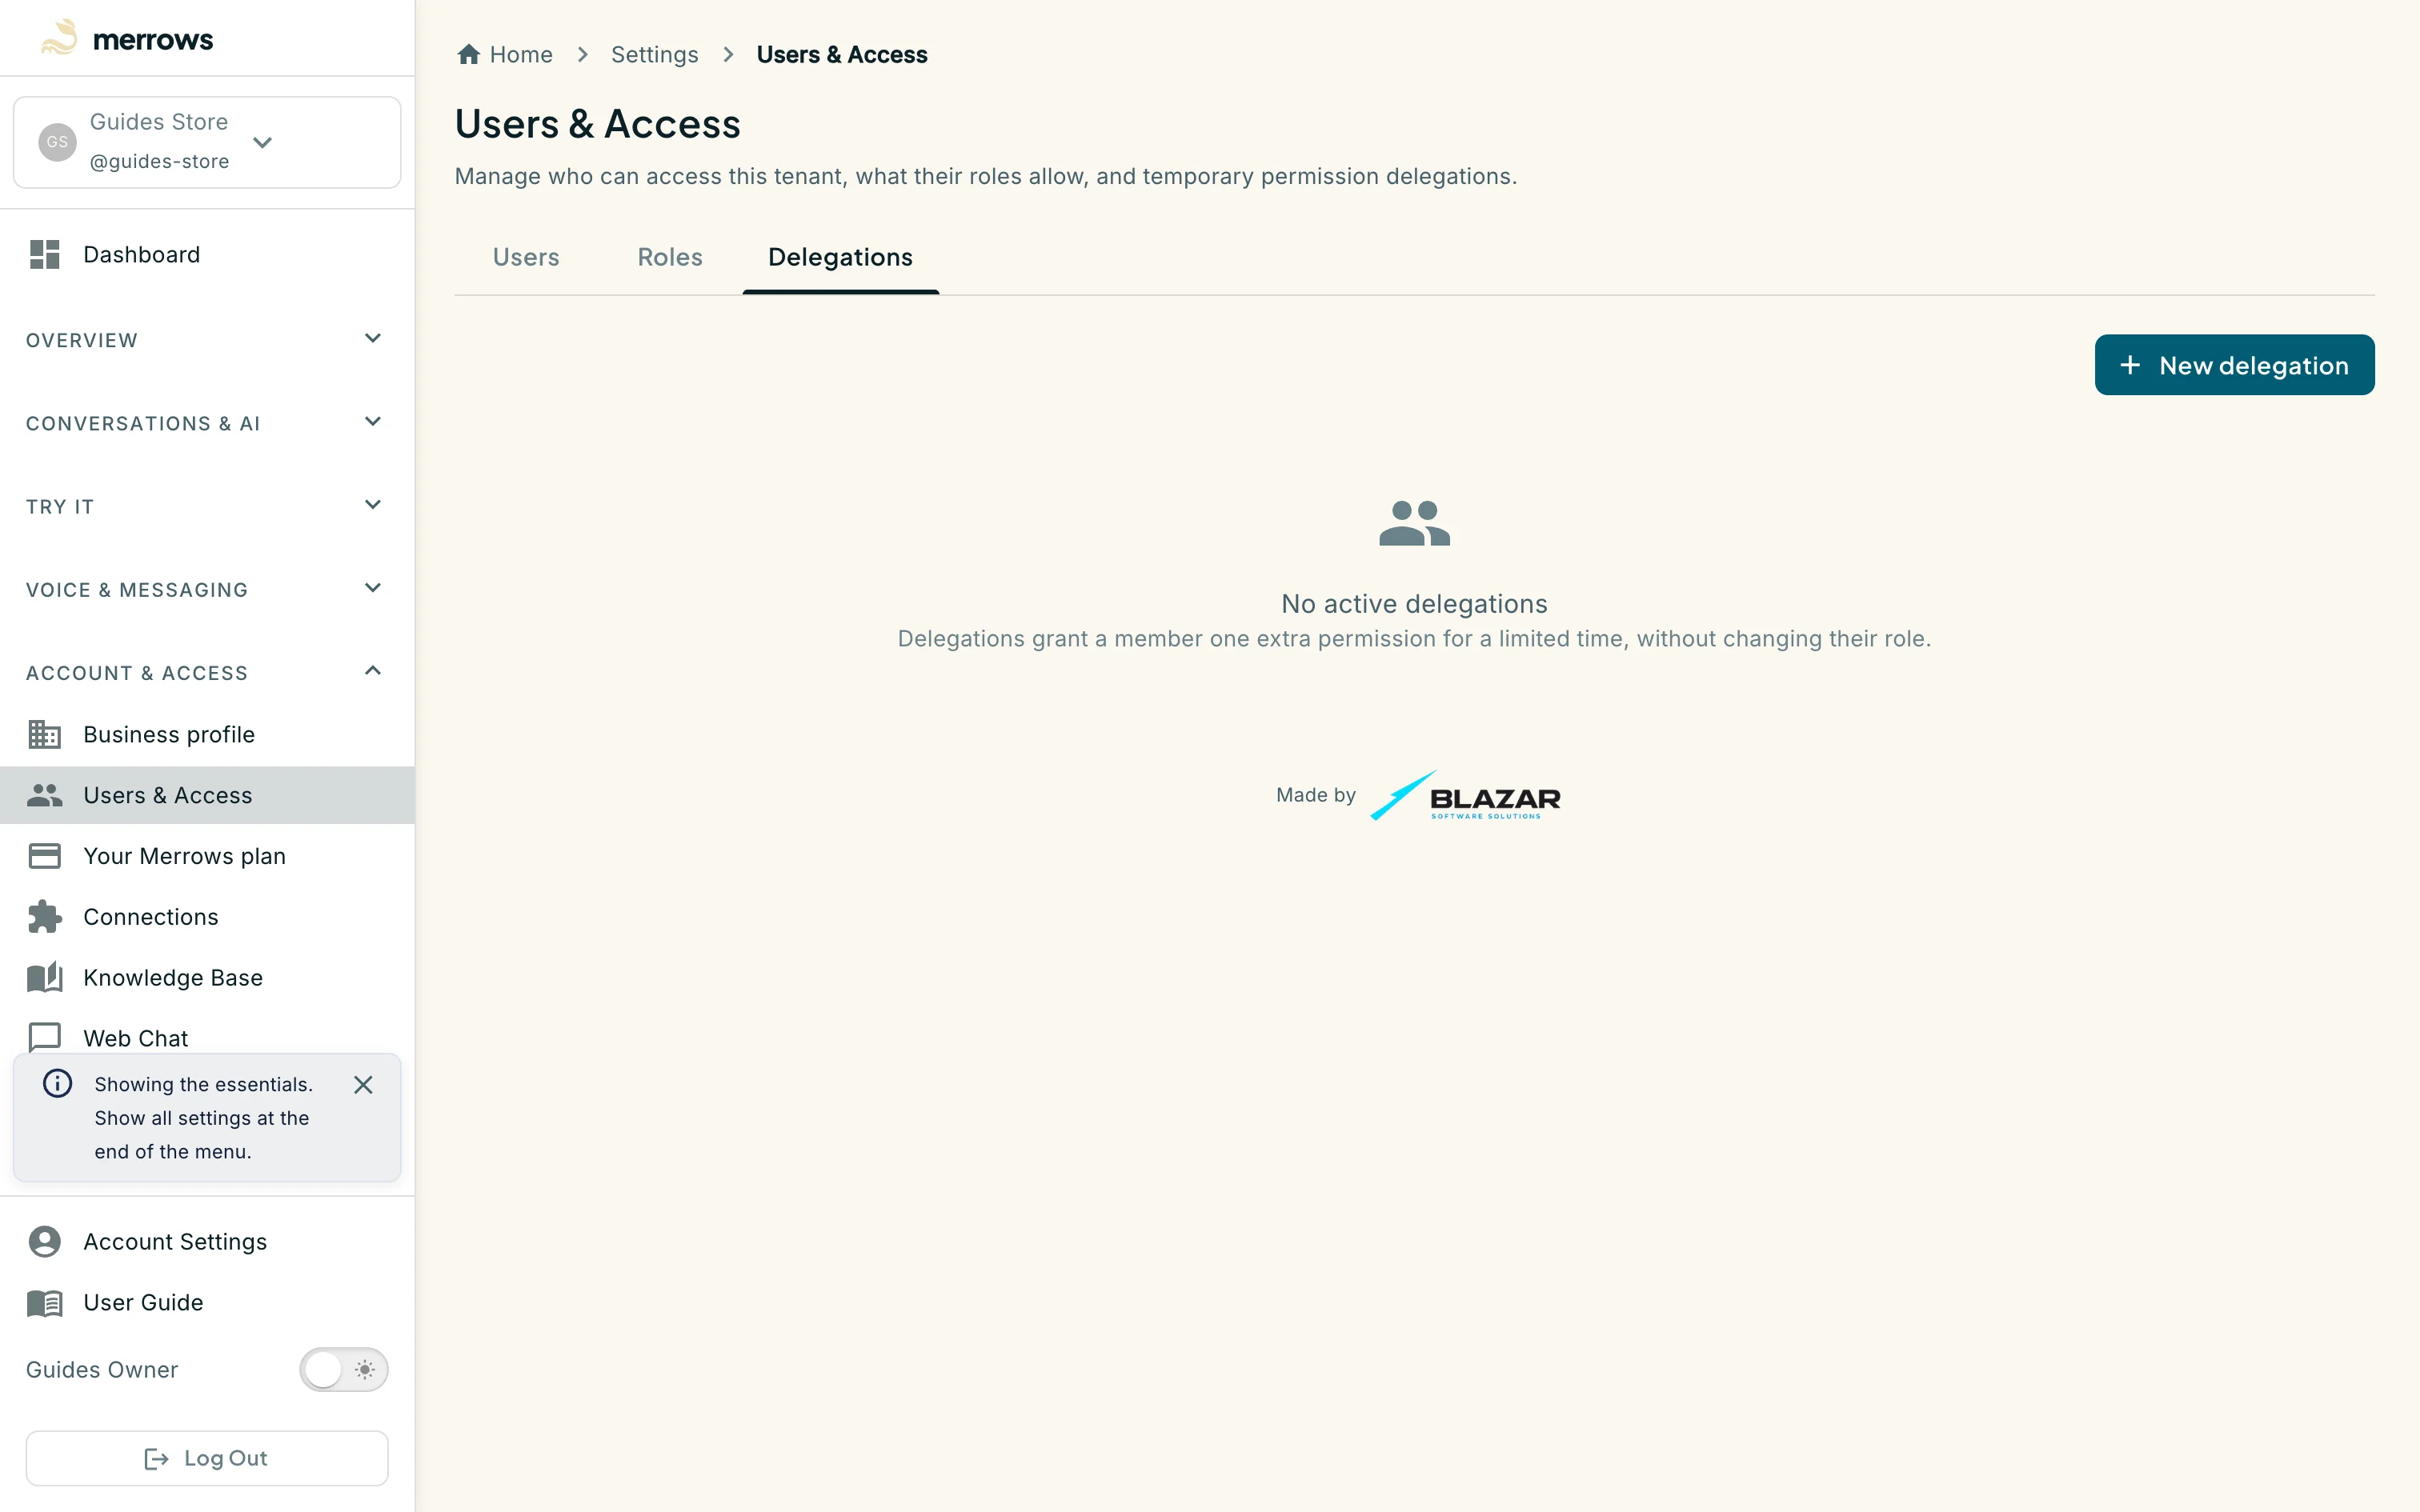
Action: Open the Delegations tab to hand one permission to a member for a period.
What you should see: Delegations grant a member one extra permission for a limited time without changing their role. New delegation names the member, the permission and an end date, and the permission is gone the day after that date. Use it for cover during a holiday instead of changing the role.
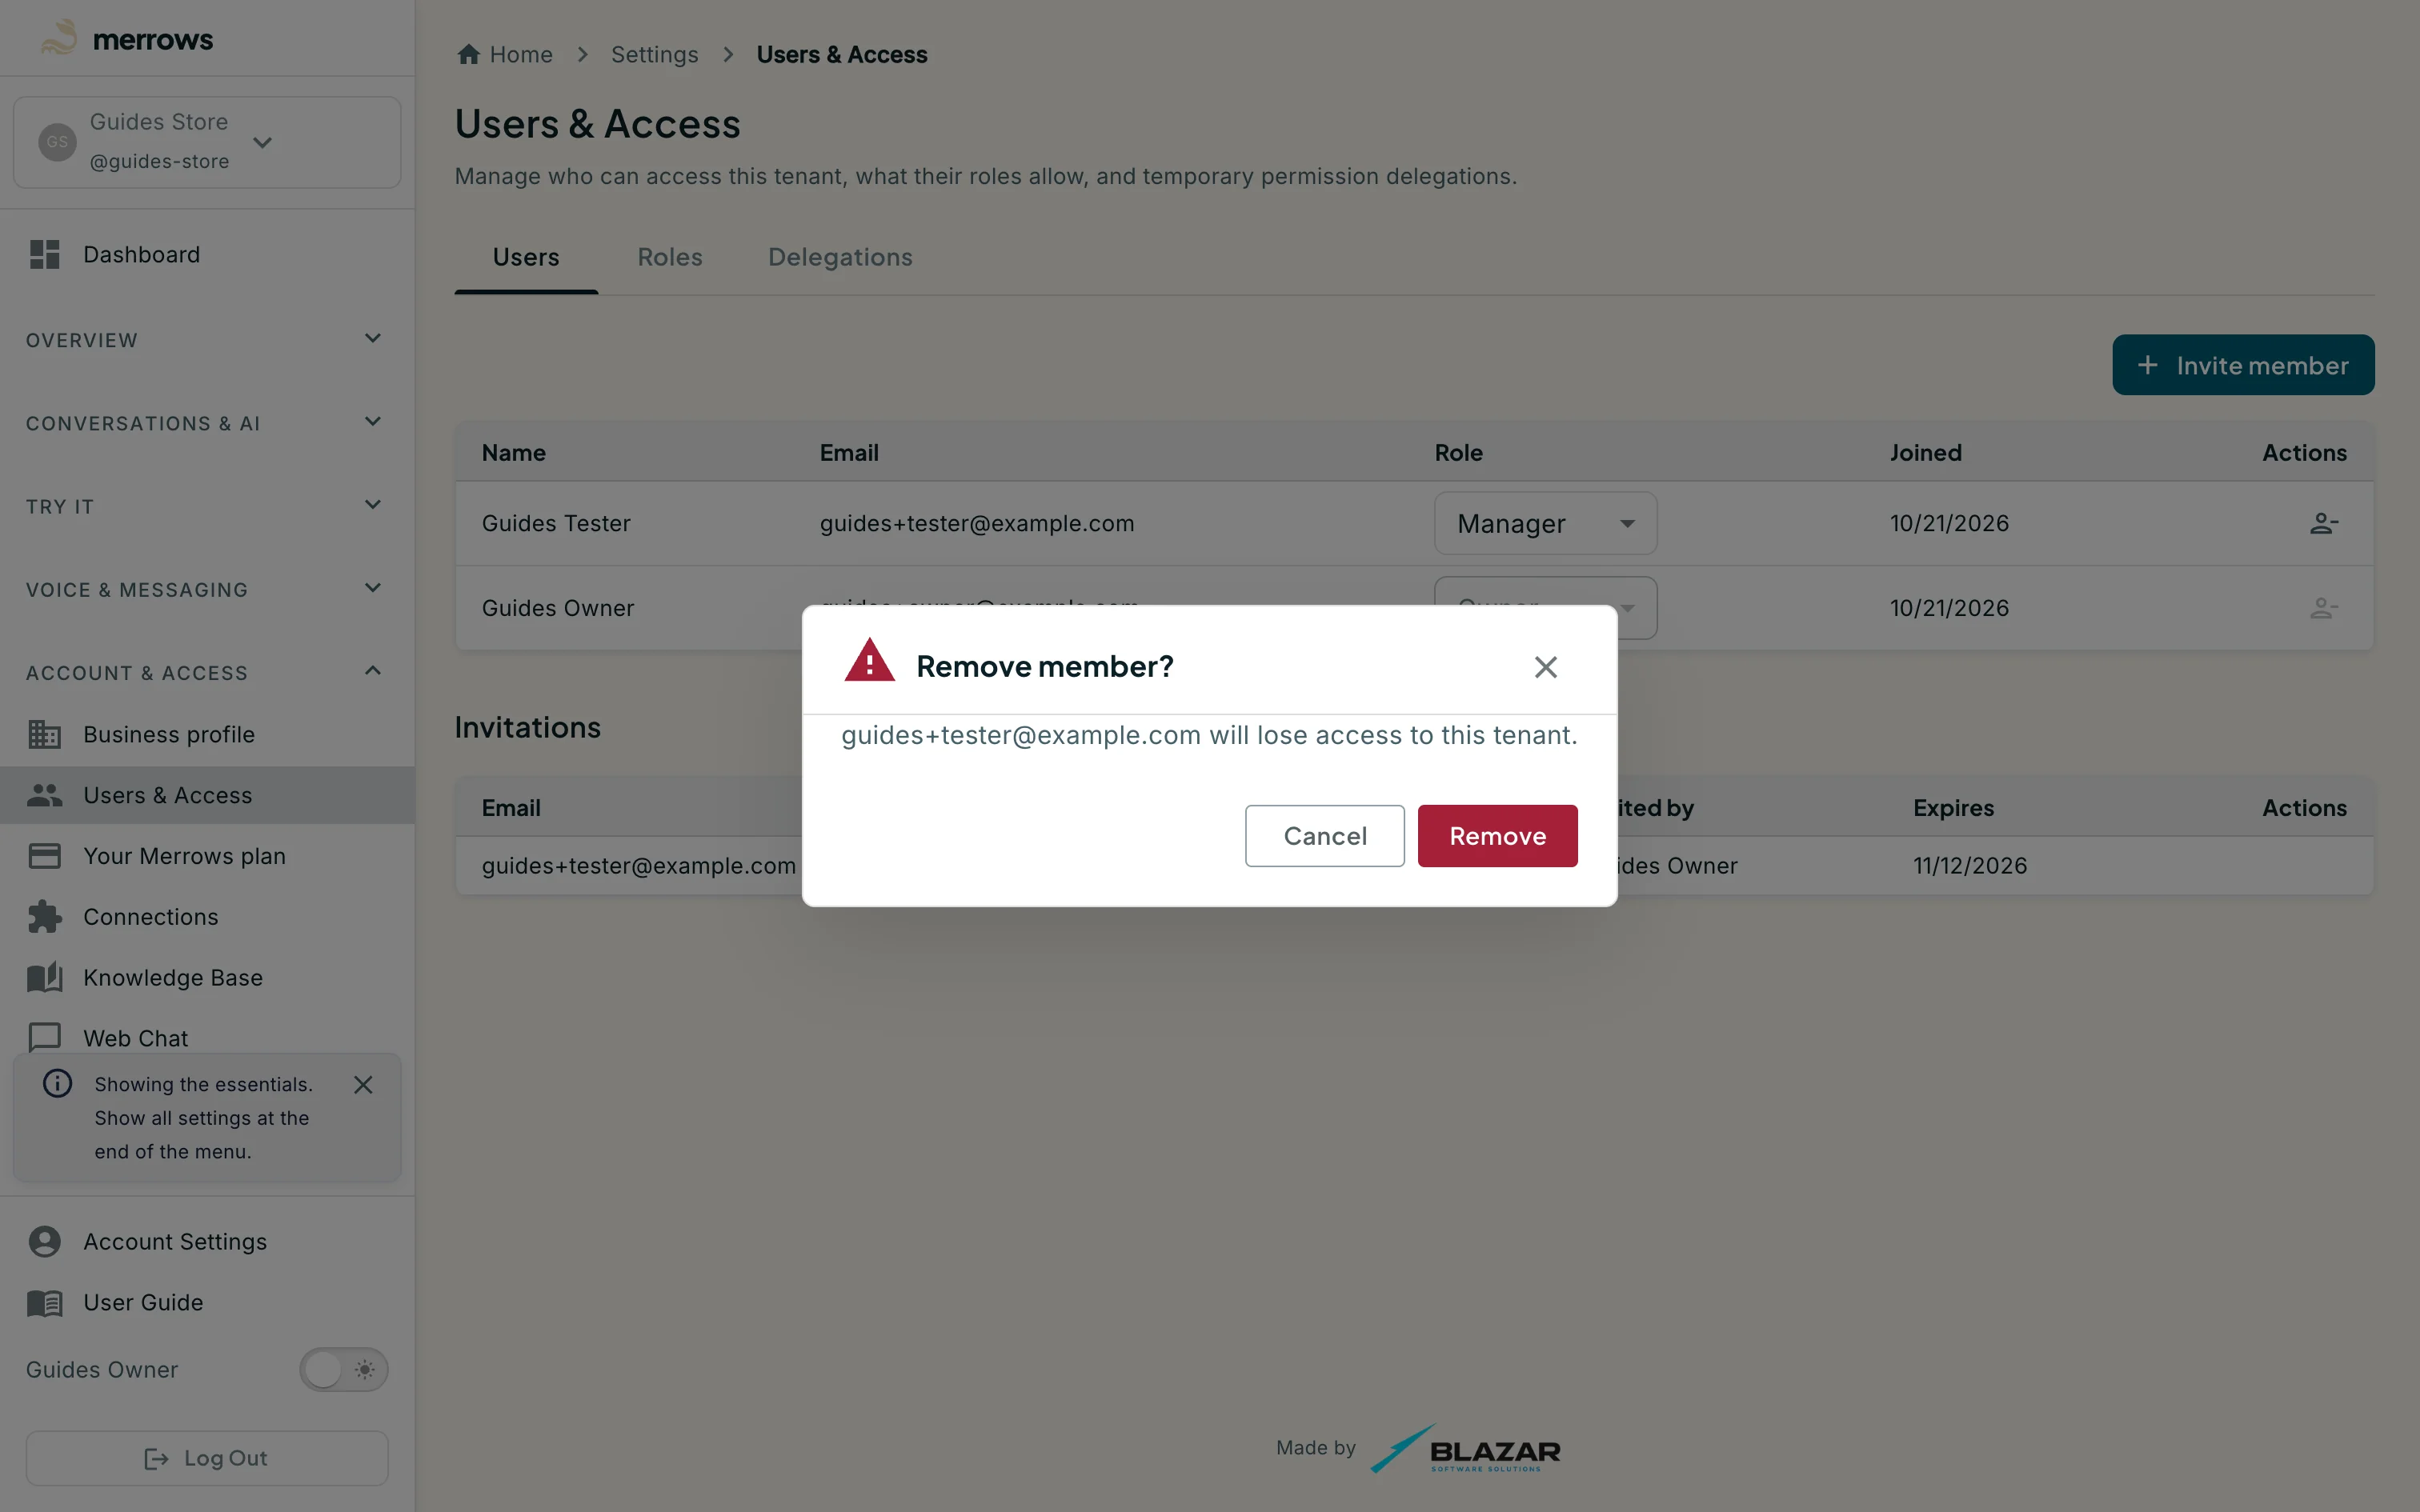
Action: Click Remove beside a member.
What you should see: A confirmation names the person. Confirming ends their access to this business at once; their account and other businesses are untouched. Cancel changes nothing.