Read the dashboard that opens after sign-in: whether your AI employee is answering, what is left to set up, the business at a glance, and how the sidebar is organised.
Action: Sign in, or click Dashboard at the top of the sidebar.
What you should see: The page greets you by name under the business name. The first card says whether your assistant is answering customers yet and lists each channel: Web chat, Phone, Texts and Email, each with its state and, where something is missing, a Fix or “See the add-on” button. Phone and Texts read “Not part of your setup” while the business has no phone number. Check again re-reads the live state.
Action: Read the “Finish setting up” checklist below it.
What you should see: The checklist counts what is done, here 7 of 9: teach it your FAQs, name your assistant, your AI employee is built, try it yourself, put it on your website, get a phone number, start your subscription, give it a way to reach you and answer email too, with connect your systems under Optional. Each open item has a button that opens the page which completes it. Naming the assistant happens right here: type a name, see the greeting your customers will hear, and click “Use this name” or “Speak as my business”.
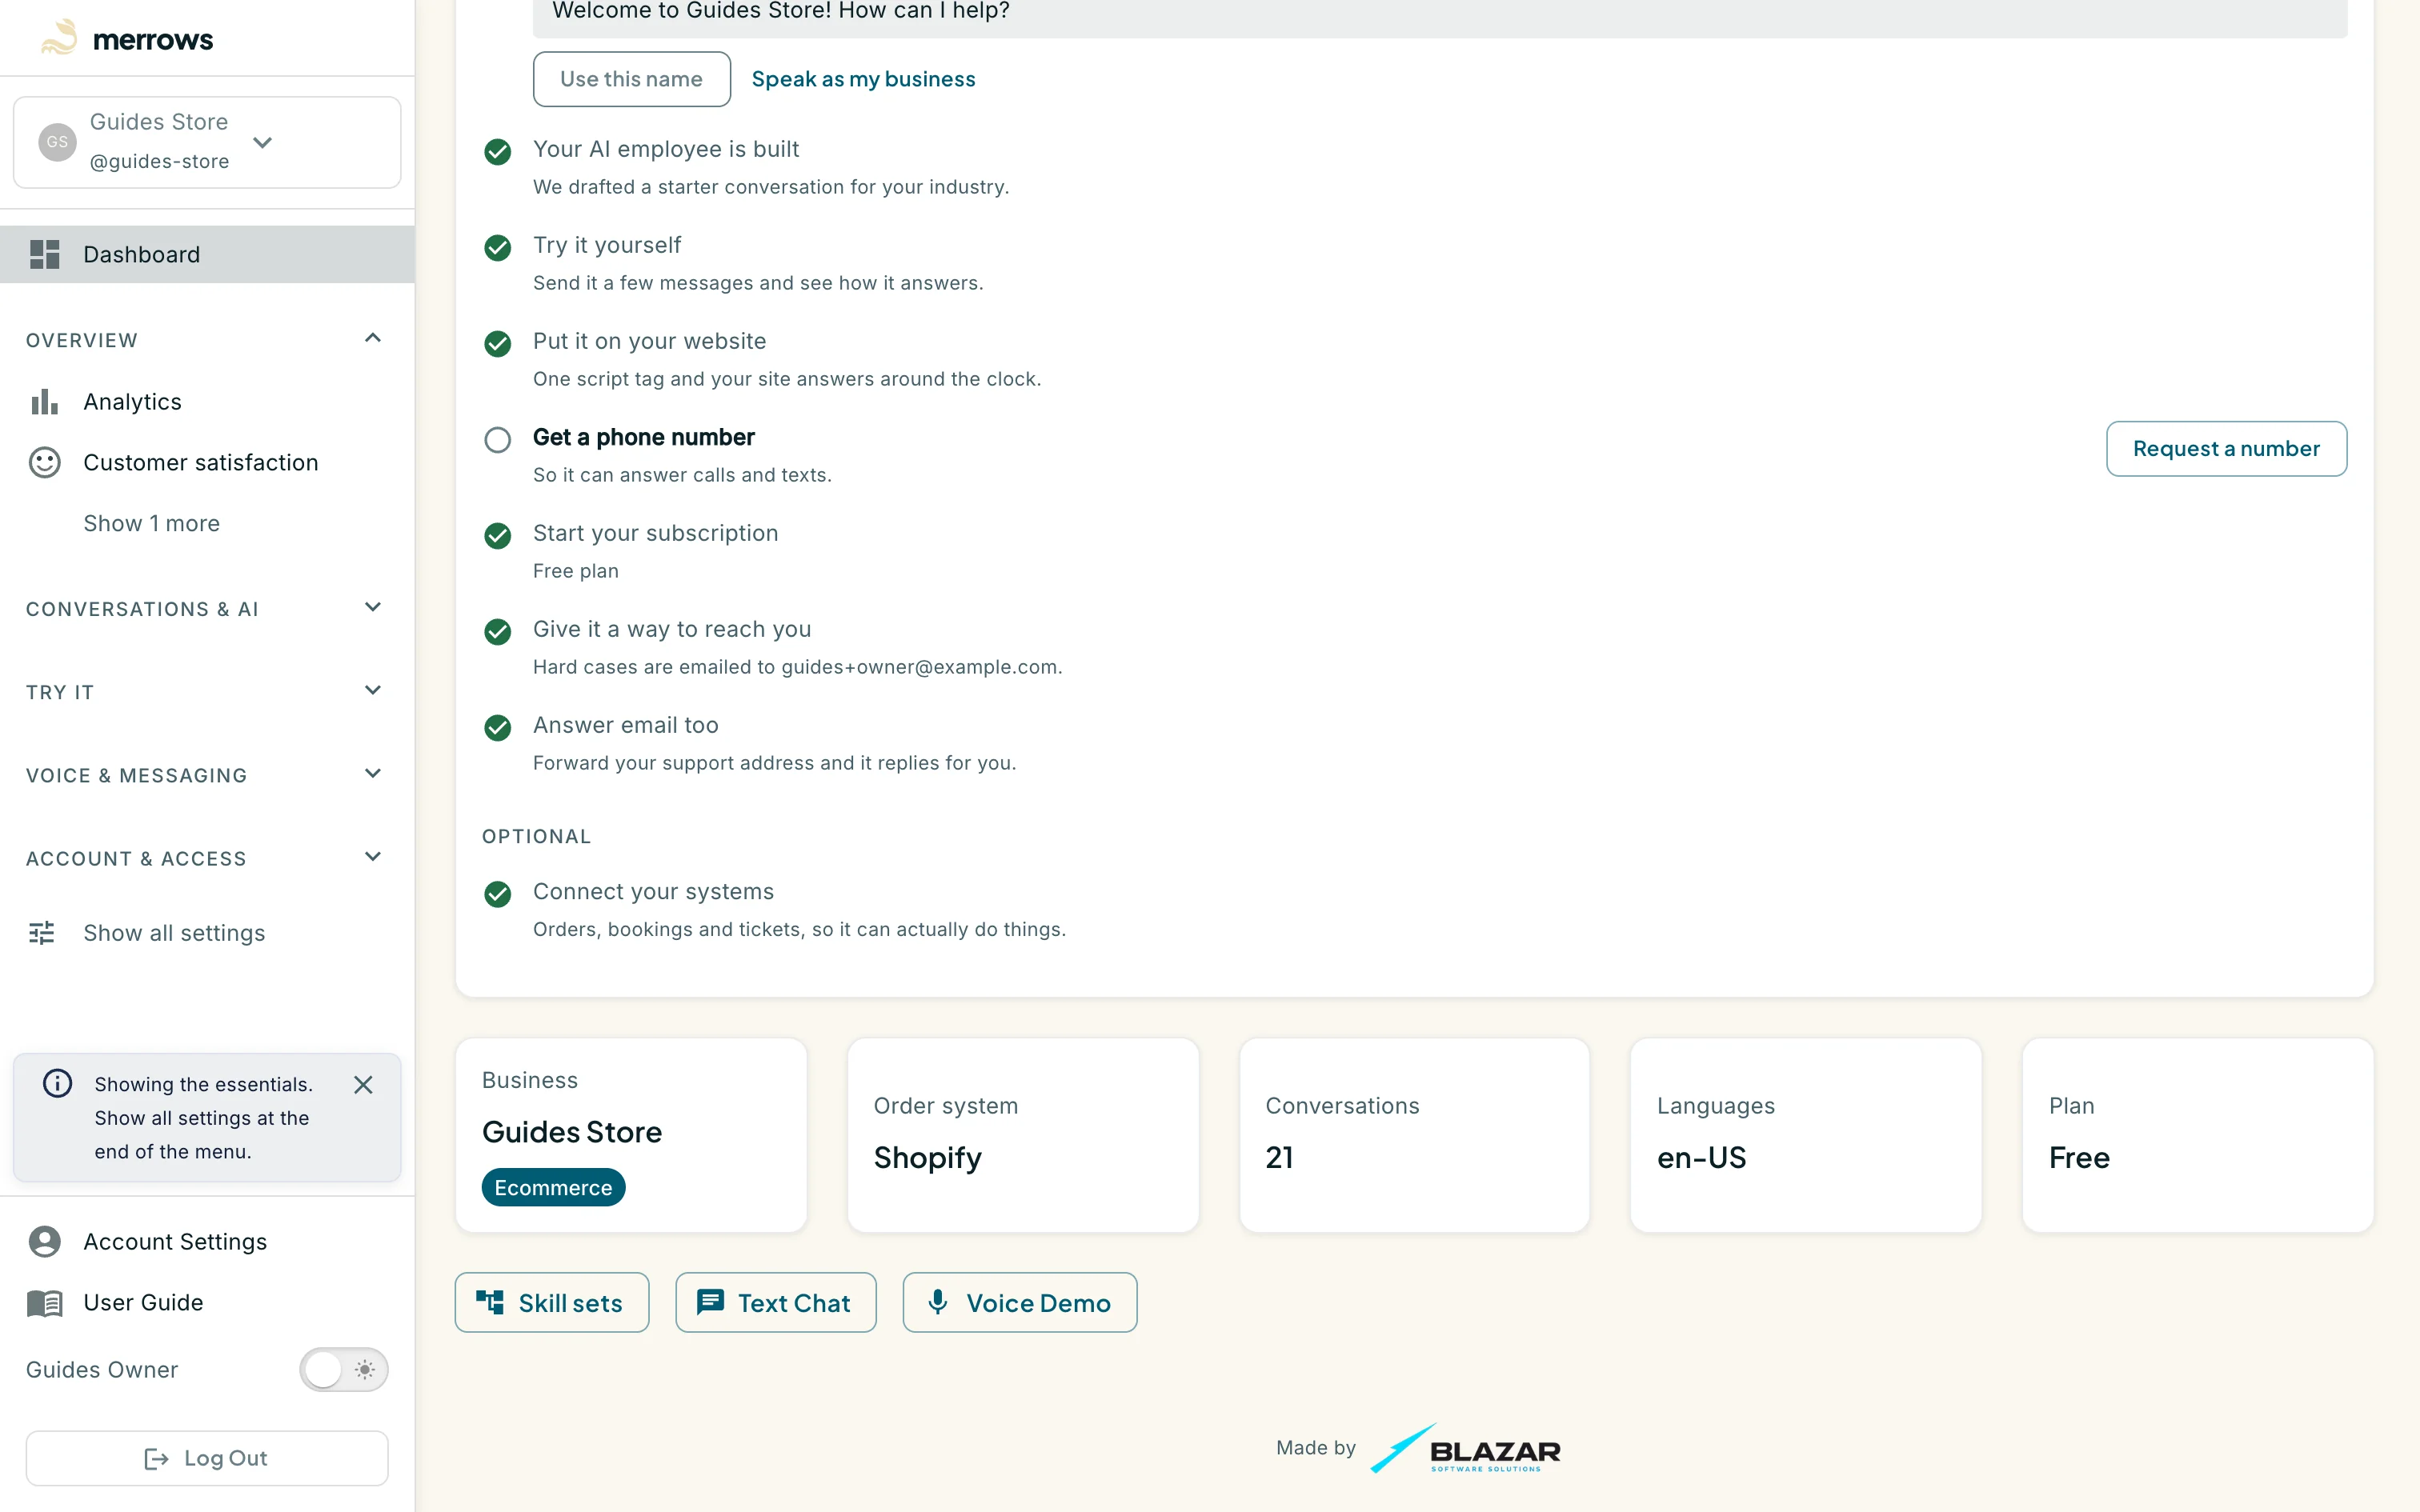
Action: Scroll to the cards and shortcuts at the bottom.
What you should see: Cards show the business and its industry (Ecommerce here), the order system it is connected to (Shopify here), the number of conversations, the languages and the plan. Shortcuts open Skill sets, Text Chat and Voice Demo.
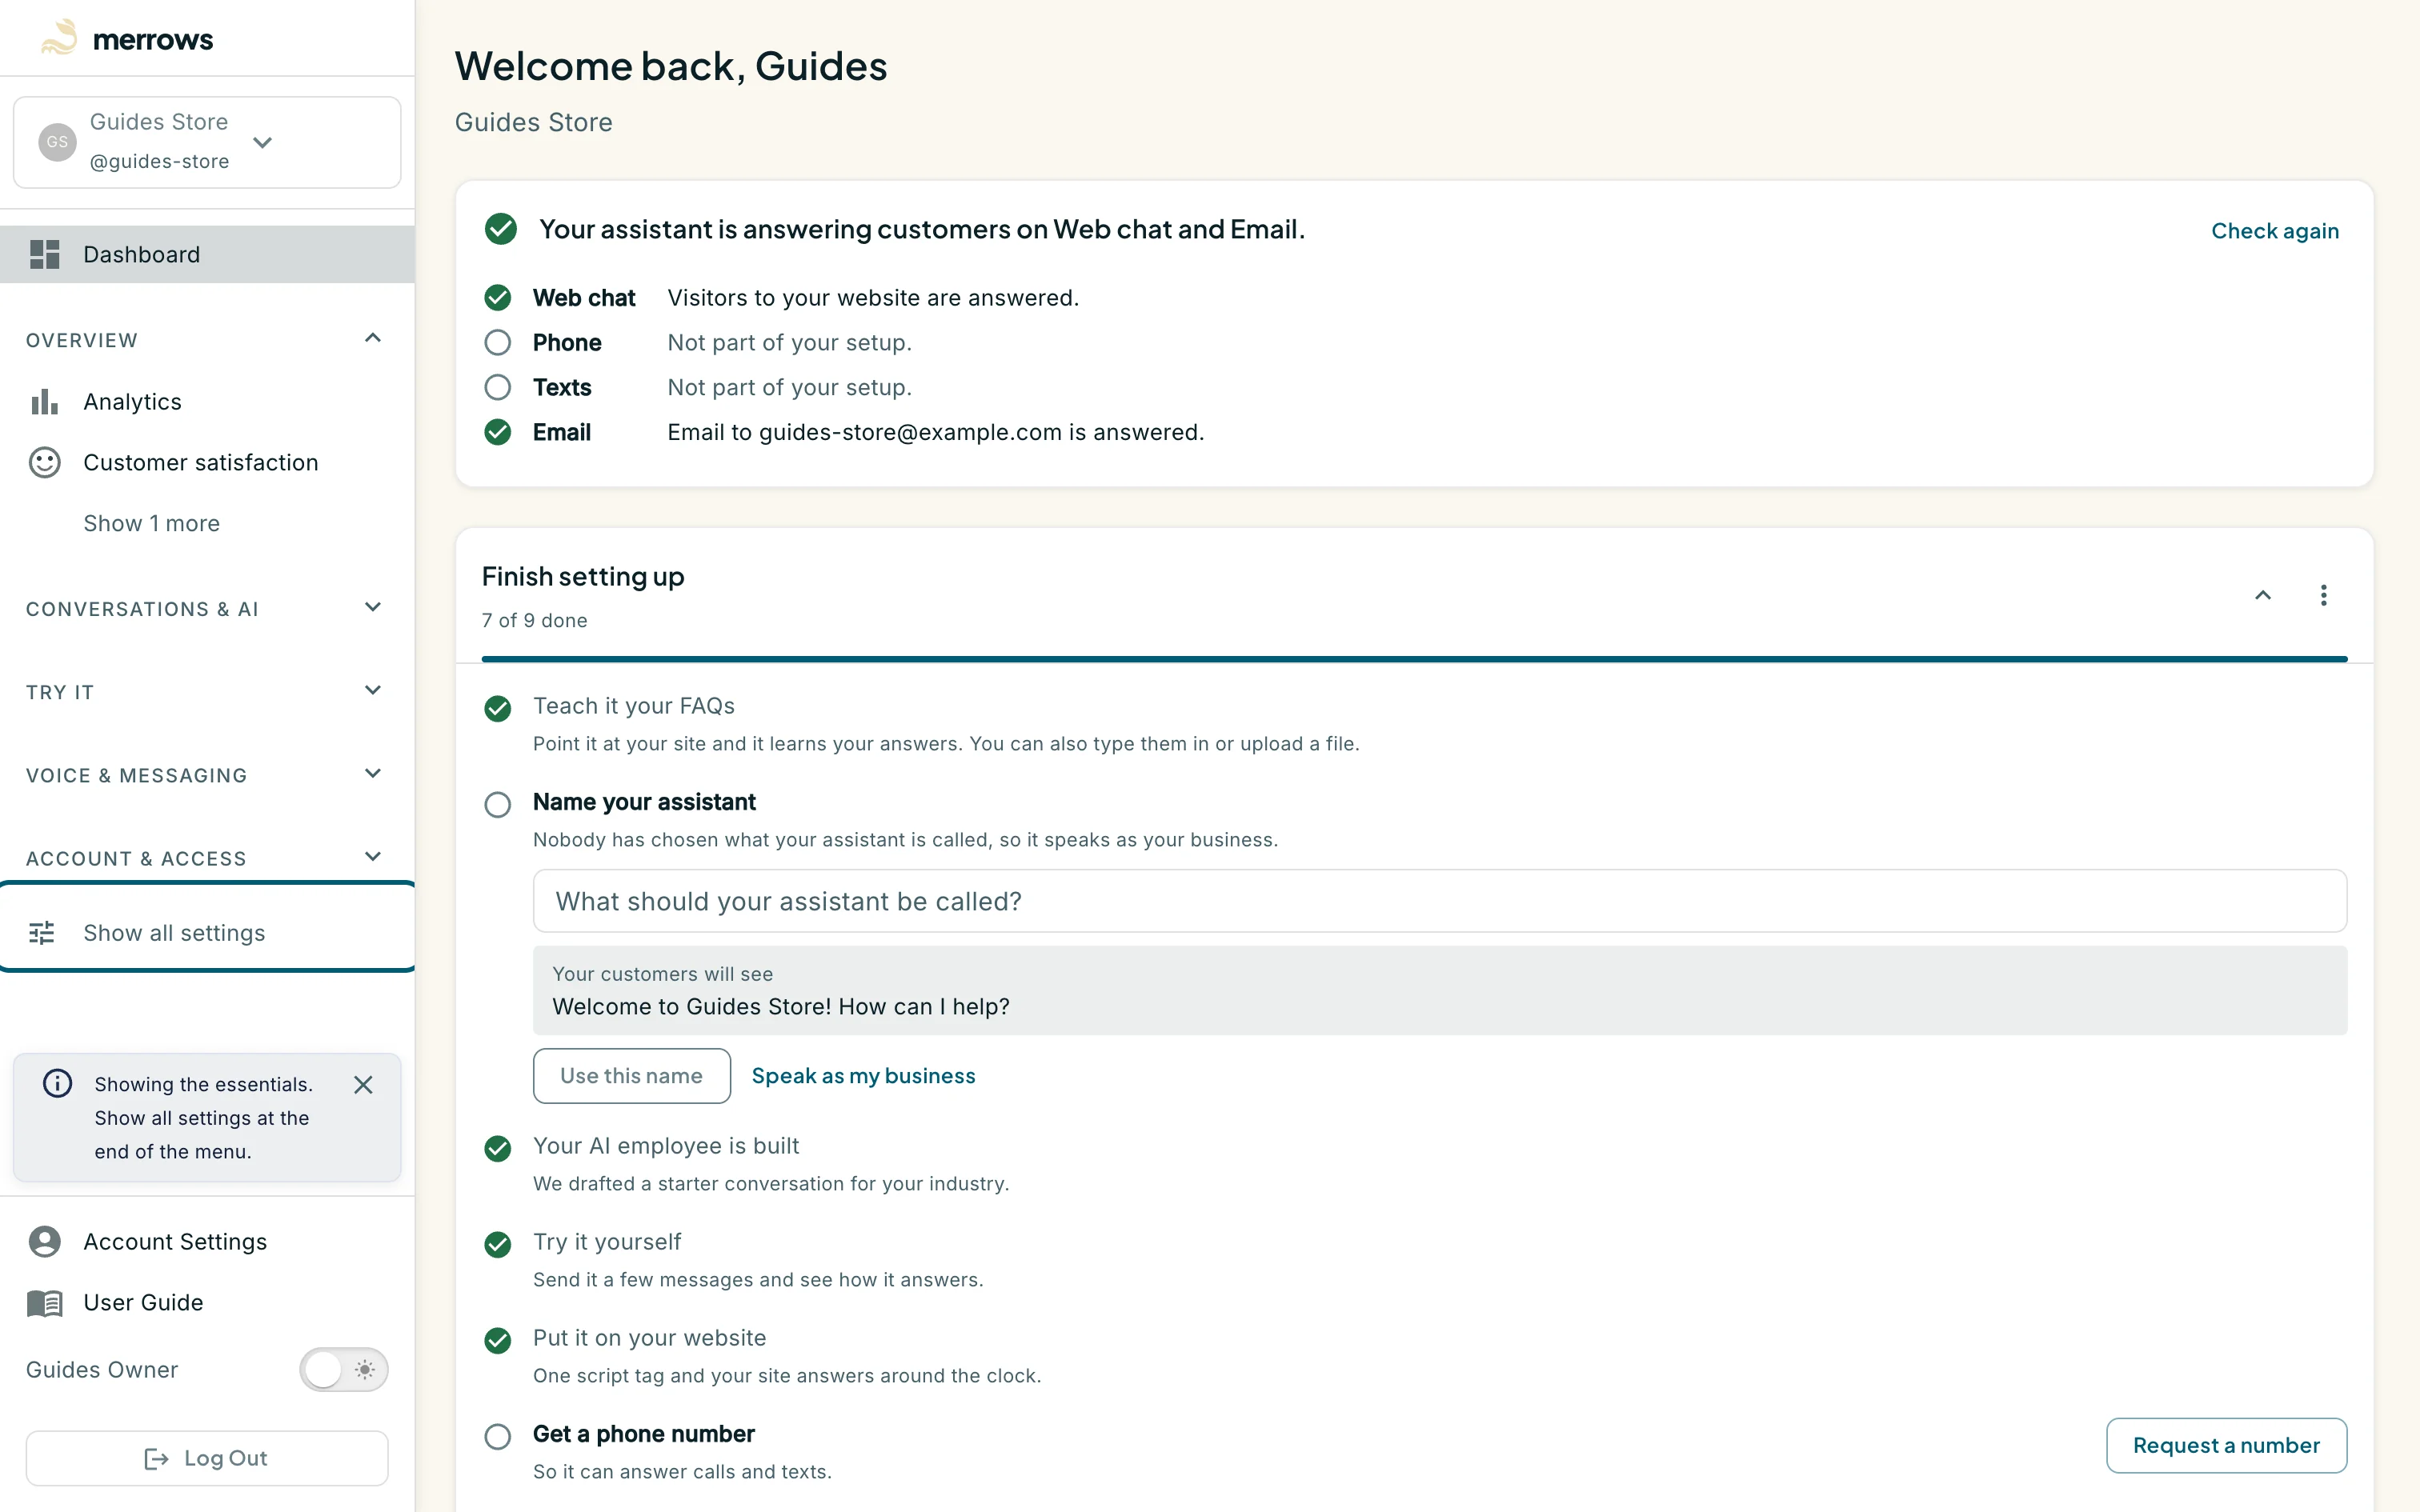
Action: Look at the sidebar. It opens in Simple mode.
What you should see: Dashboard is pinned at the top. The groups are Overview, Conversations & AI, Try it, Voice & Messaging and Account & Access; each opens like an accordion. In Simple mode a group shows its essentials and a “Show N more” line, and the sidebar ends with “Show all settings” and a note that the essentials are showing. At the bottom are Account Settings, the User Guide link, your name, the dark mode switch and Log Out.
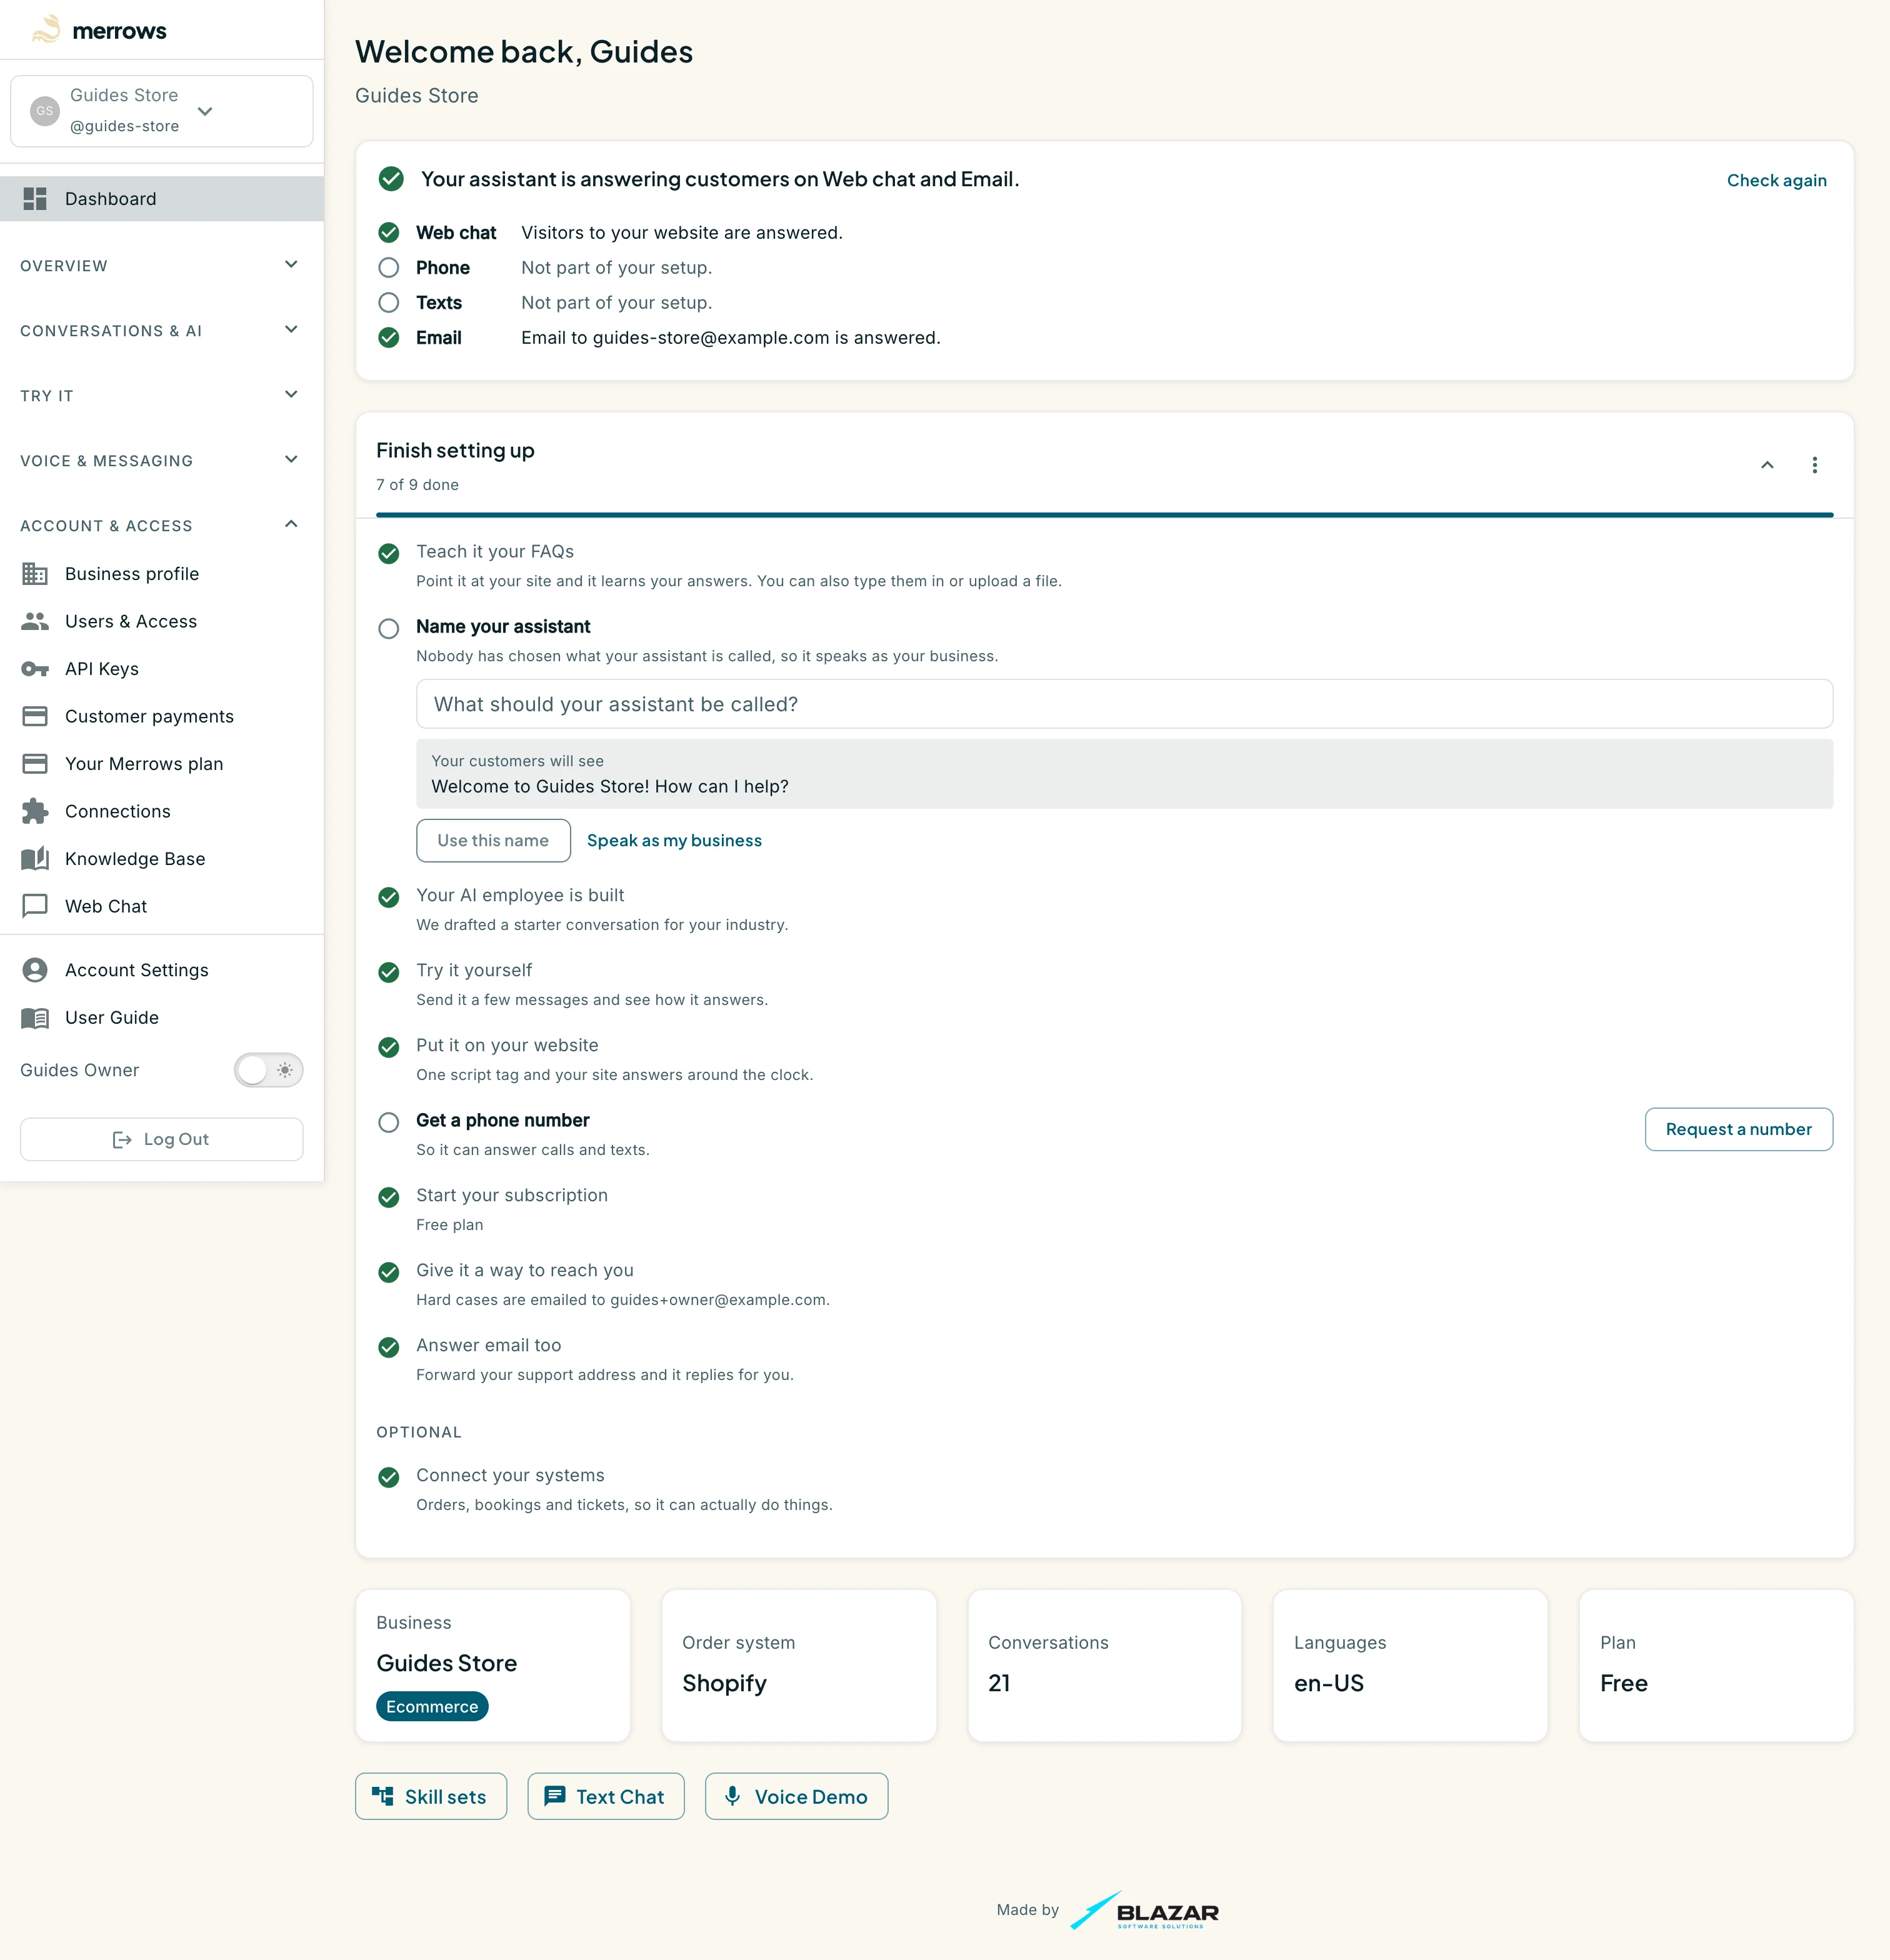
Action: Click “Show all settings”.
What you should see: Every item appears, and the line at the end reads “Show only the essentials” to go back. One group opens at a time: Overview gains Customer satisfaction and Automation detail; Conversations & AI holds Skill sets, Manage skill sets, A/B tests, What customers say, Instructions, Skills and Advanced tuning; Voice & Messaging holds Voice, Message Templates, Email Inbox and Email Setup; Account & Access holds Business profile, Users & Access, API Keys, Customer payments, Your Merrows plan, Connections, Knowledge Base, Web Chat and Helpdesk. The same switch is the Advanced mode checkbox on the Preferences tab of Account Settings, and it is remembered for your account.
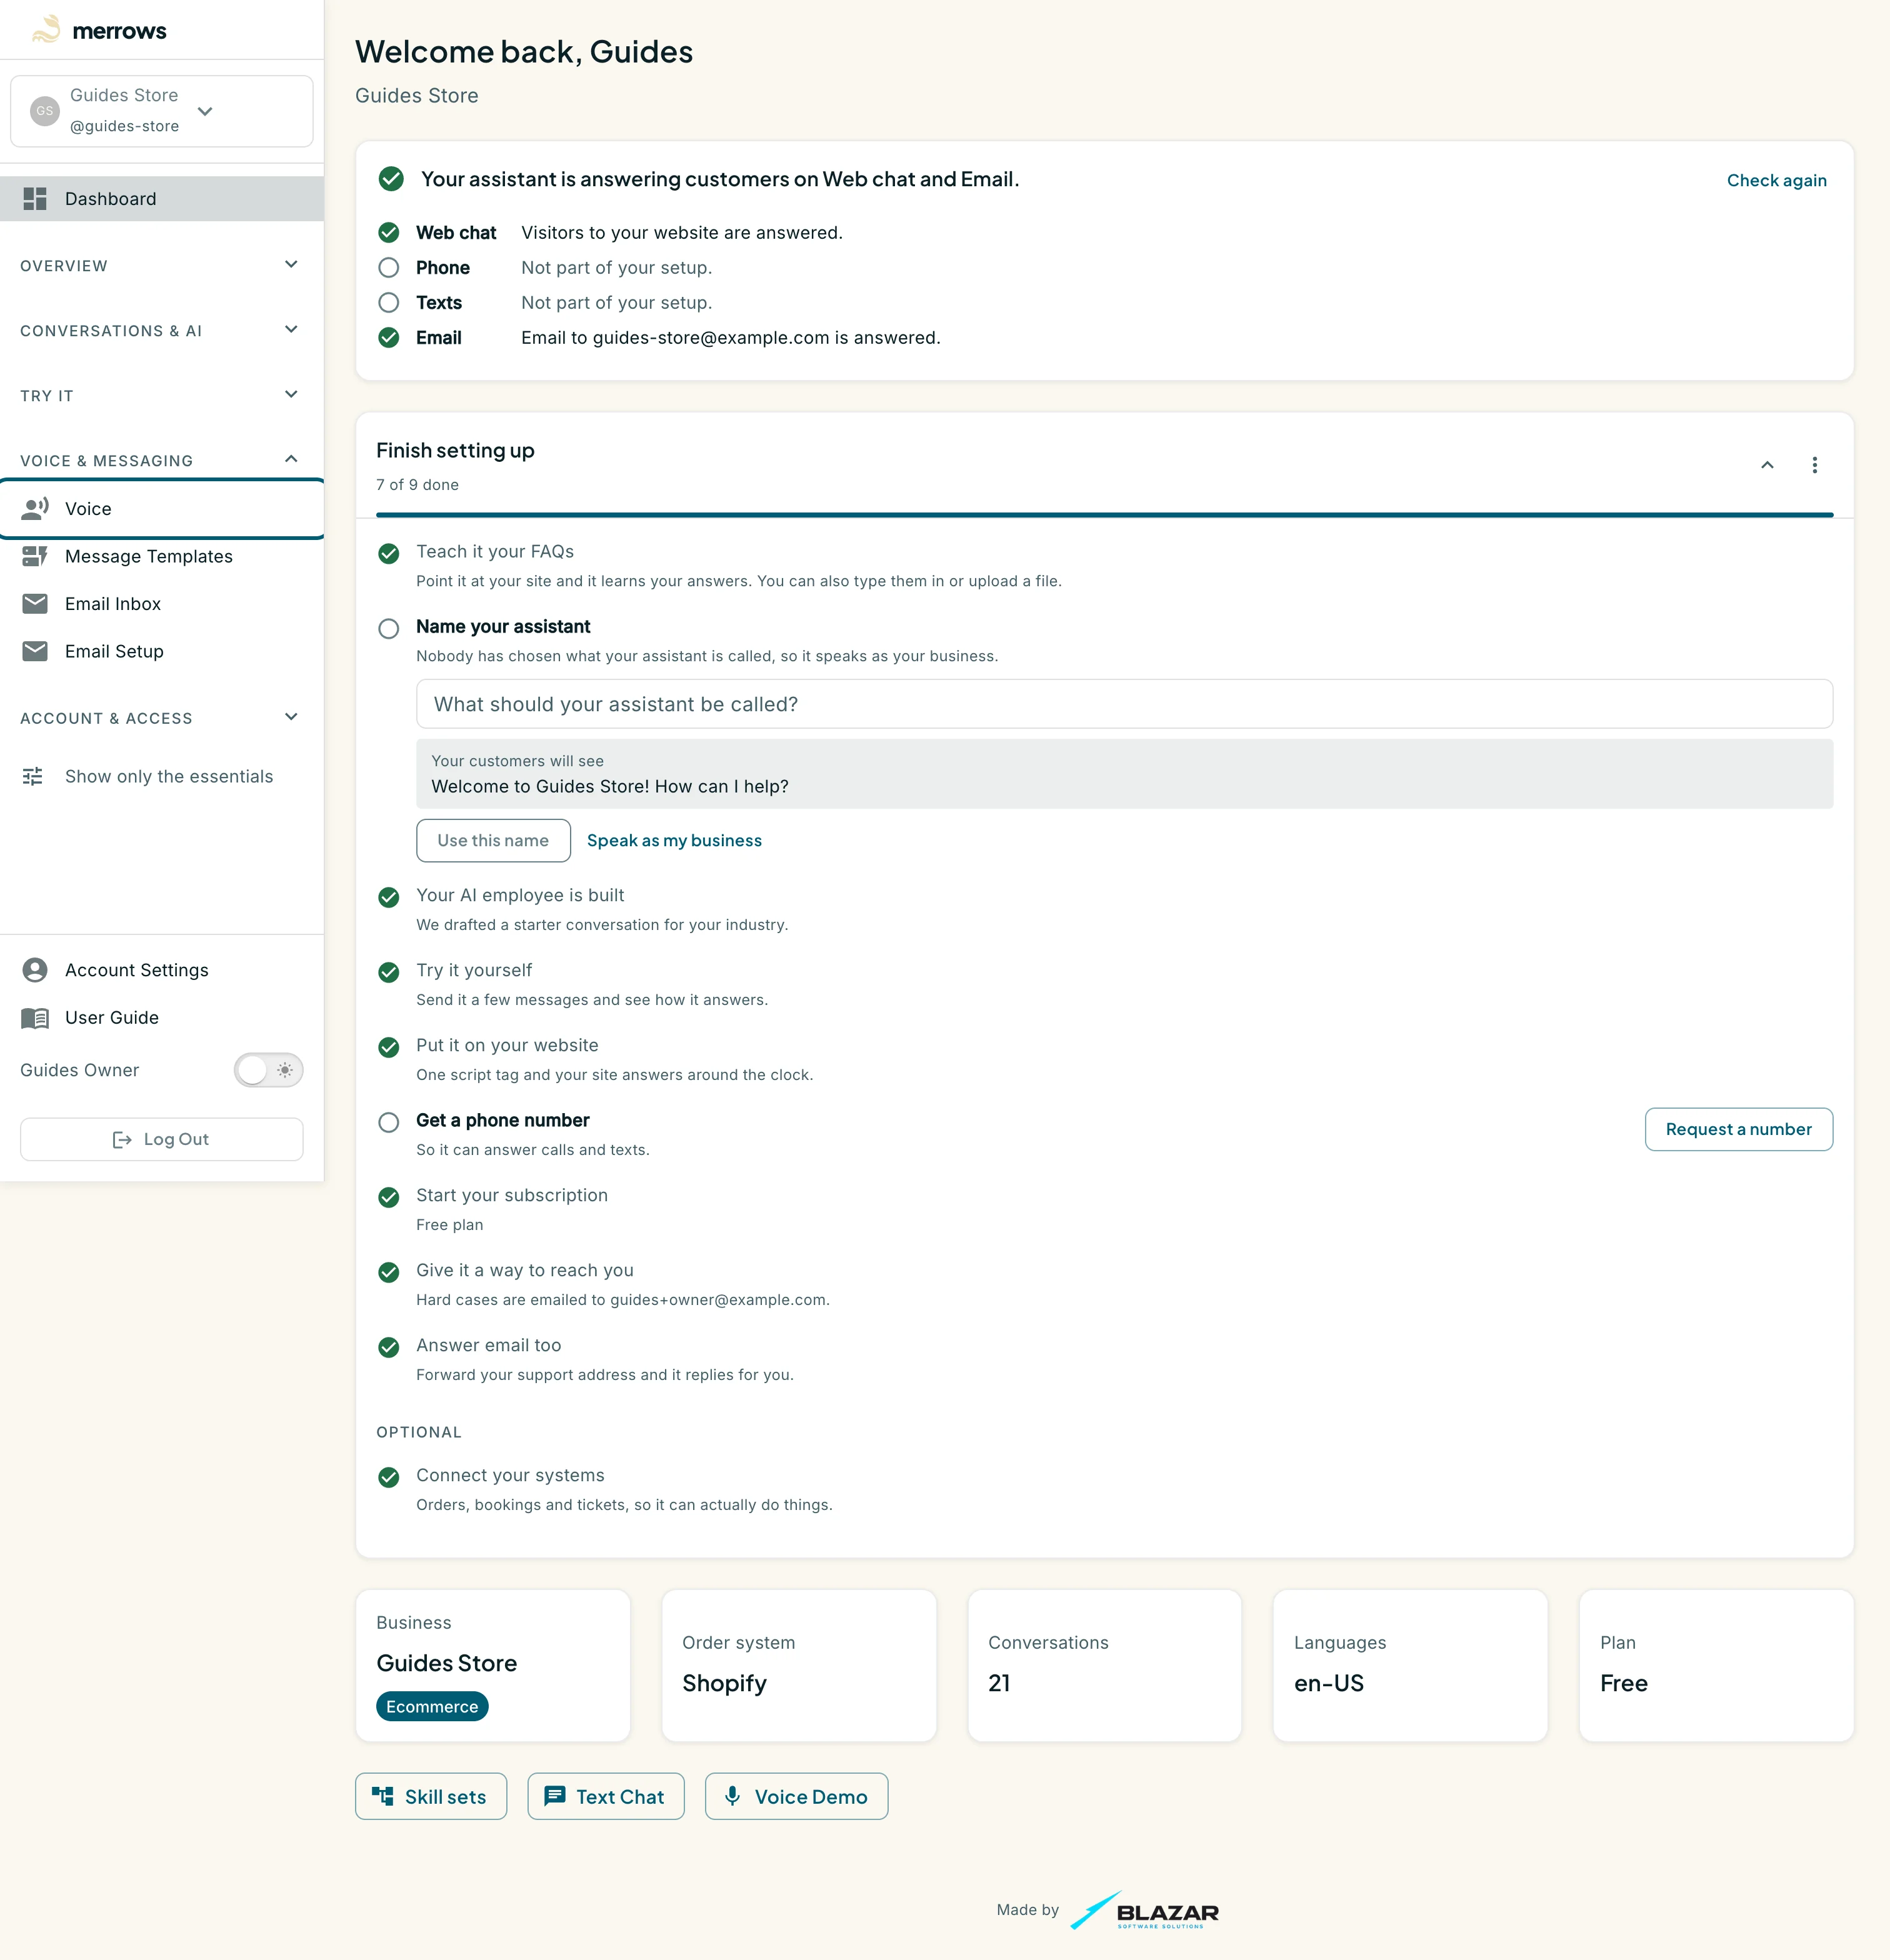
Action: Open Voice & Messaging.
What you should see: The group holds Voice, Message Templates, Email Inbox and Email Setup. A channel that is not on your plan stays in the sidebar with a lock beside it, for example Voice and, under Try it, Voice Demo. Its page explains the add-on and offers the upgrade; see the “Your plan and add-ons” guide. Items that need a permission your role lacks are not shown at all.