Send the email that reaches your Google Workspace support address to your AI employee, let it reply from your own domain, and hand customers to your team at an address of your choosing.
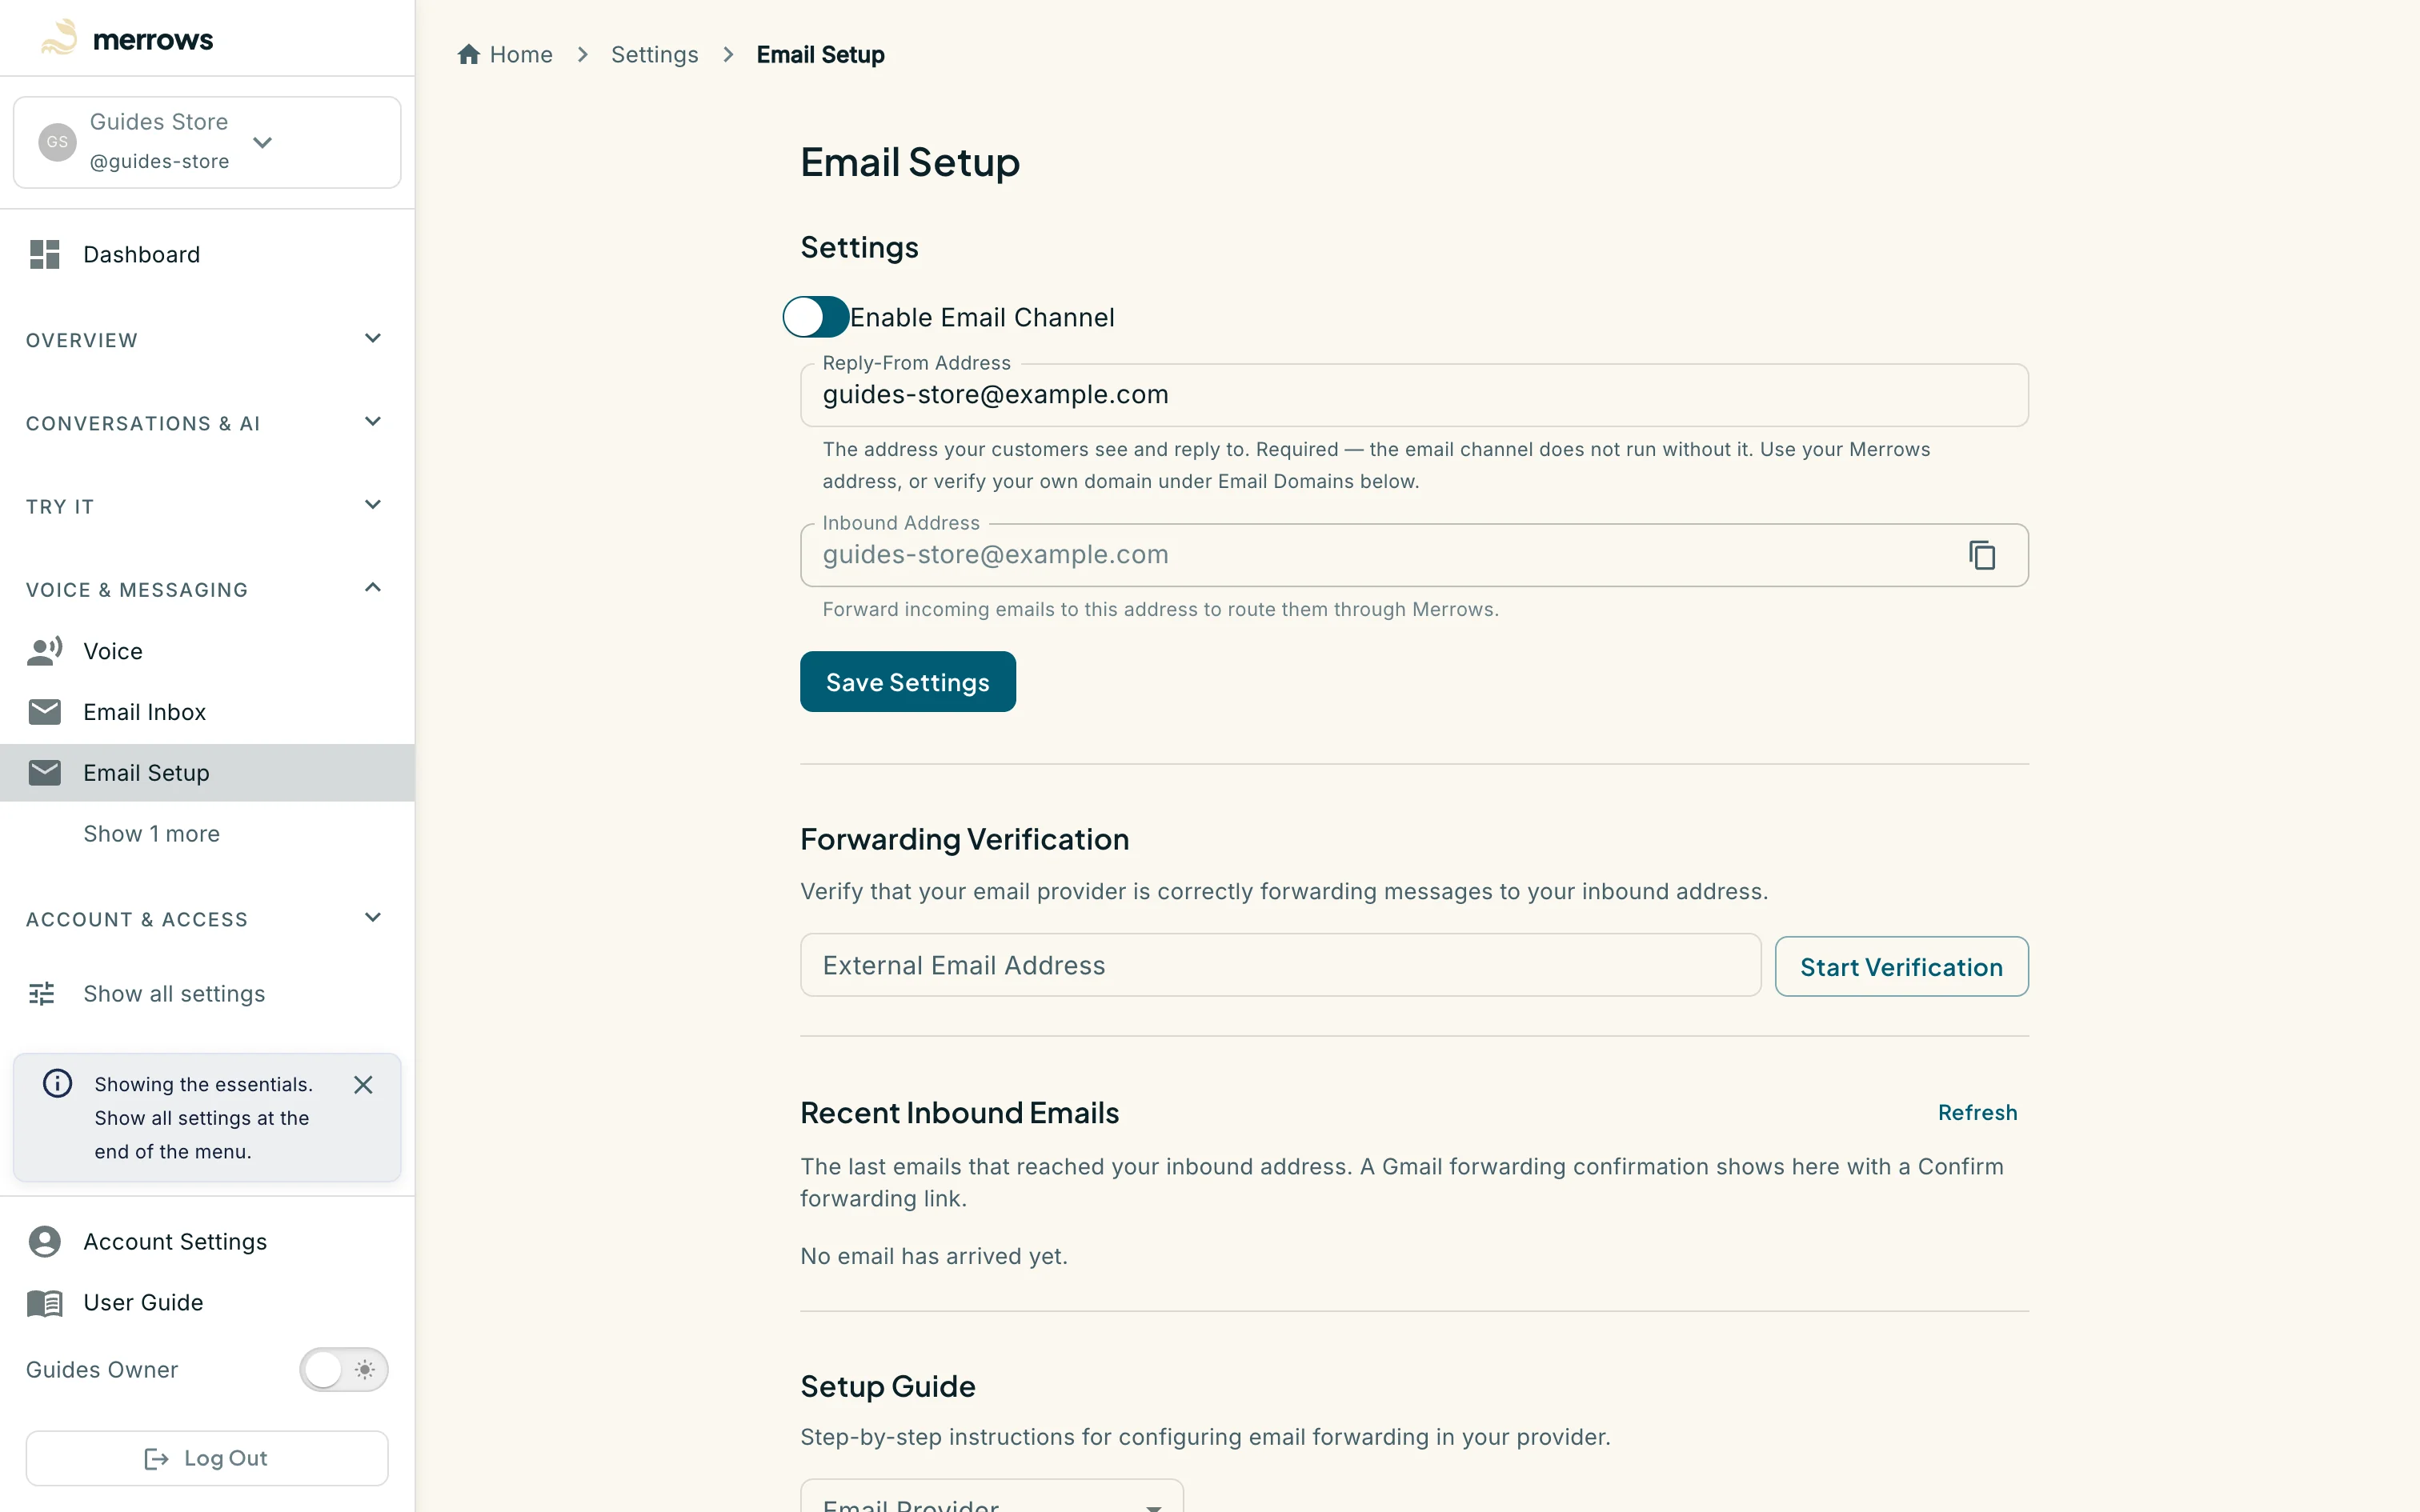
Action: Go to https://portal.merrows.ai/settings/email-channel. Type a reply-from address, tick Enable Email Channel and click Save Settings. Until your own domain is verified (step 7), use the Merrows address shown in the field, for example yourbusiness@mail.merrows.ai.
What you should see: The “not set up yet” notice clears. The Inbound Address shows yourbusiness@mail.merrows.ai with a Copy button. This is the address your support mail gets forwarded to.
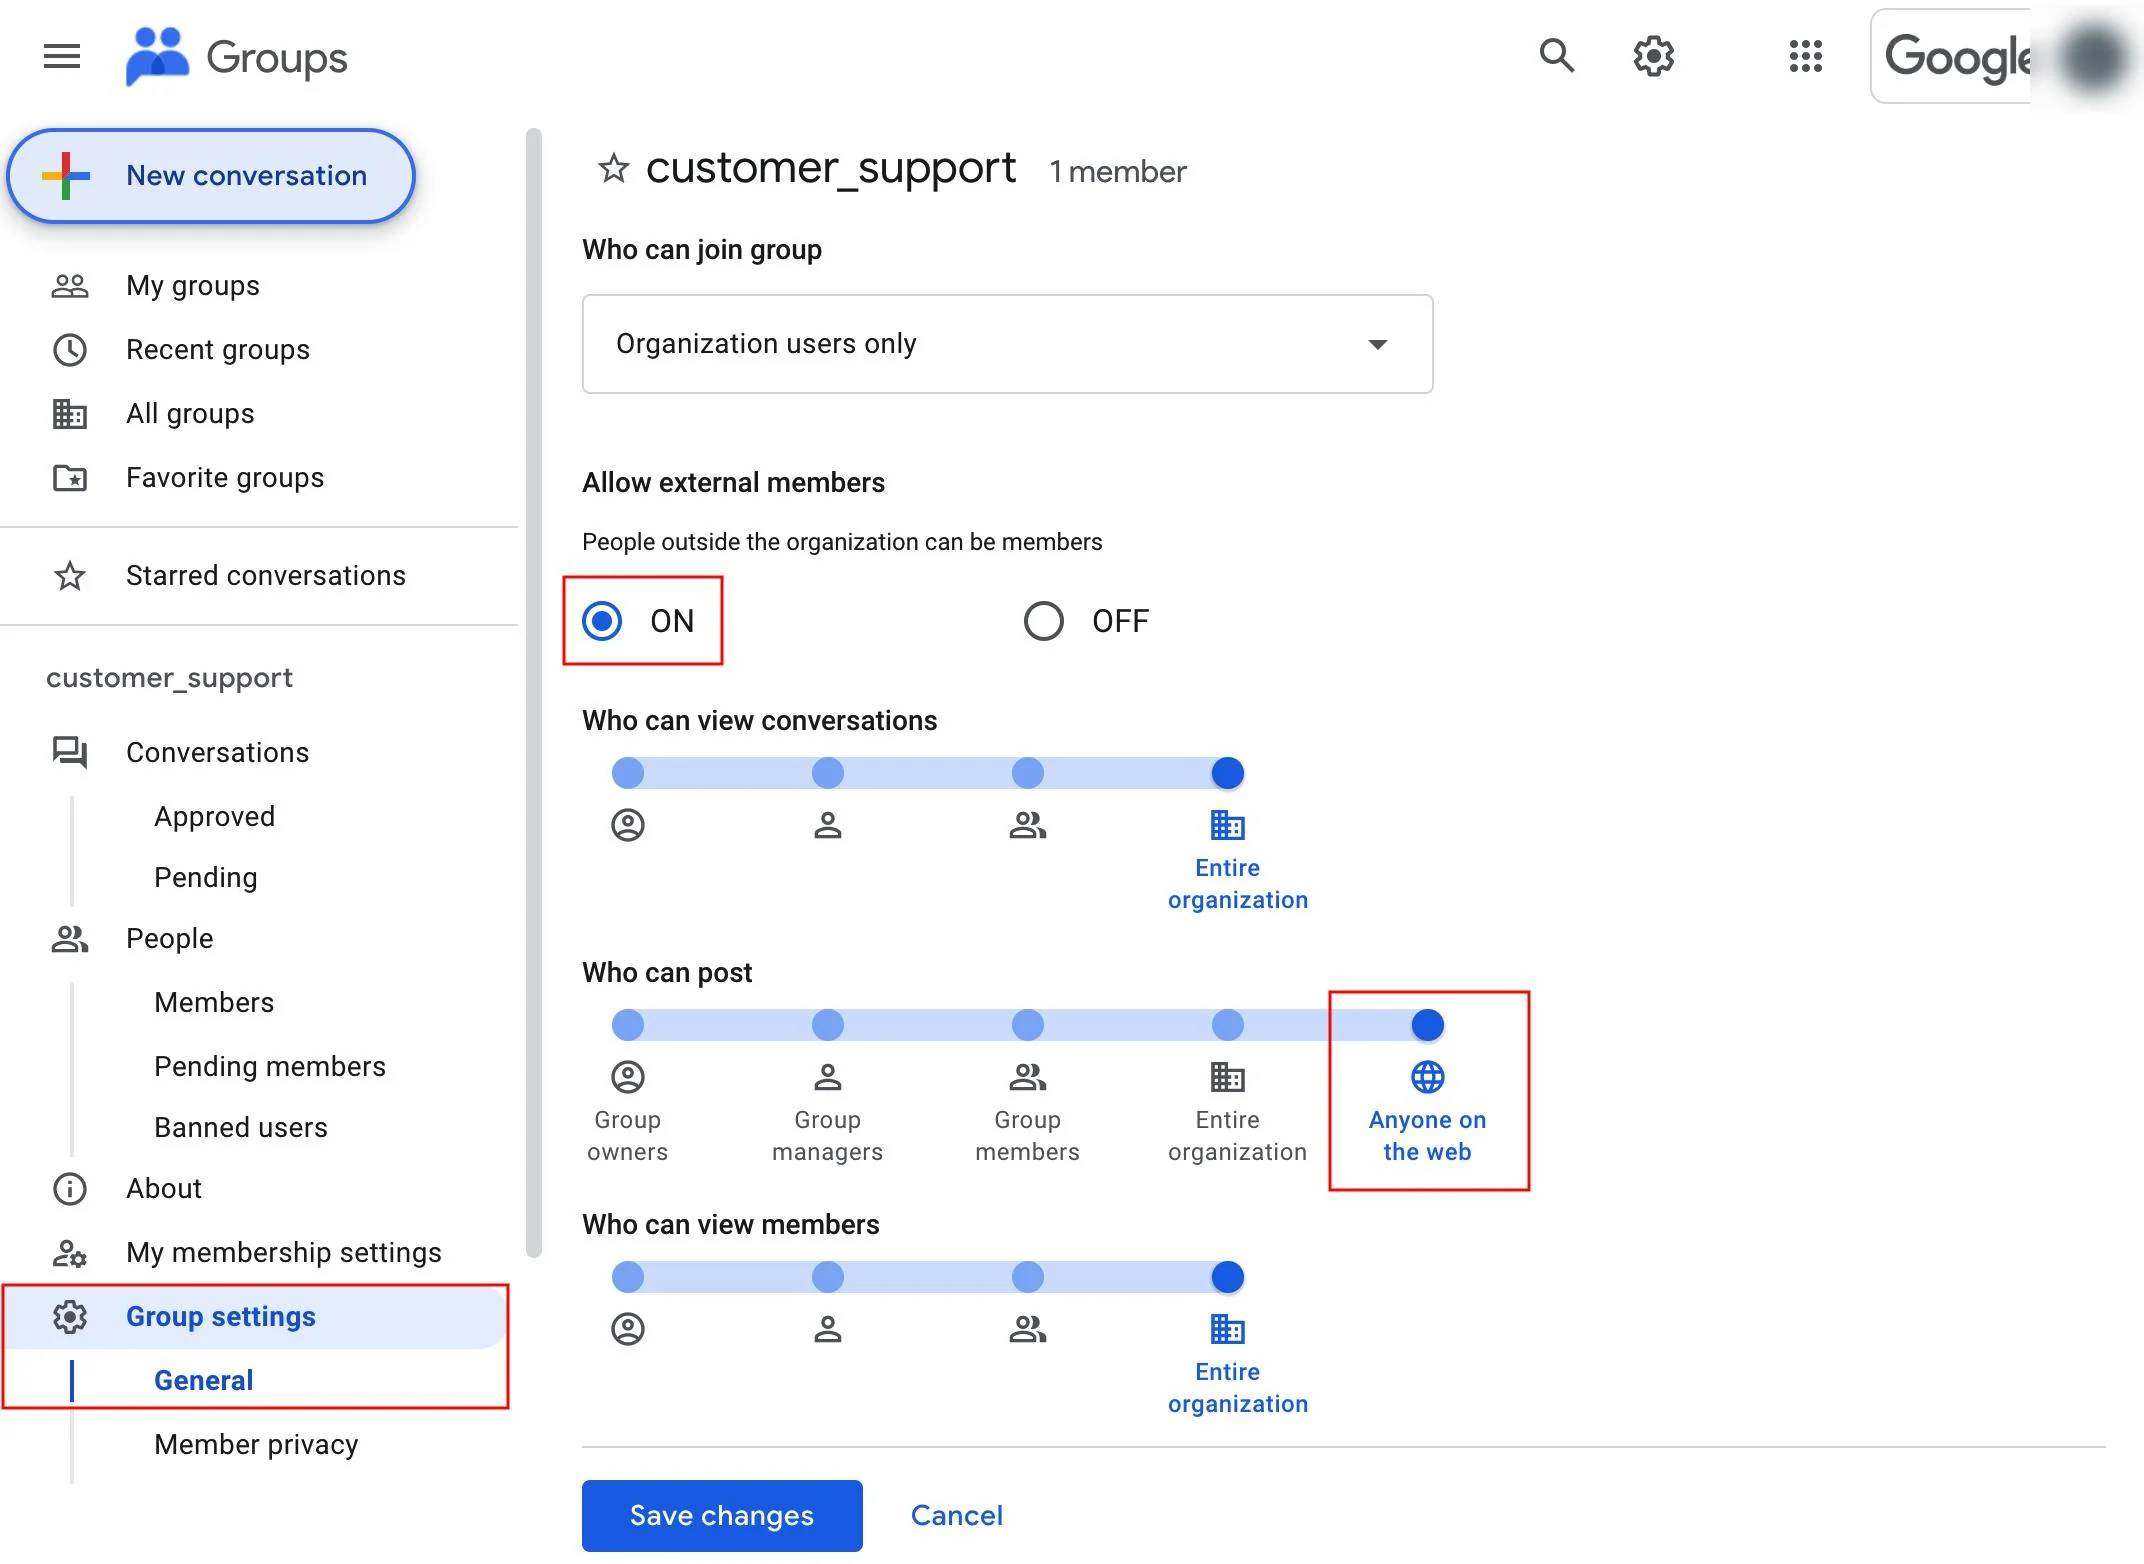
Action: If your support address (for example info@yourbusiness.com) is a Google Group: open the group at groups.google.com and go to Group settings, then General. Set “Allow external members” to ON and “Who can post” to “Anyone on the web”, then click Save changes. Then open People, then Members, and add the Inbound Address as a member. Skip steps 3 and 4.
What you should see: The Inbound Address is listed as a member of the group. Every email sent to the group now also reaches Merrows, and your team keeps receiving it as before.
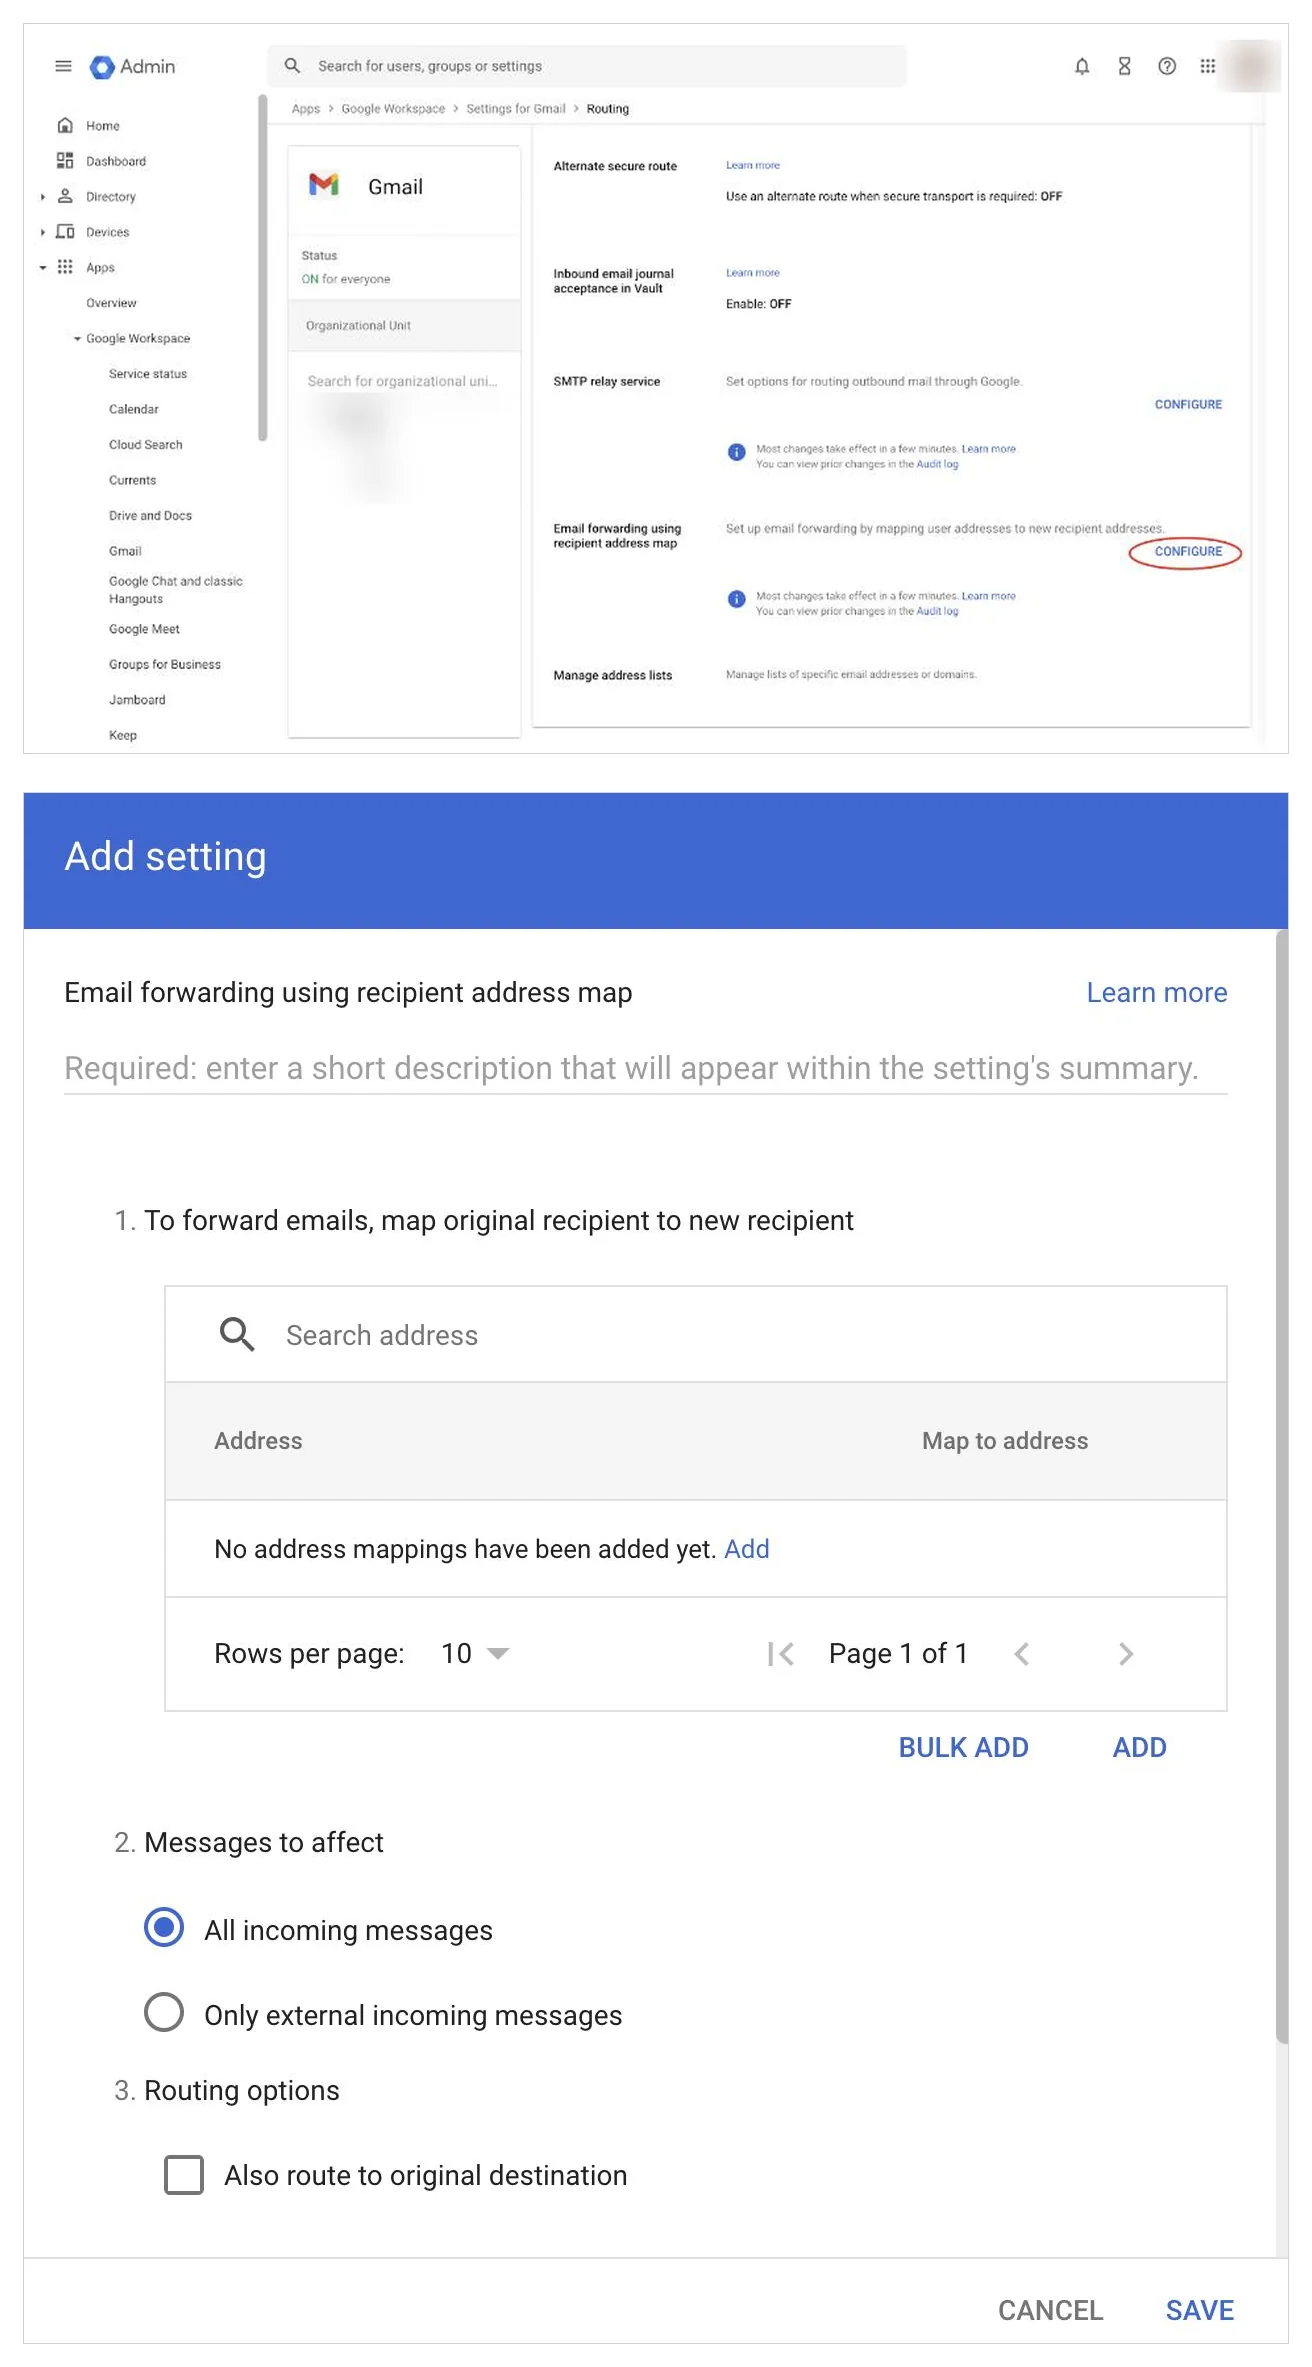
Action: If your support address is a user’s mailbox: in the Google Admin console go to Apps, then Google Workspace, then Gmail, then Routing. Click Configure next to “Email forwarding using recipient address map”. In the Add setting window, type a short description, click Add and map the support address to the Inbound Address. Leave “All incoming messages” selected, tick “Also route to original destination” and click Save.
What you should see: The rule is listed under Routing. Changes usually apply within minutes and can take up to 24 hours. The mailbox keeps its own copy of every email.
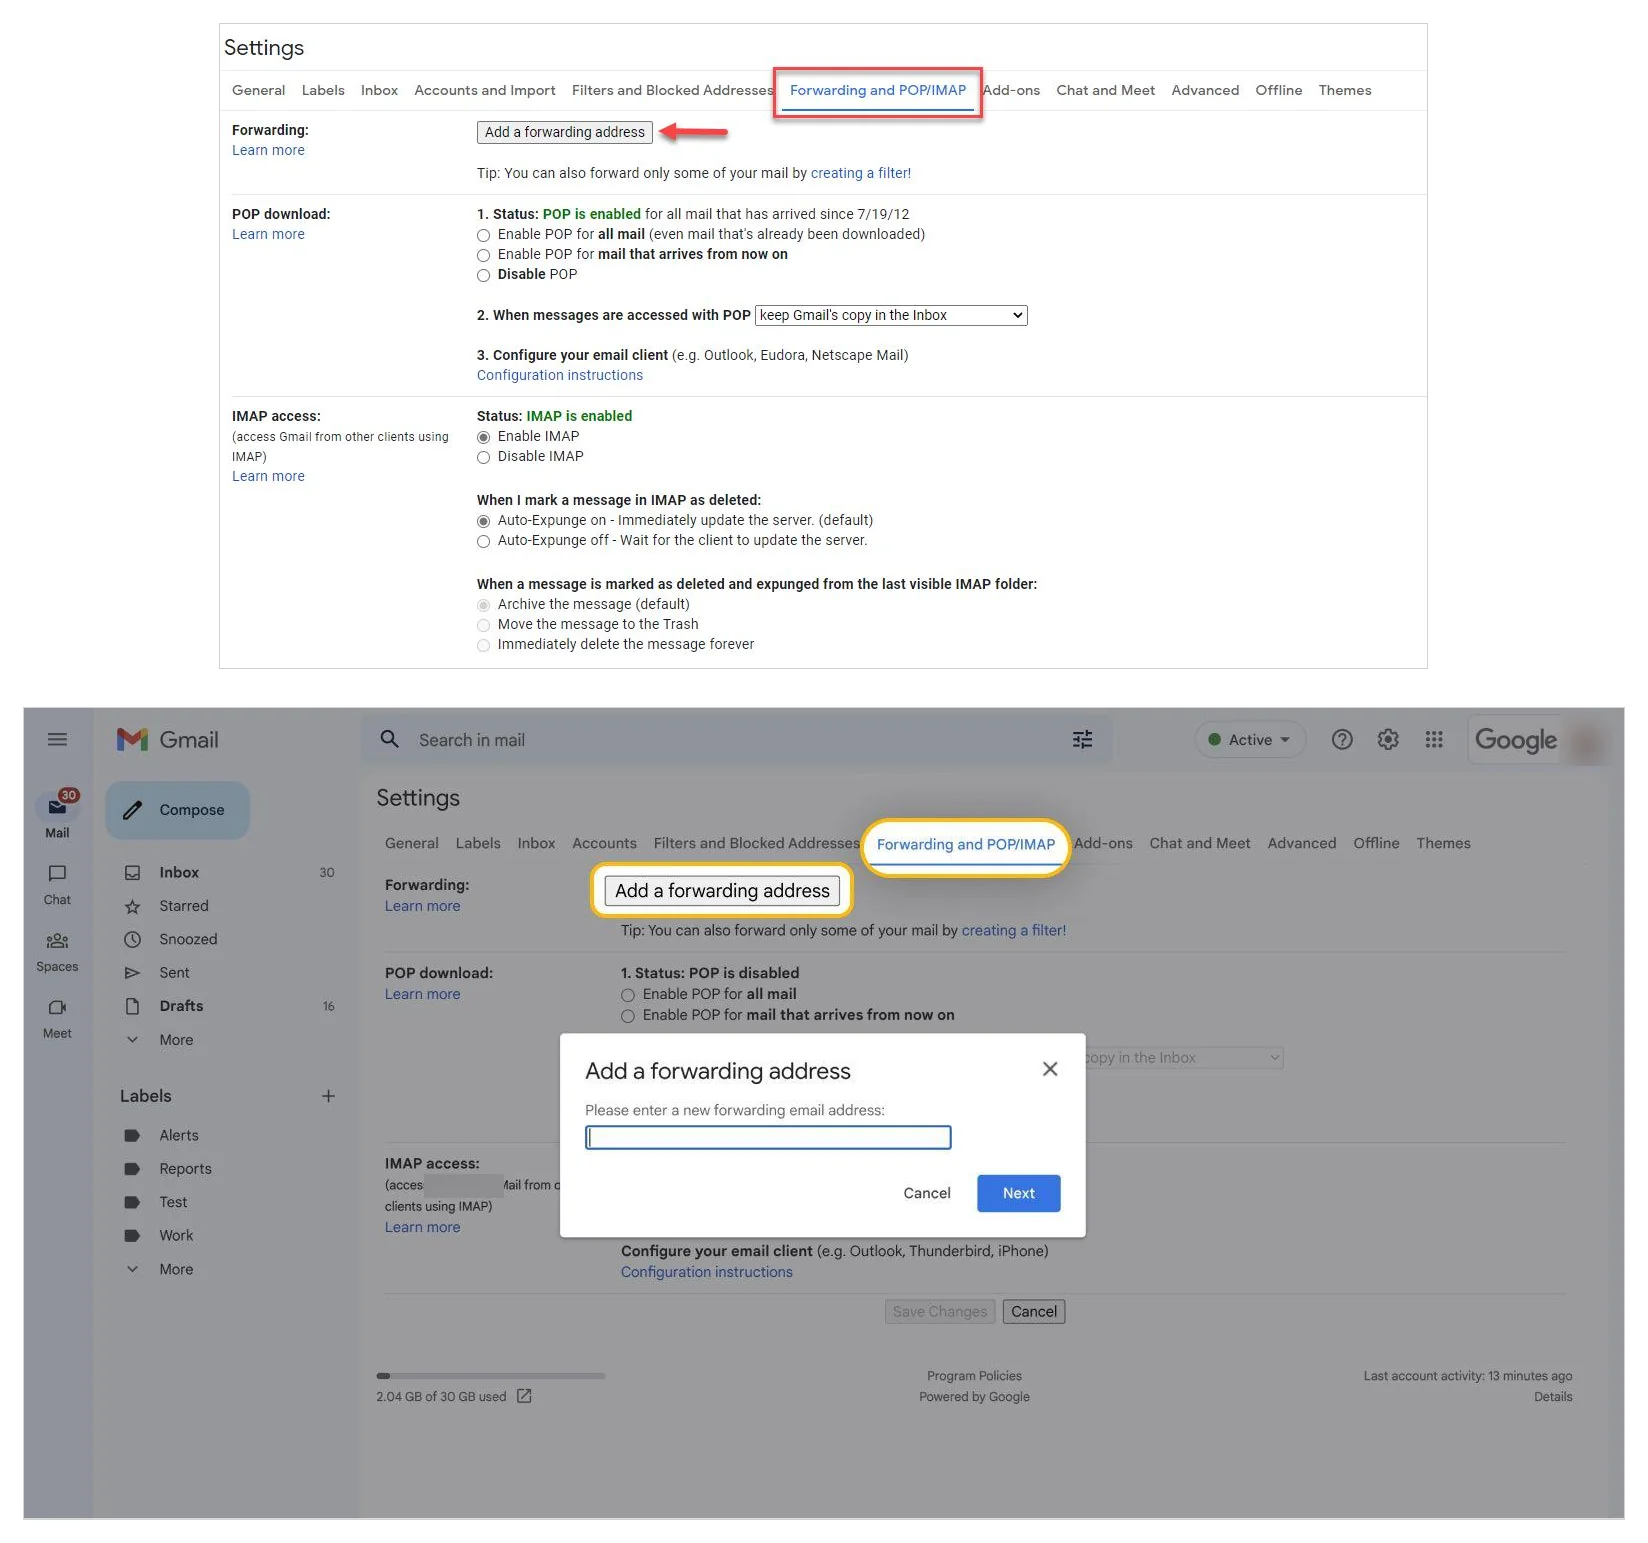
Action: Without admin access, forward from the mailbox itself: in Gmail open Settings, then See all settings, then Forwarding and POP/IMAP. Click “Add a forwarding address”, enter the Inbound Address and confirm. Back in the portal, open Recent Inbound Emails on the Email Setup page. The email from Google is listed there with a Confirm forwarding link. Open the link and click Confirm on Google’s page. If your email shows a numeric code instead, type that code into the verification box on Gmail’s Forwarding tab. Then choose “Forward a copy of incoming mail to” the Inbound Address and keep Gmail’s copy in the inbox.
What you should see: Google’s confirmation email is listed under Recent Inbound Emails as “Forwarding confirmation, not answered” with a Confirm forwarding link. After you confirm, Gmail shows the Inbound Address as a forwarding destination.
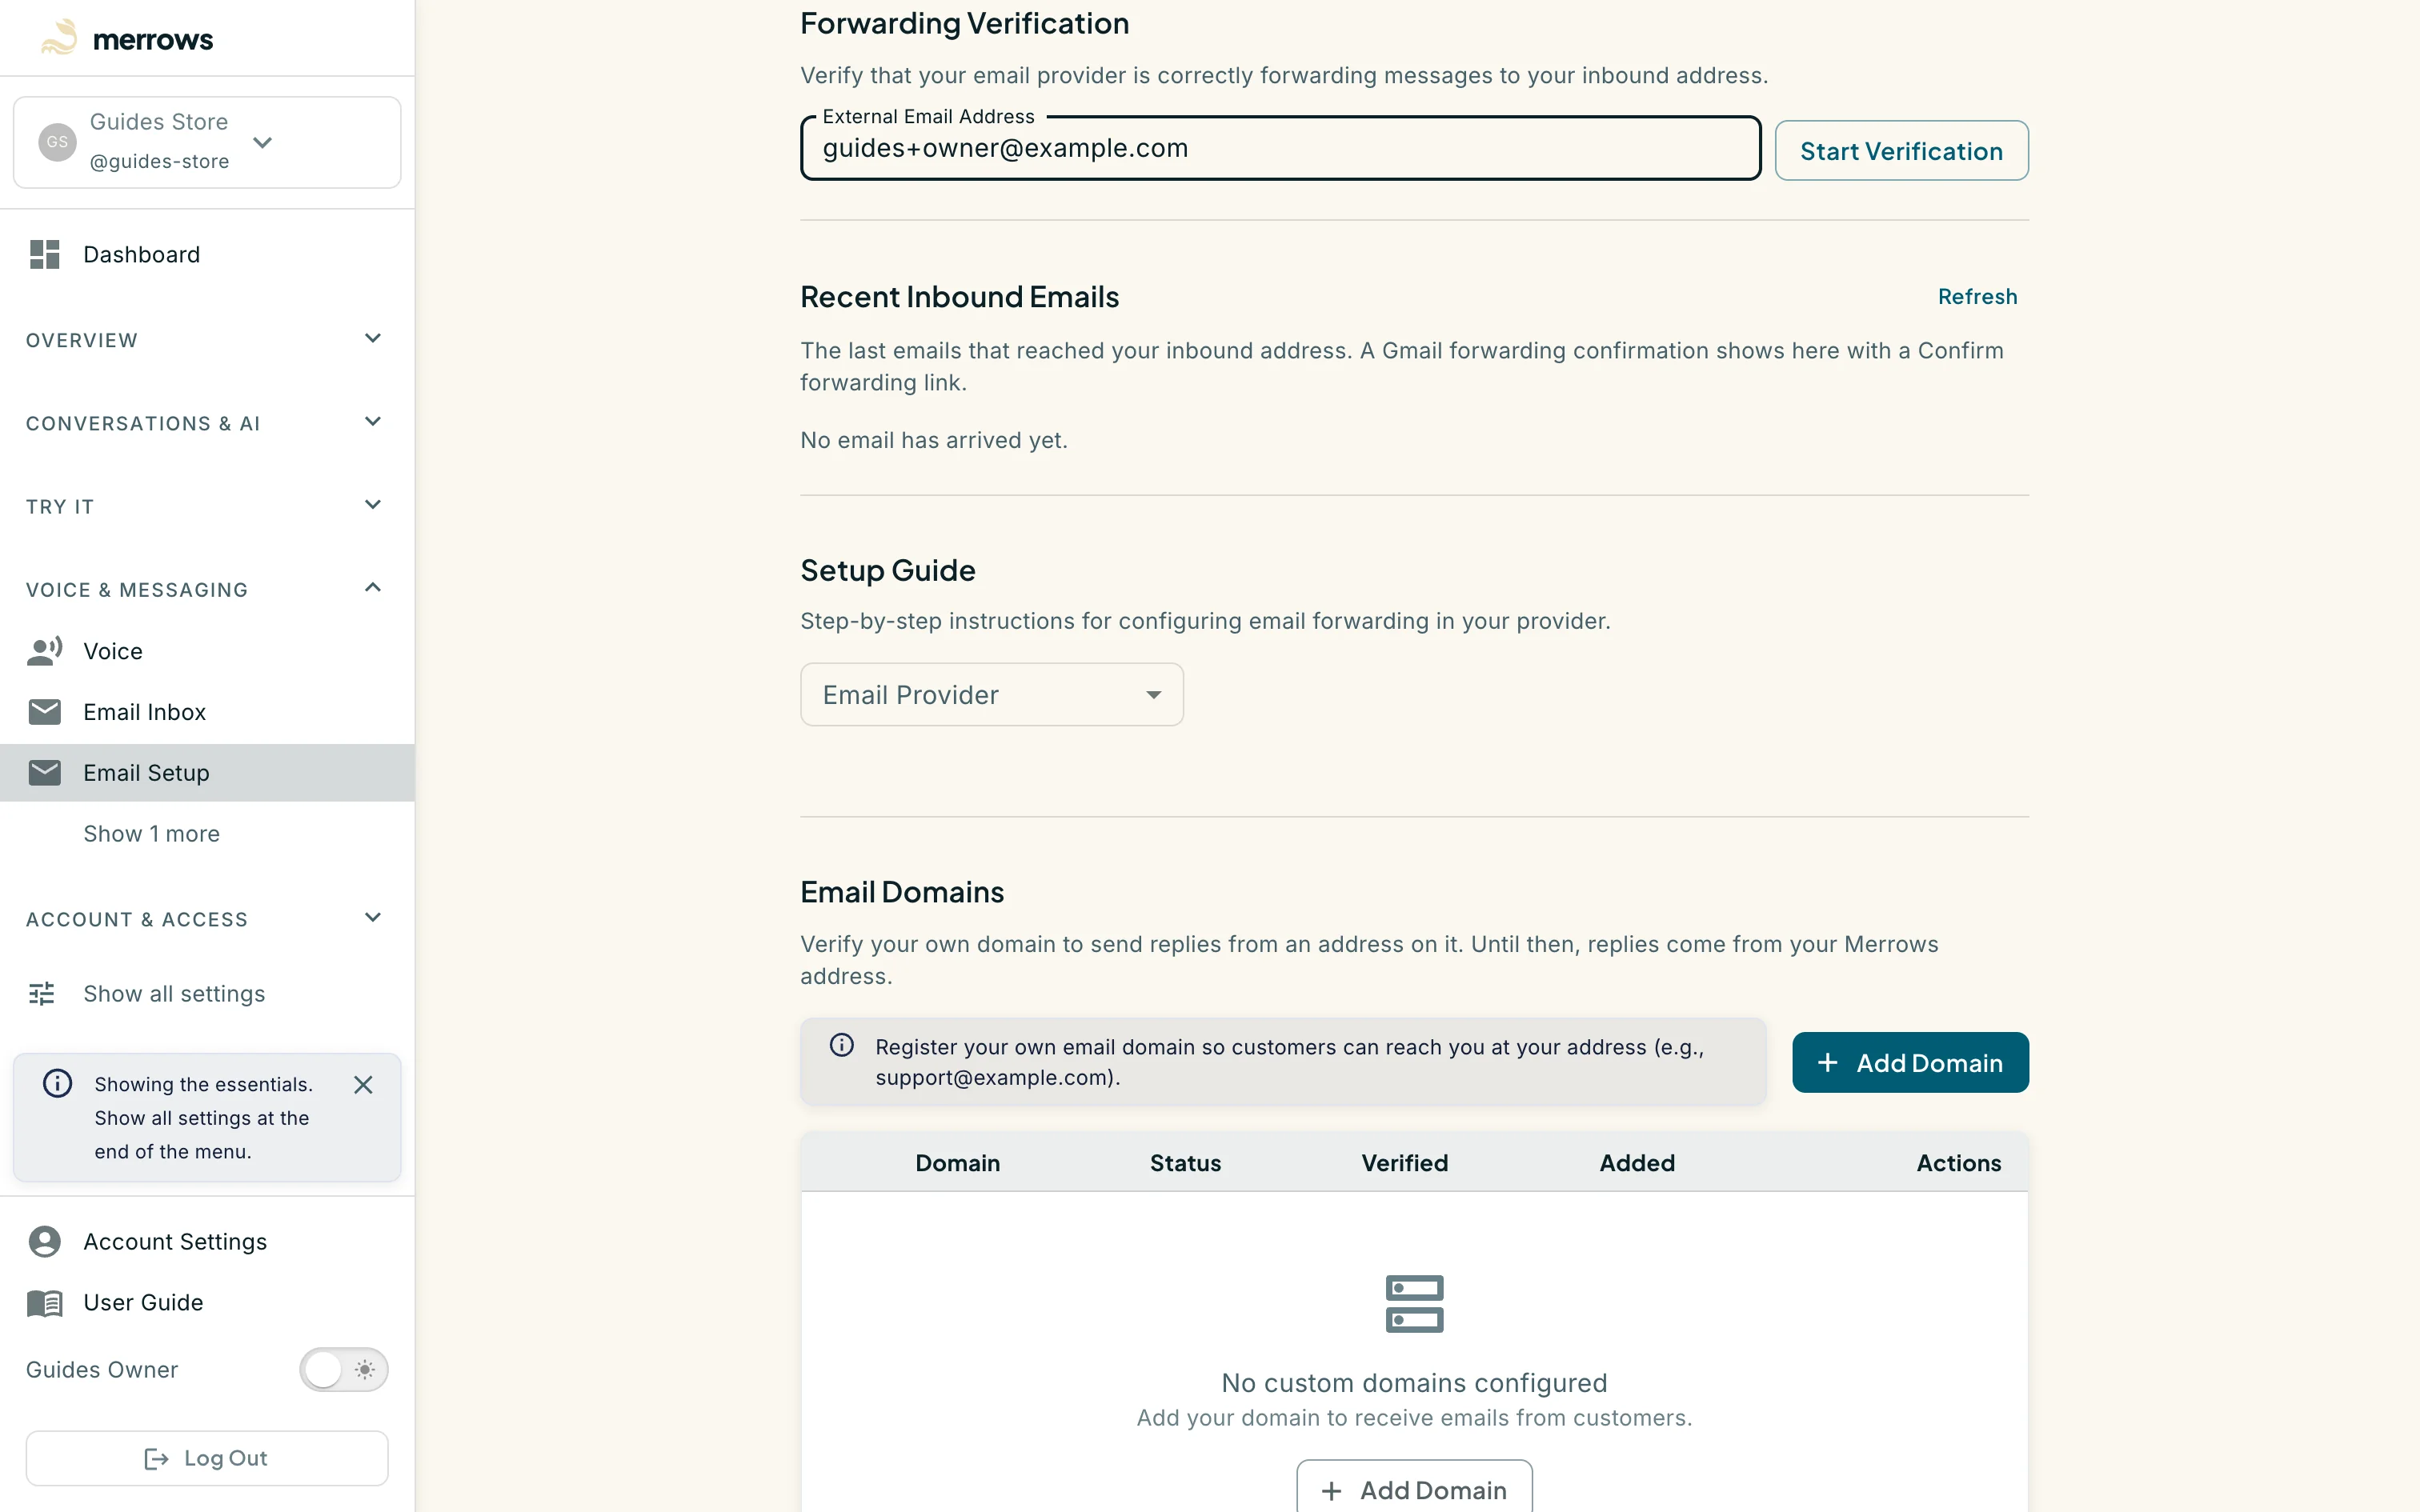
Action: On the Email Setup page, under Forwarding Verification, type your support address and click Start Verification.
What you should see: Merrows sends a message to your support address. Your forwarding brings it back, and within a minute the check reads “verified”. If it stays pending, the forwarding from step 2, 3 or 4 is not in place yet.
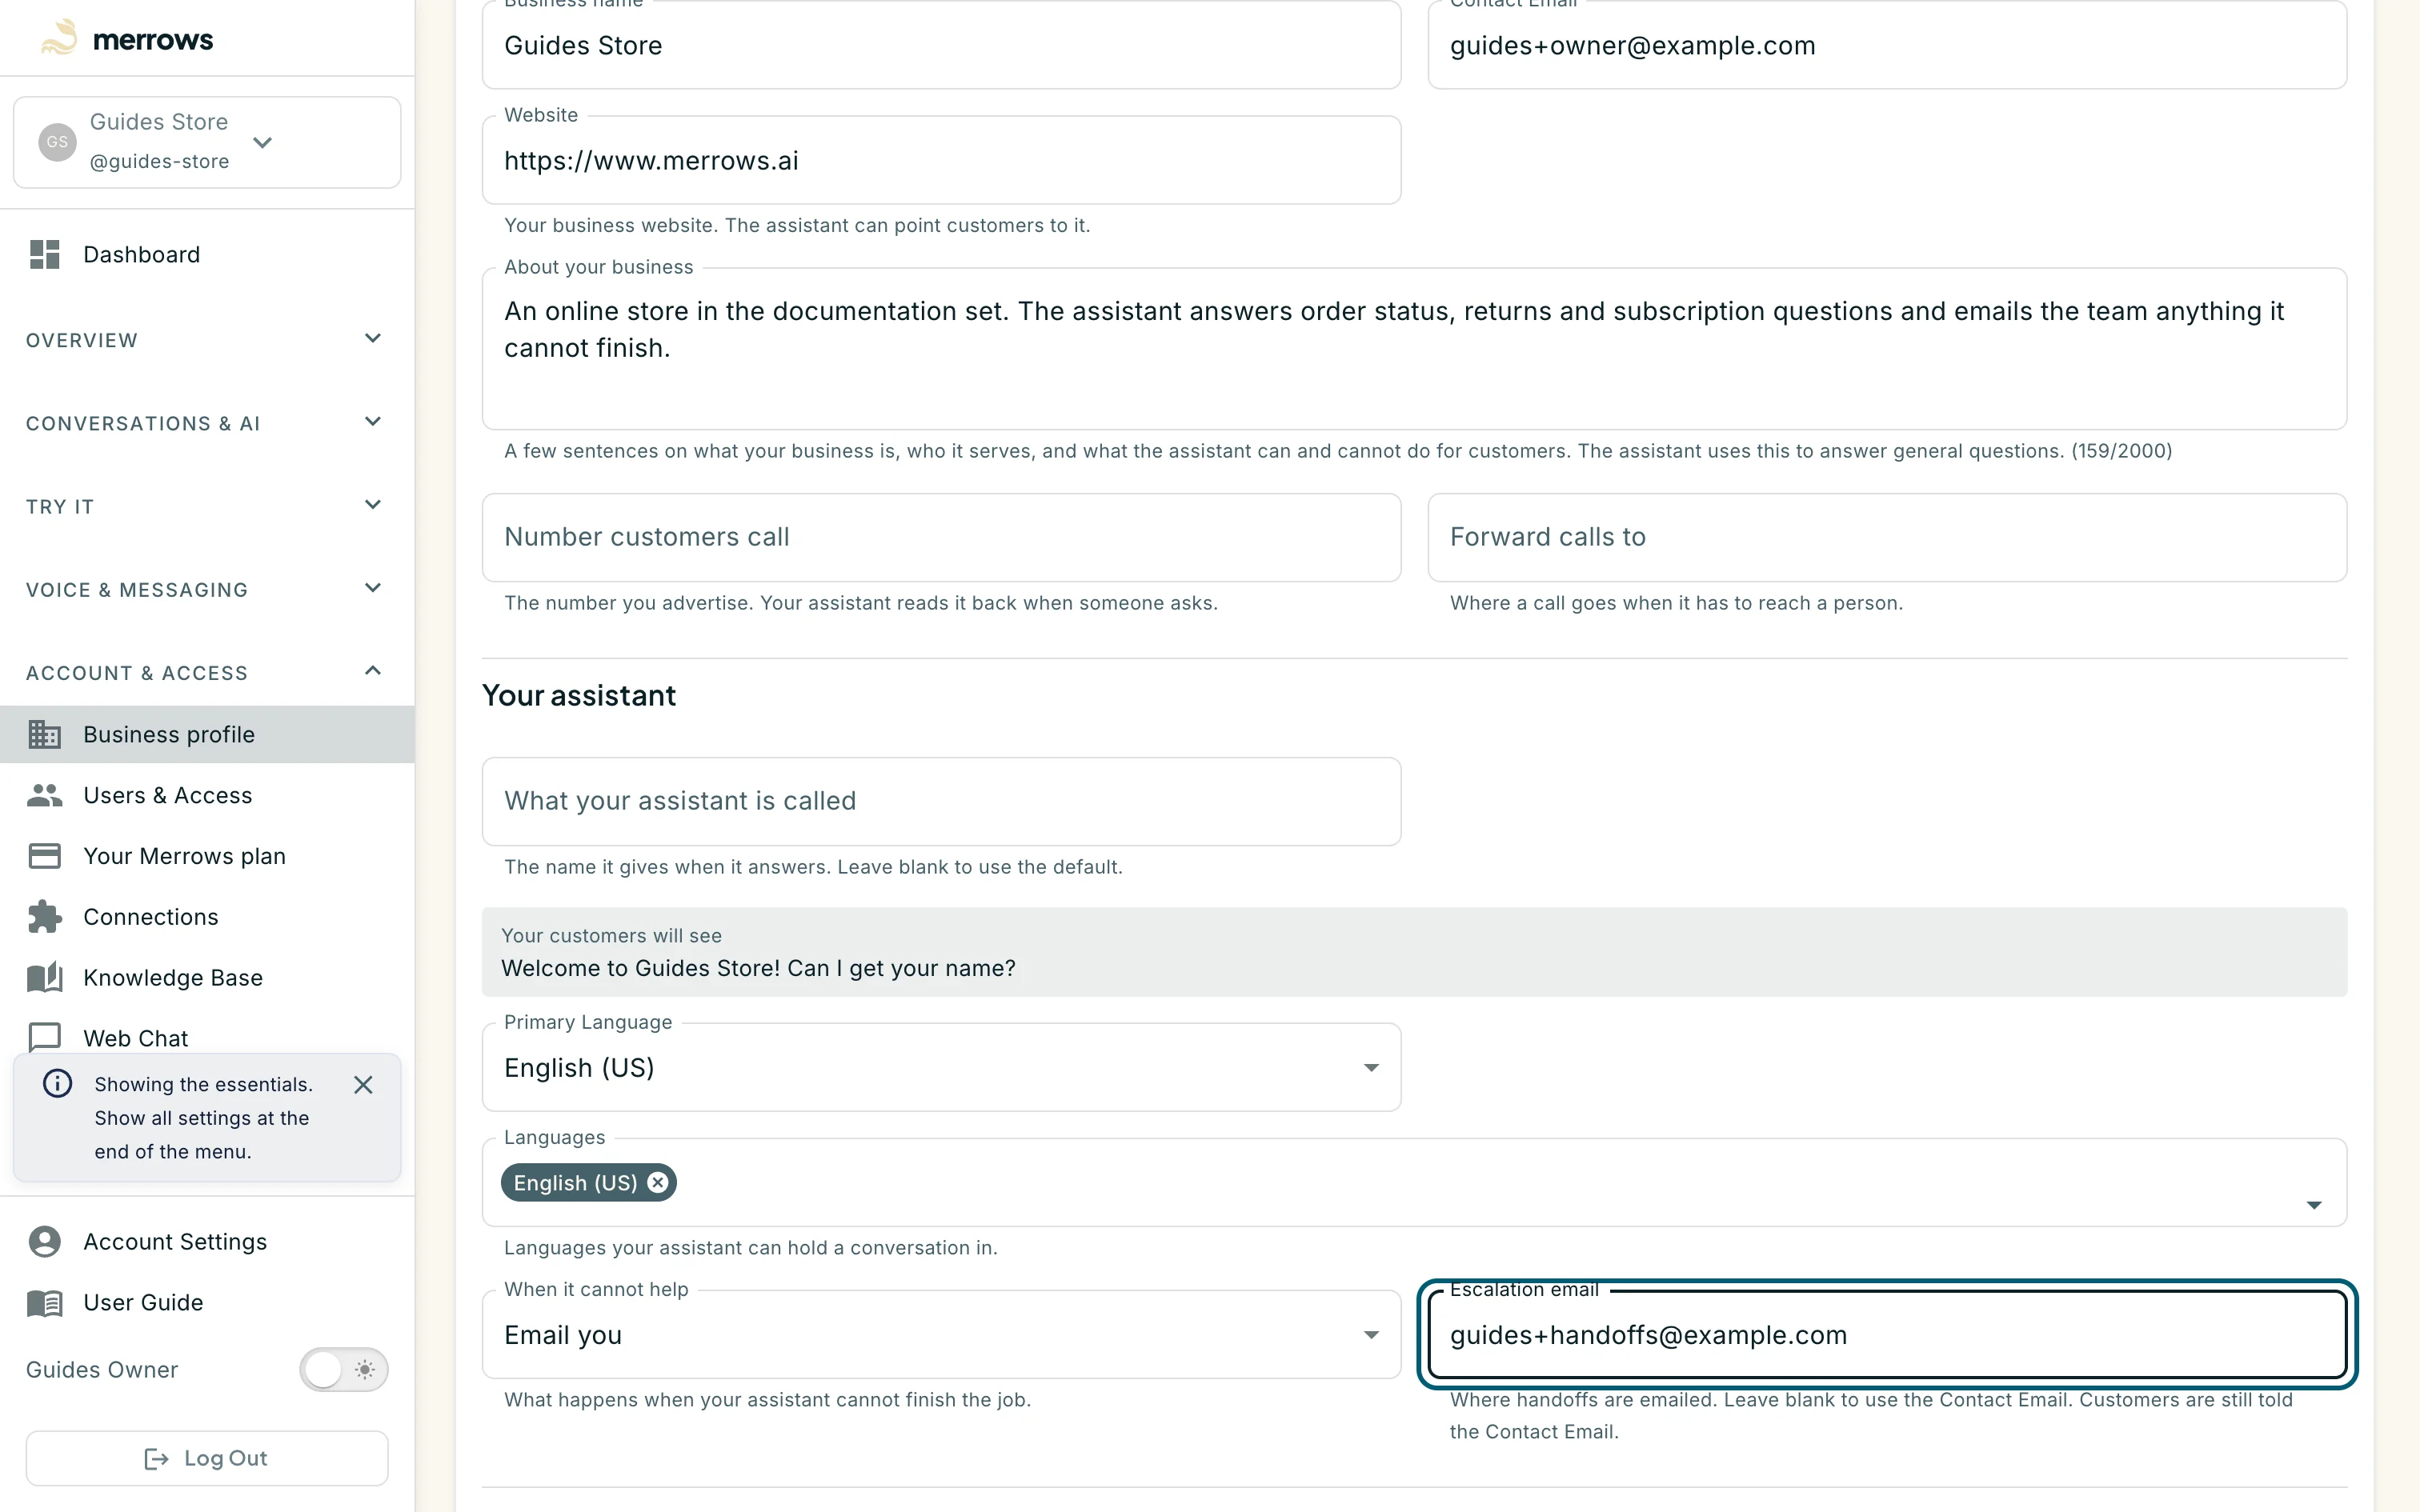
Action: Go to https://portal.merrows.ai/settings/tenant. Under “When it cannot help”, choose “Email you”, and in Escalation email enter the address that should receive handoffs, for example a team member’s own mailbox. Click Save changes.
What you should see: Handoffs go to the escalation email. Customers are still given your Contact Email. Use an address that does not forward to Merrows: if the escalation email forwards to the Inbound Address, the handoff comes straight back to your AI employee.
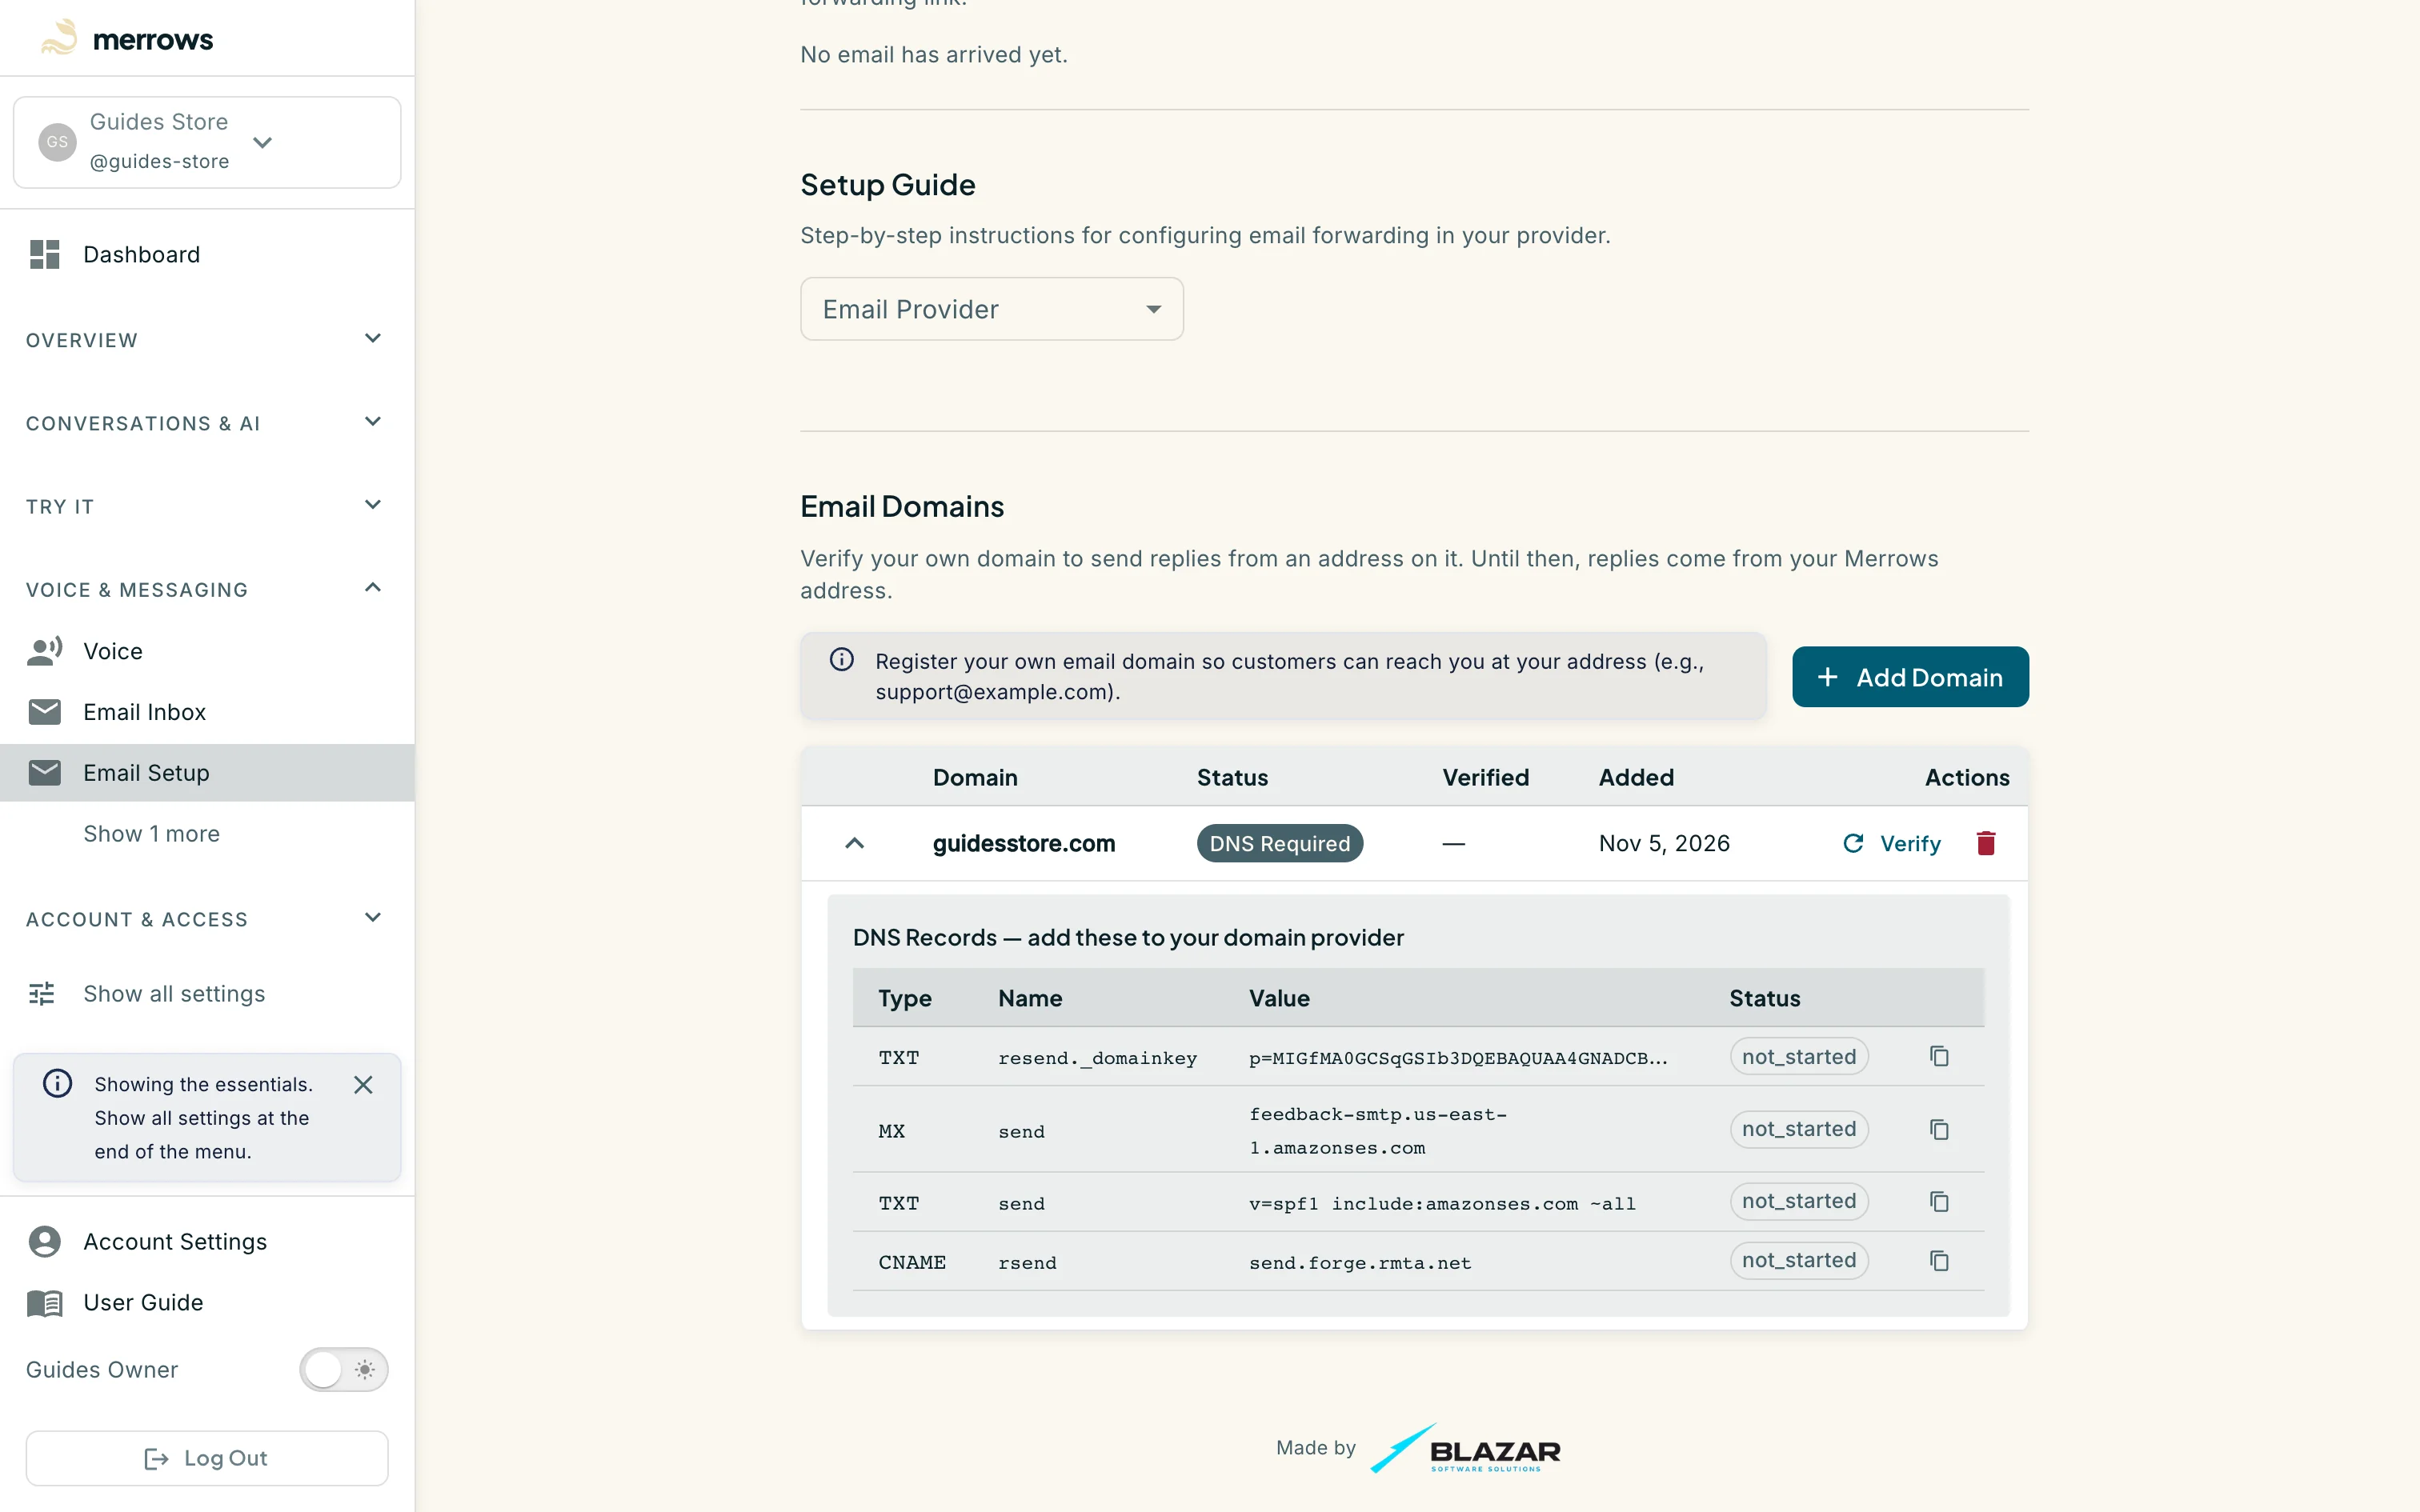
Action: To reply from your own domain, scroll to Email Domains on the Email Setup page, click Add Domain, enter your domain, for example yourbusiness.com, and click Add Domain in the dialog. Open the domain’s row with the arrow to see its DNS records, and add each one at your DNS host. In Google Cloud DNS, open your zone and add each record with the name shown, followed by your domain. When they are in place, click Verify on the domain’s row.
What you should see: The domain is listed as DNS Required, with four records: a TXT record named resend._domainkey, an MX and a TXT record named send, and a CNAME named rsend. None of them is at the root of your domain. Leave your existing MX records and your root SPF record unchanged. Once your DNS host publishes the records, Verify marks the domain as verified, usually within minutes.
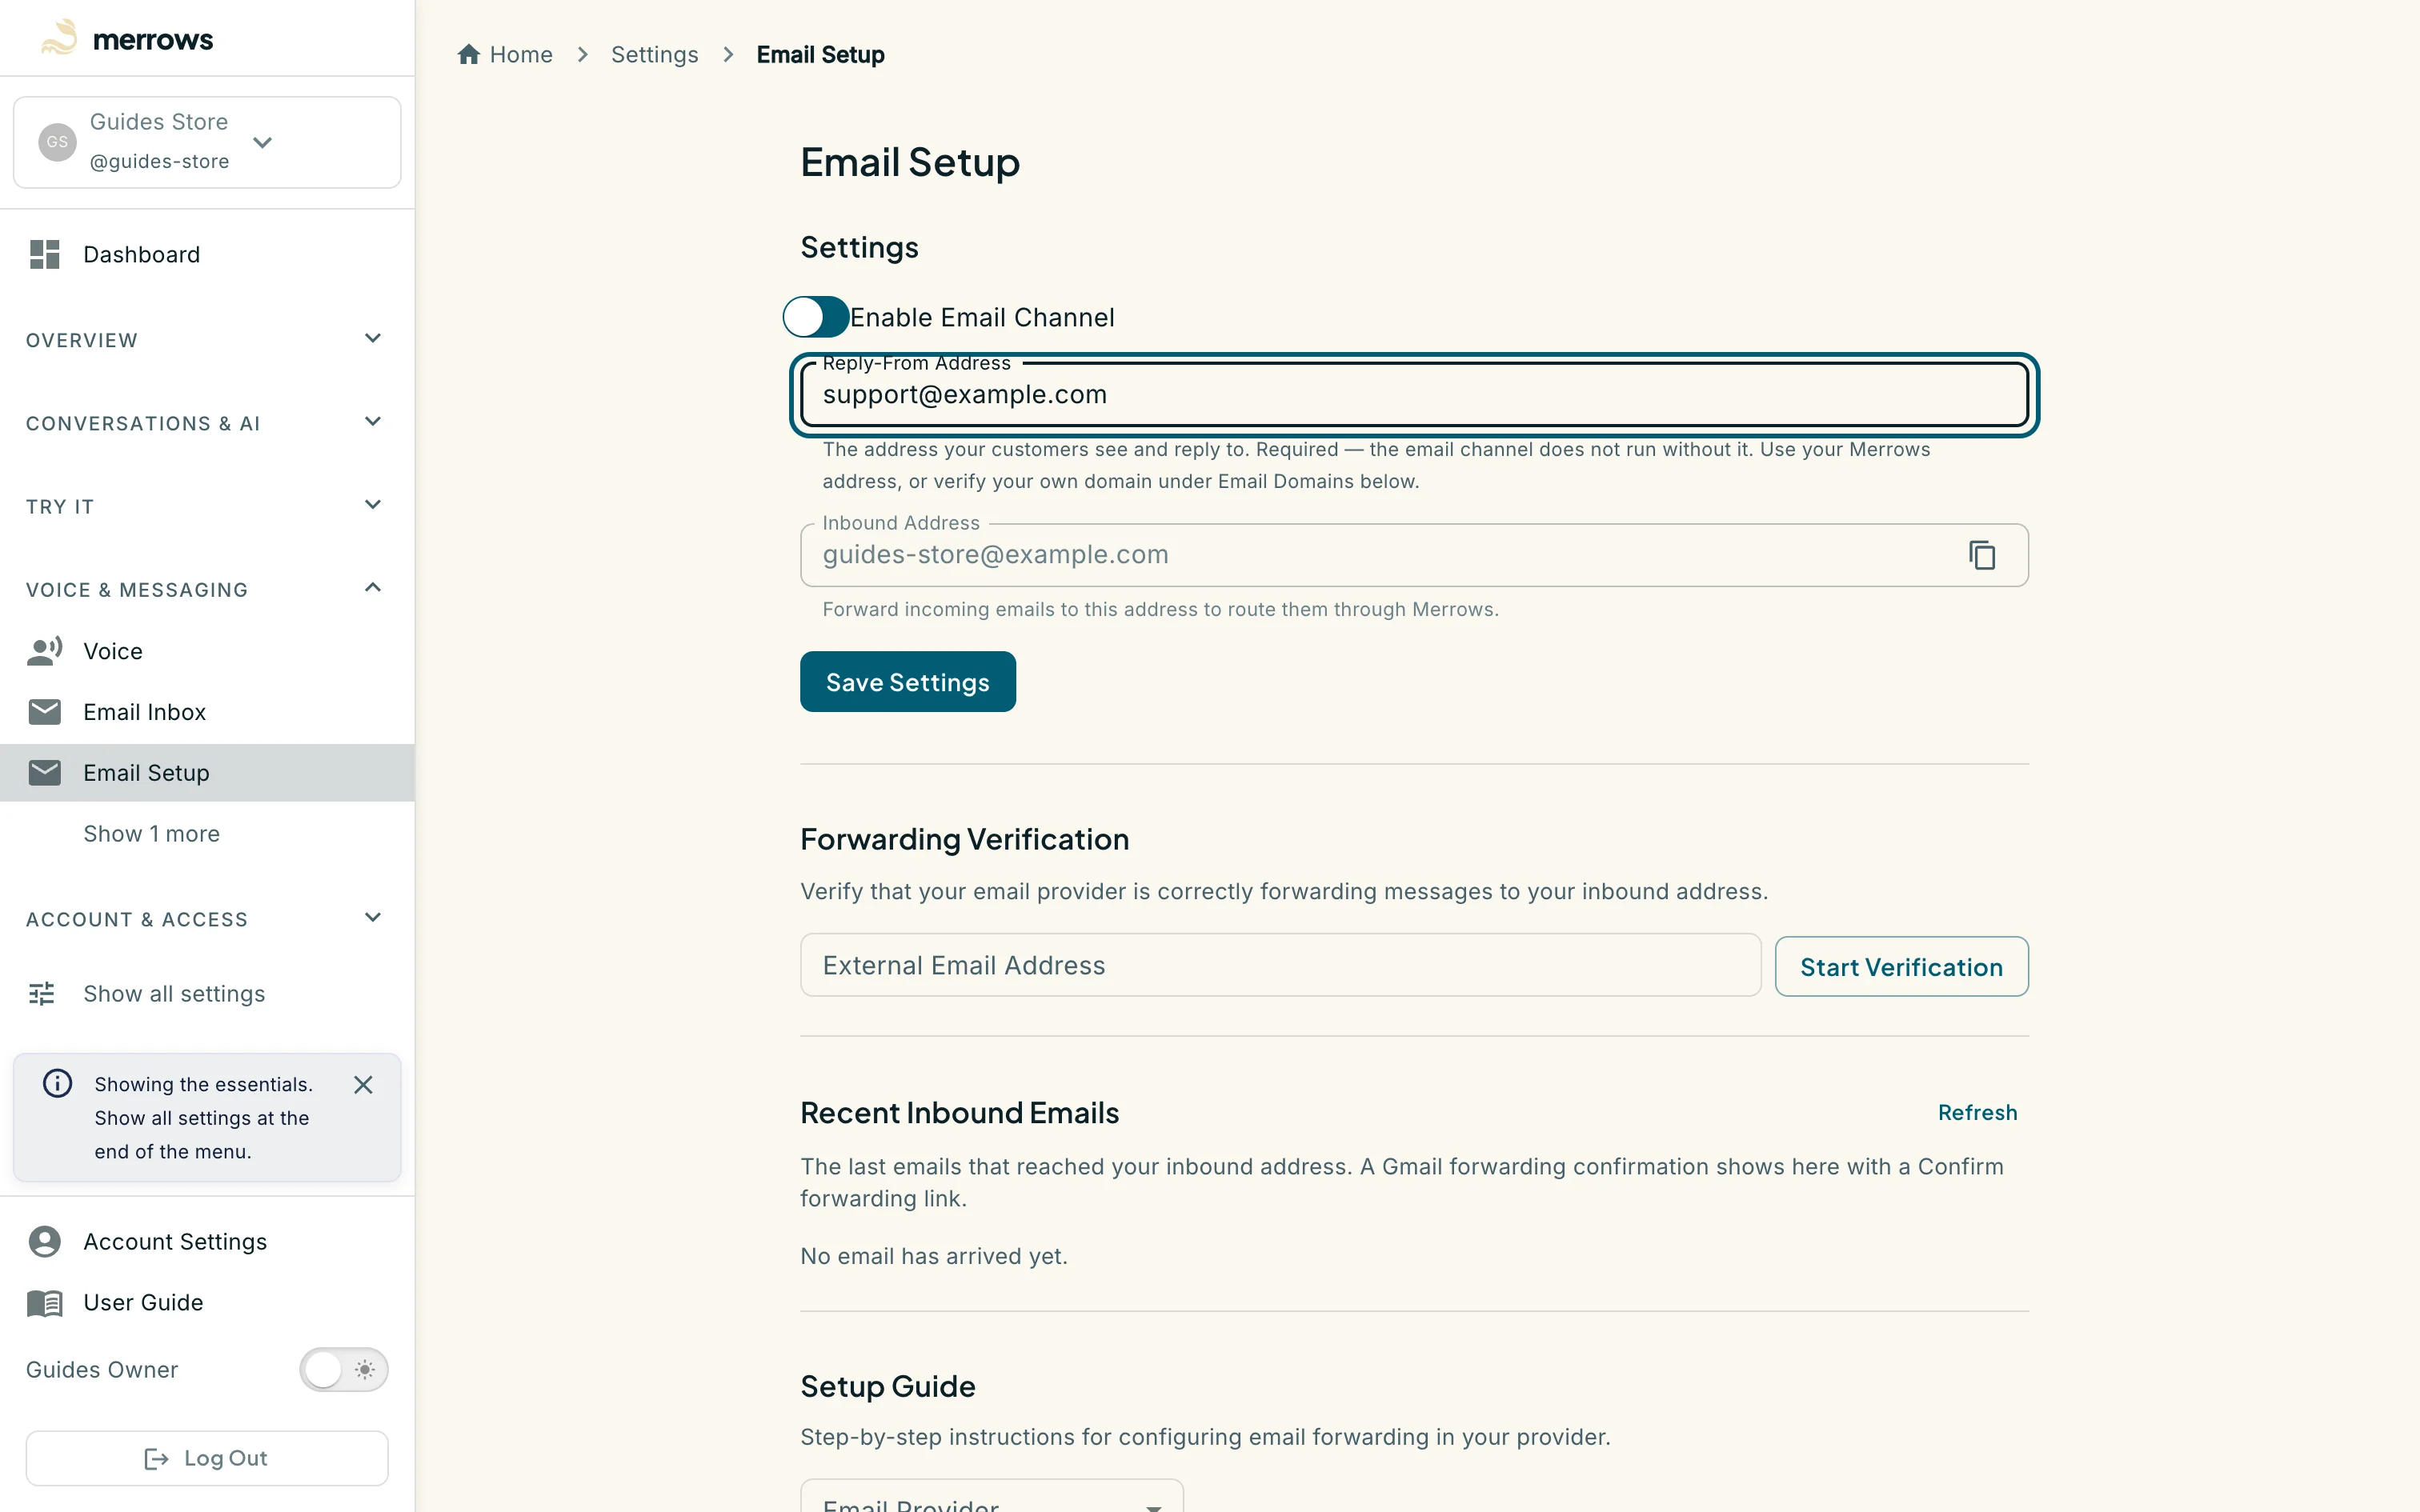
Action: Change the Reply-From Address to your support address on that domain, for example info@yourbusiness.com, and click Save Settings. Then send a test email to your support address from a personal email account.
What you should see: A reply arrives in the same thread, from your support address, usually within a minute. The conversation appears under Email Inbox at https://portal.merrows.ai/settings/email-conversations.