Give other people access to your demo workspace from the Sharing page: invite a teammate by email and watch them accept, manage members and their roles, and create a share link that opens the guest experience for a prospect.
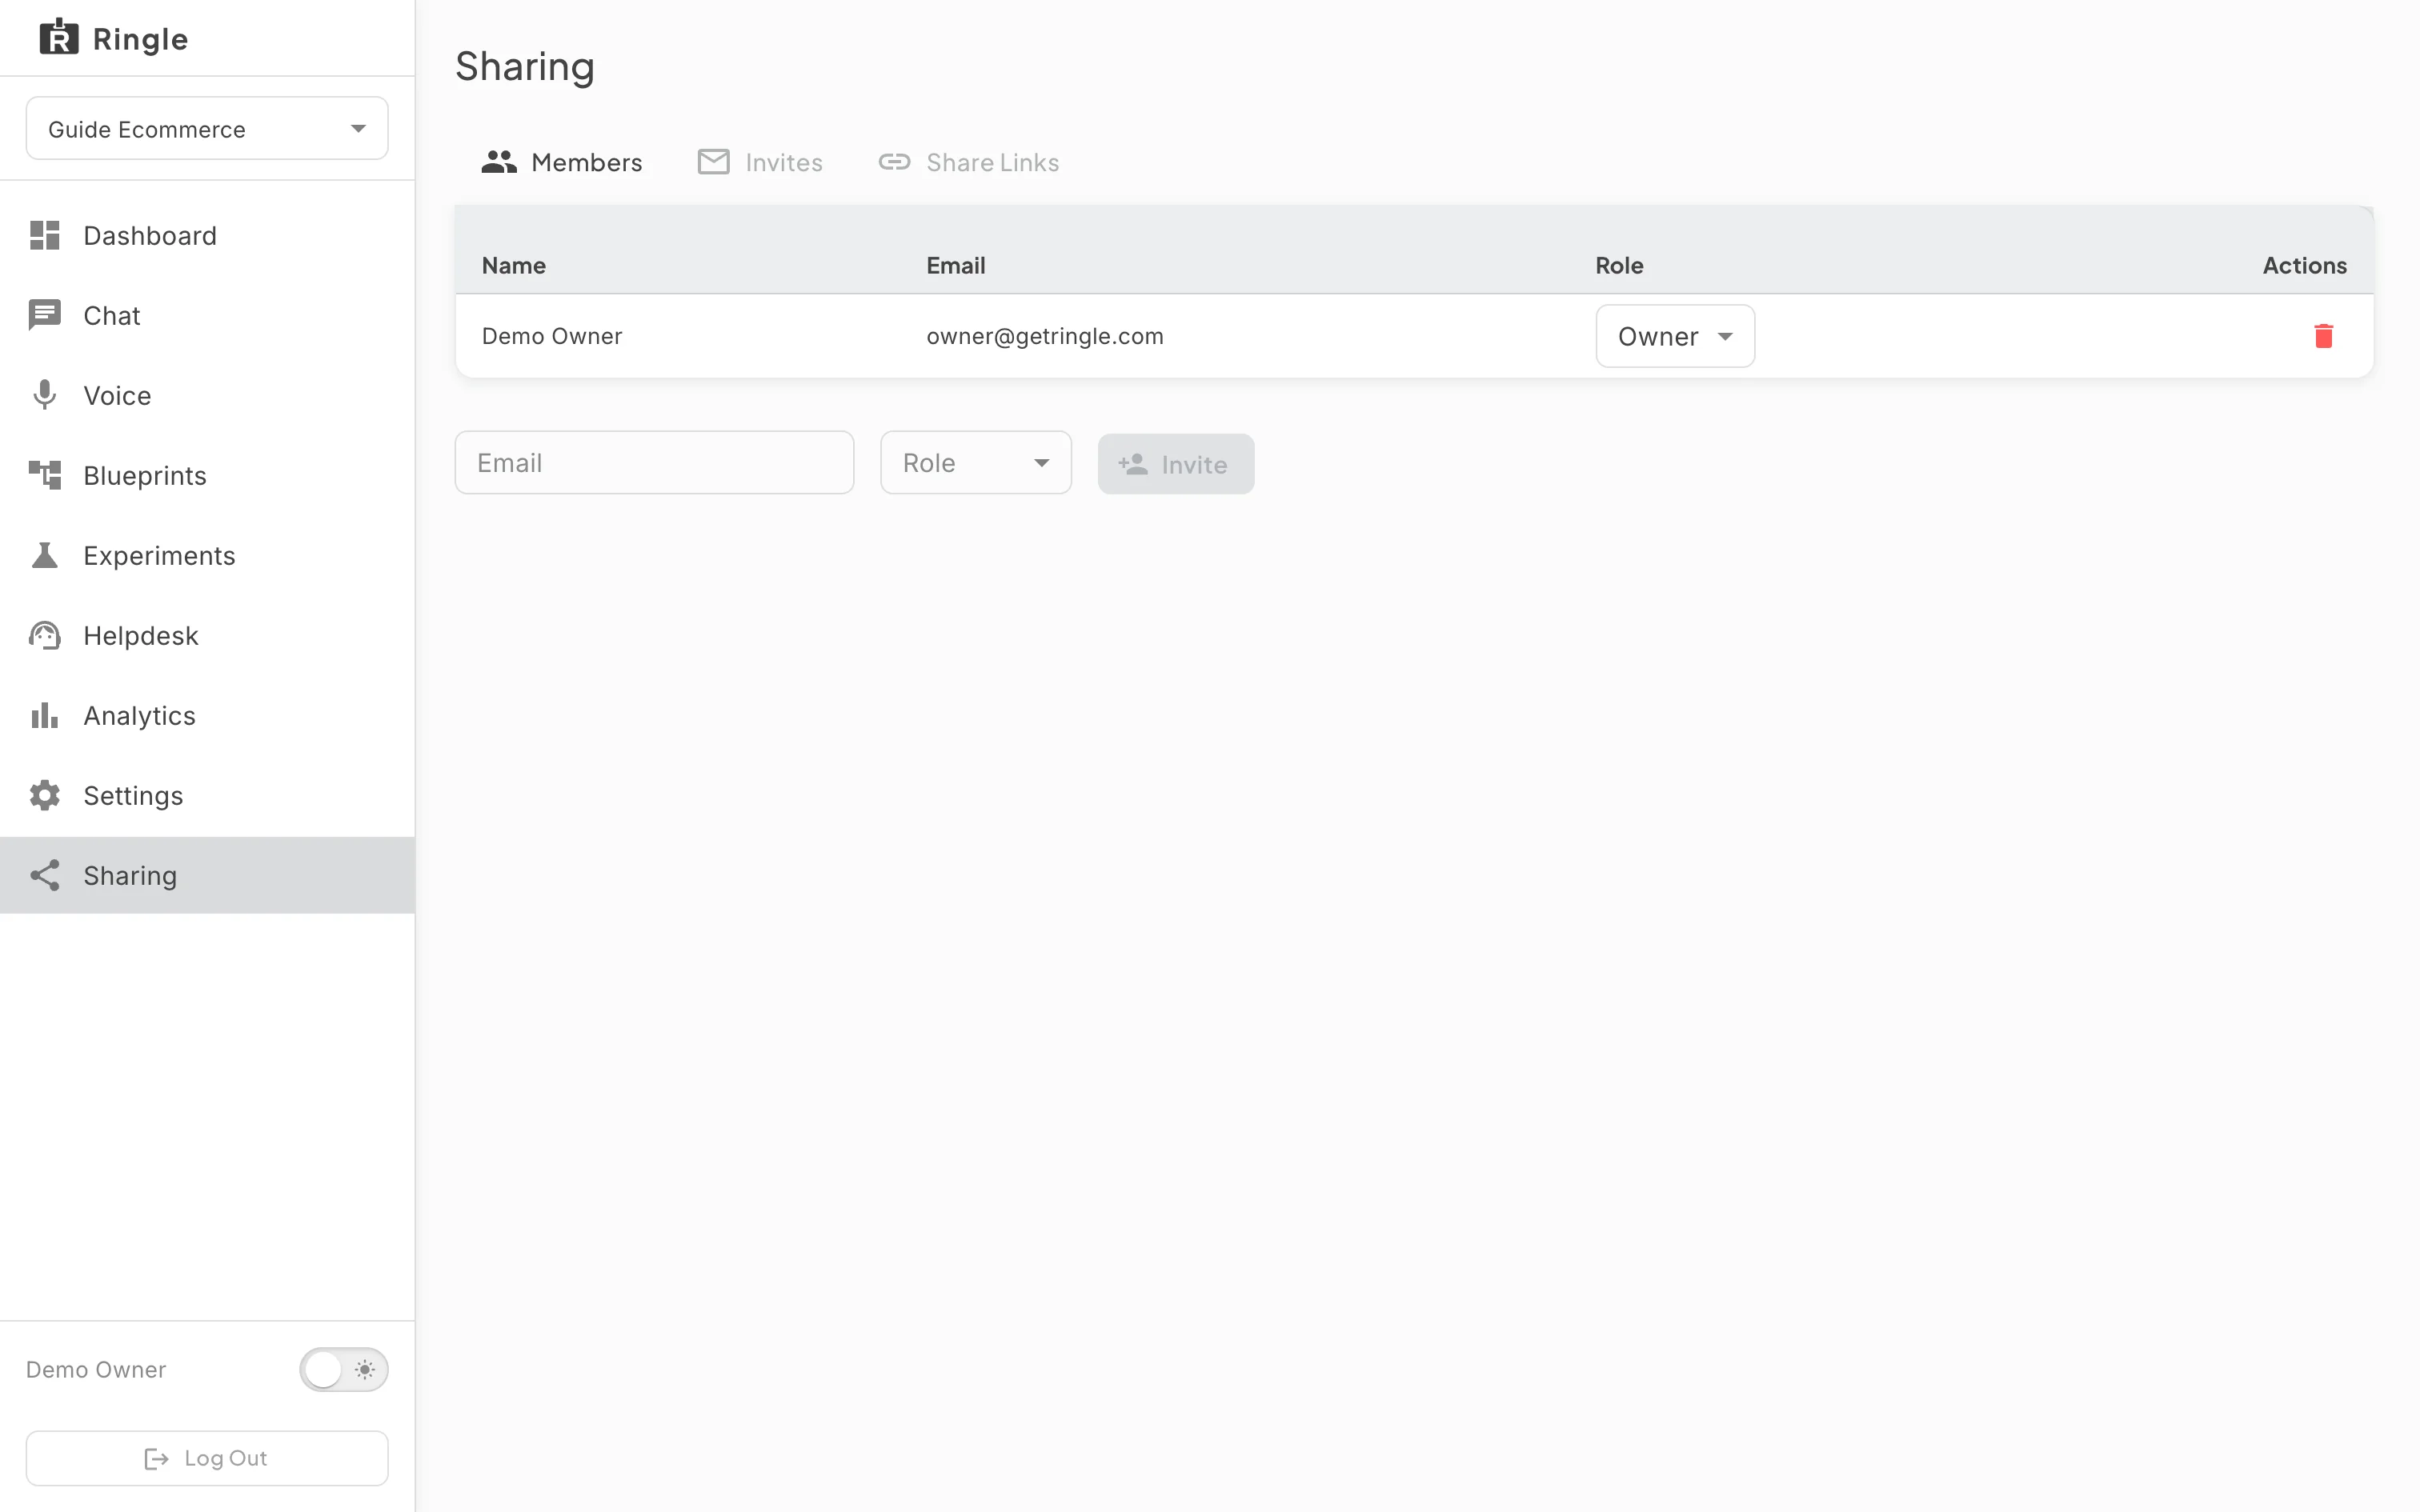
Action: Click Sharing in the workspace sidebar.
What you should see: The page has Members, Invites and Share Links tabs. Members lists each member with their name, email, a Role selector and a Remove button; your own row is locked, since you cannot change your own membership. Under the table, an Email field, a Role selector and an Invite button send an invitation.
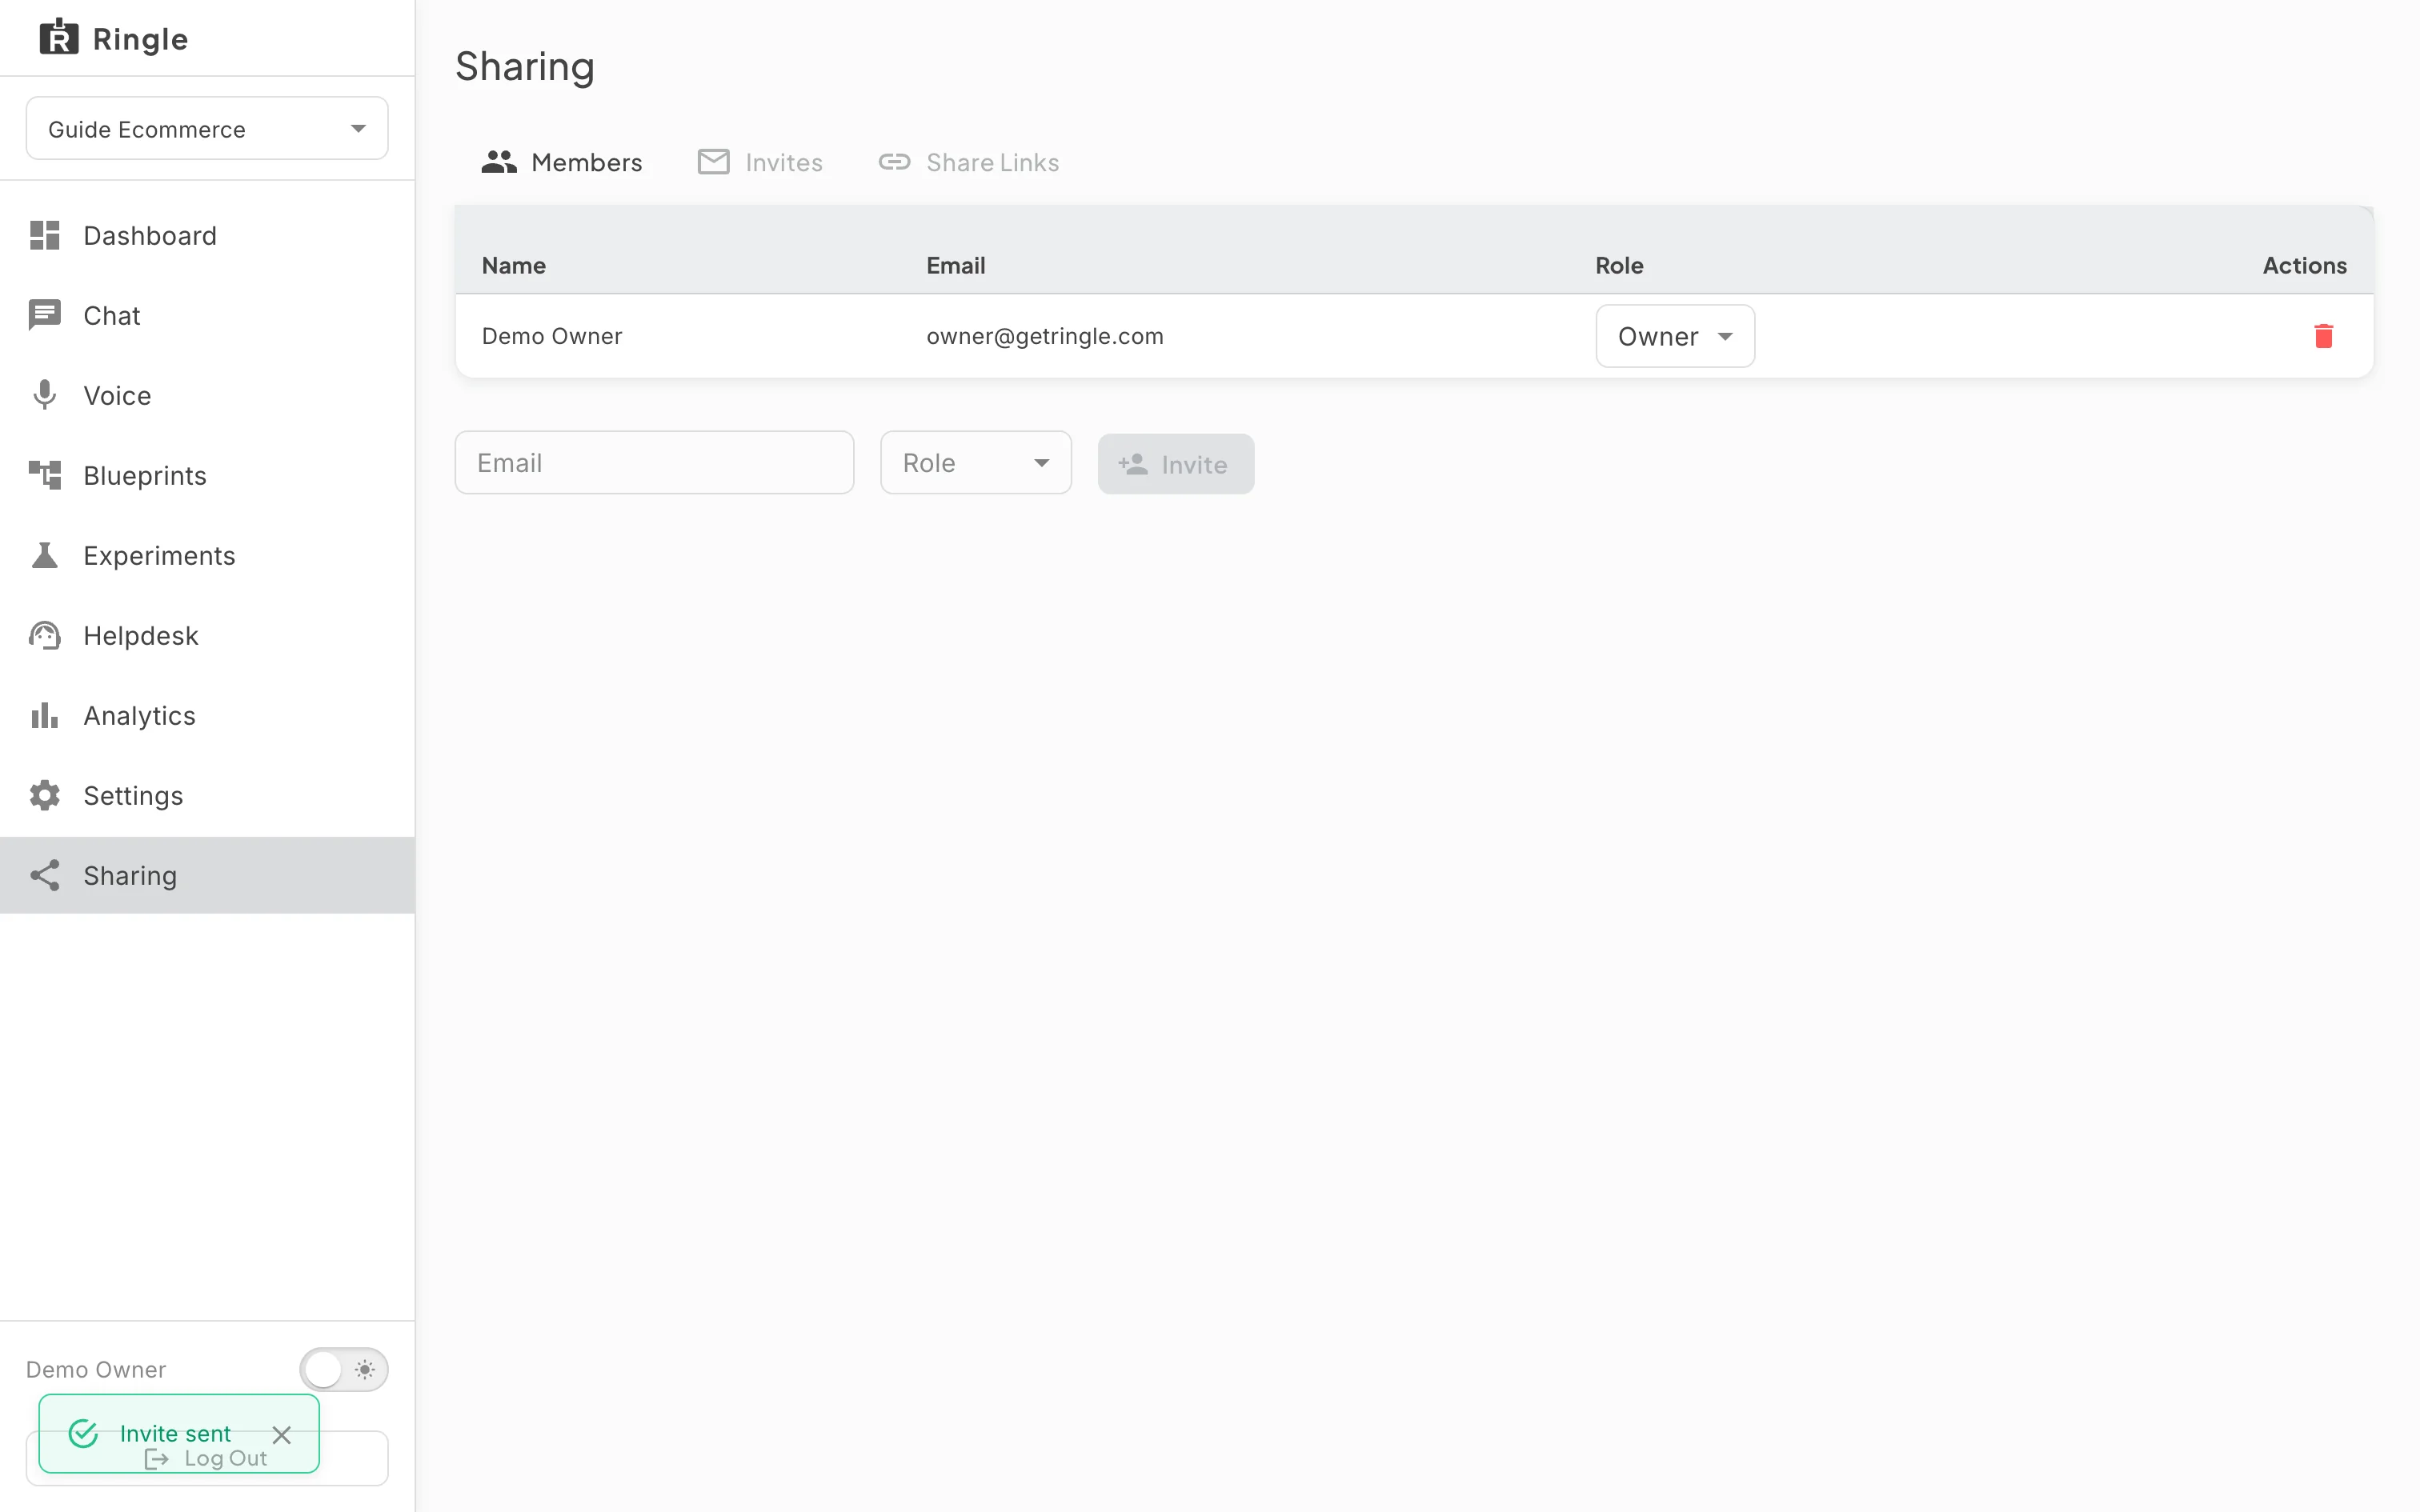
Action: Type the invitee’s email address, pick a role (Tester here) and click Invite.
What you should see: The roles are Owner, Manager, Builder and Tester. An Owner can do everything including delete the workspace; a Manager runs members, sharing and settings; a Builder edits products and skills; a Tester runs conversations and reads the rest. The invitation is mailed and appears under Invites.
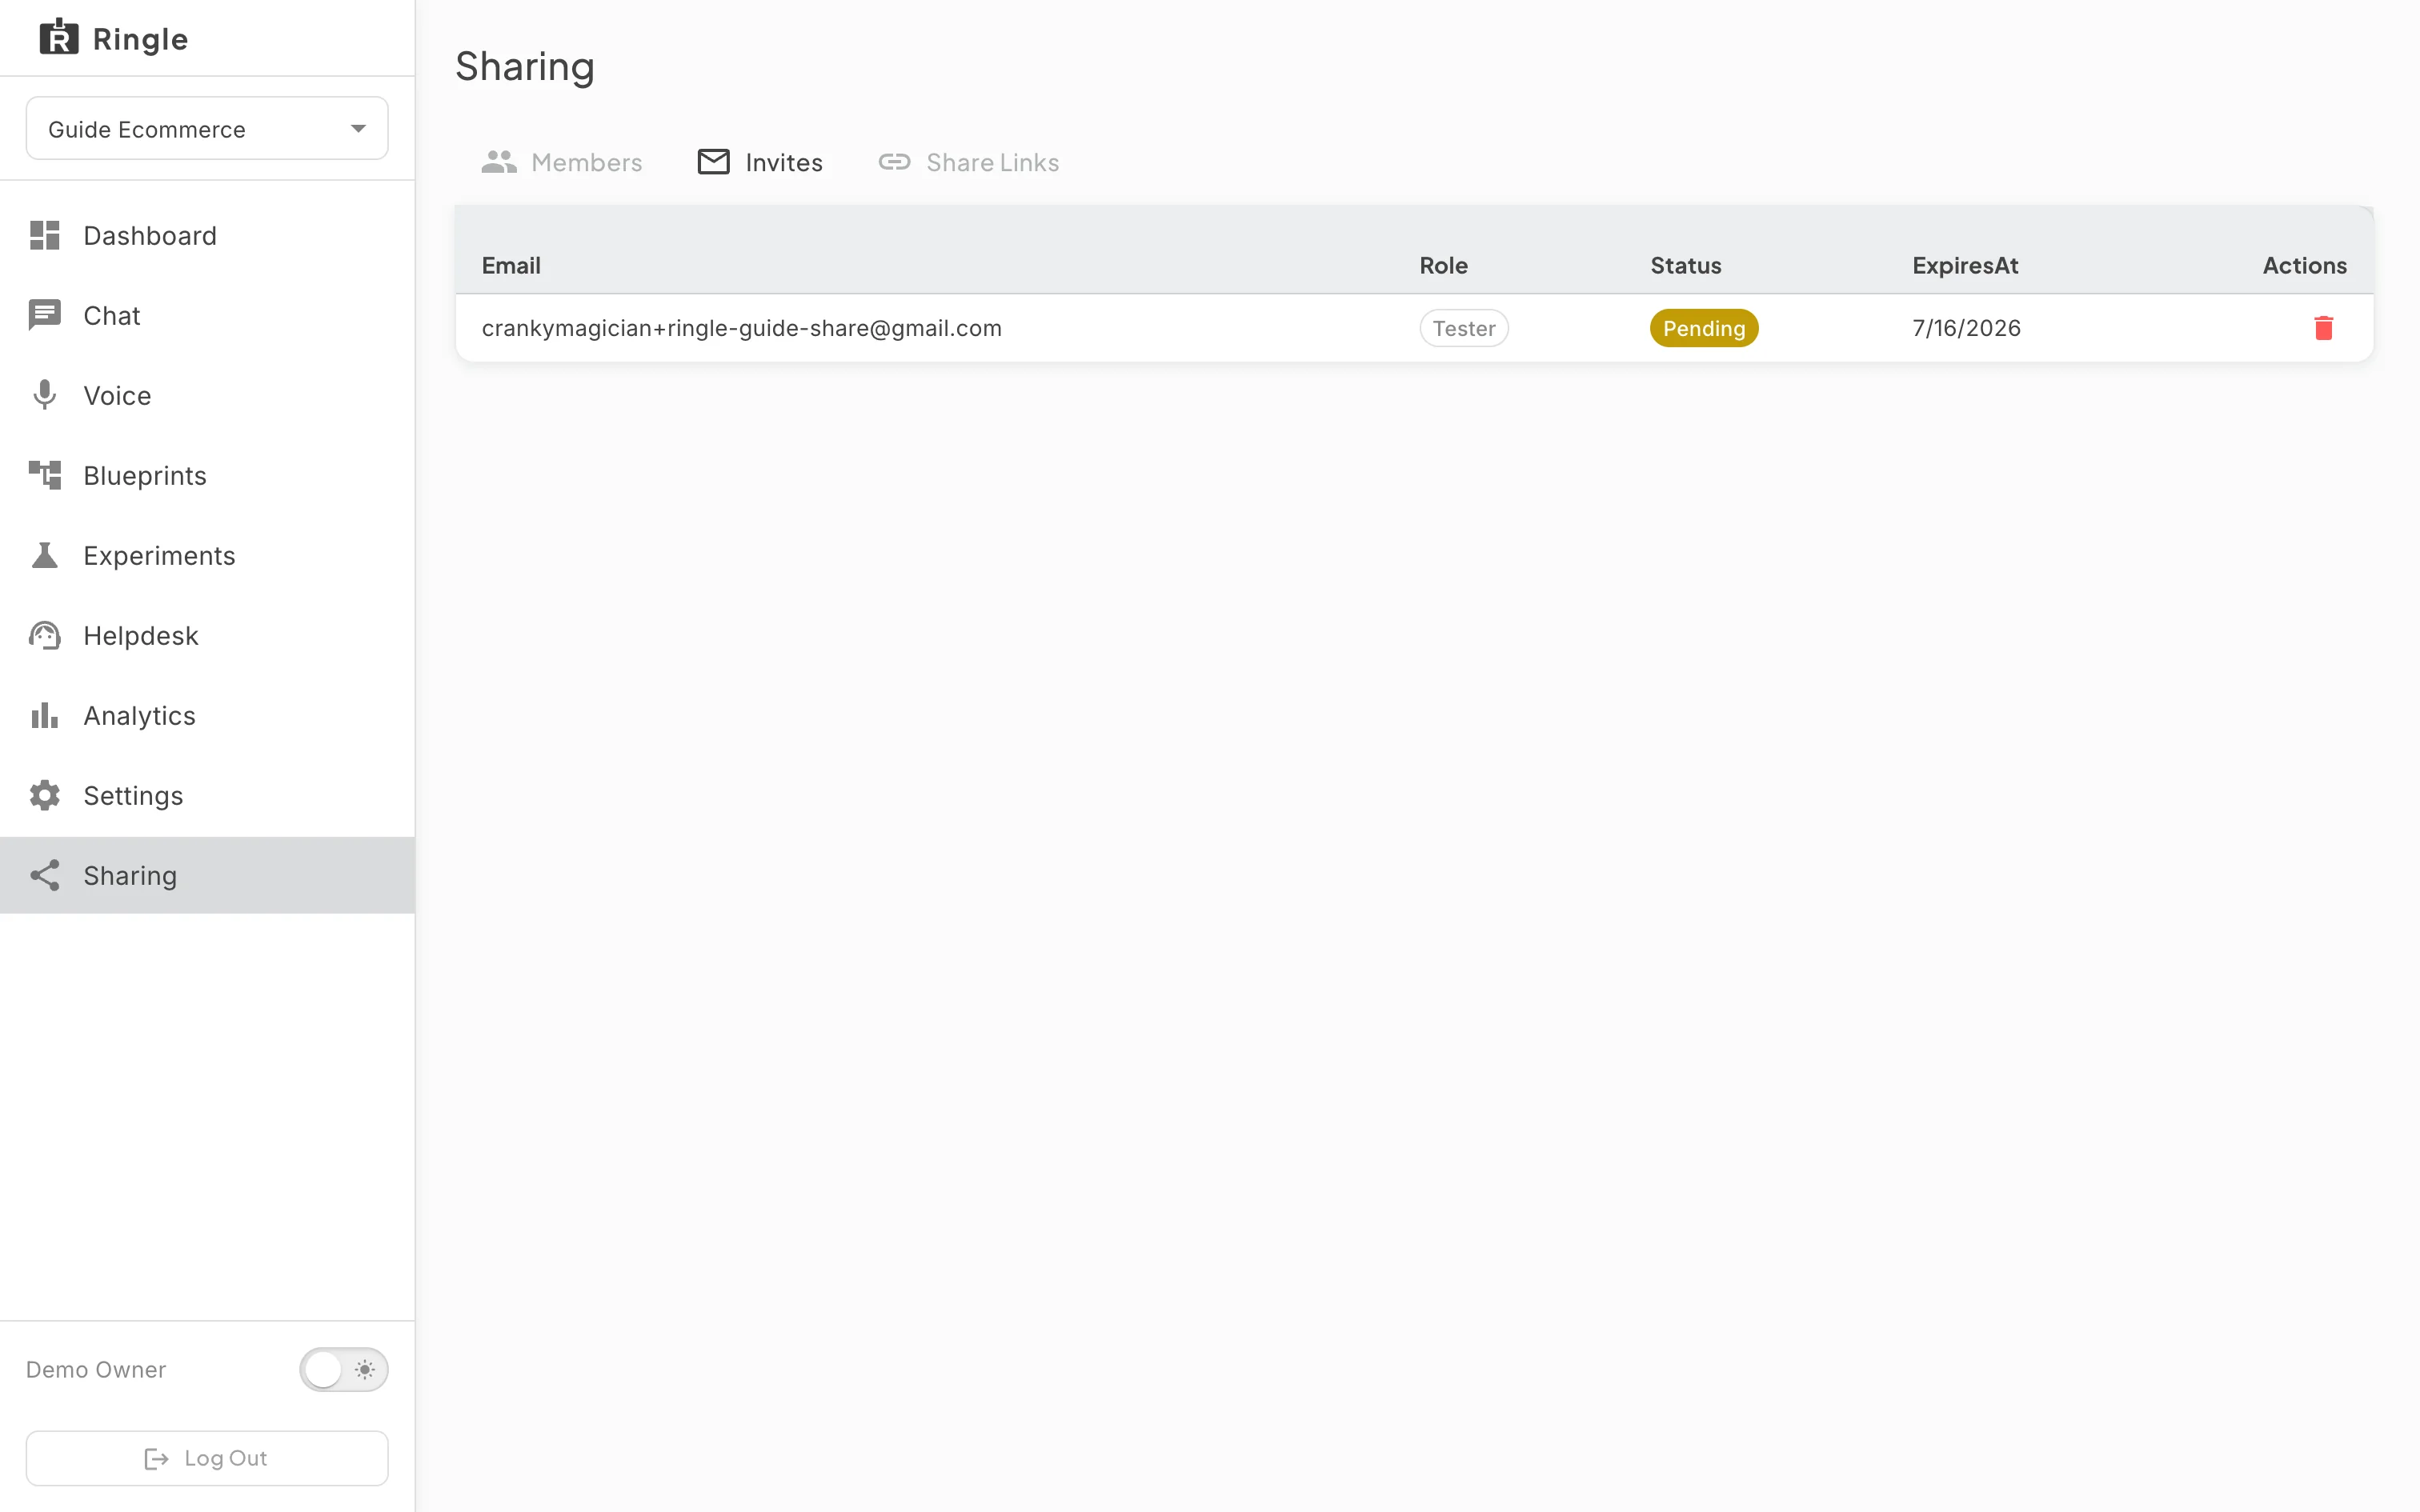
Action: Open the Invites tab.
What you should see: The pending invitation is listed with the email, the role, its status, when it expires and actions to resend or revoke it. An invitation that is not accepted before it expires has to be sent again.
Action: As the invitee, open the link in the invitation mail.
What you should see: The portal shows “You have an invitation” with the workspace name, the role offered and an Accept Invite button. An invitee without an account is asked to sign up or log in first; the invitation is tied to the email address it was sent to.
Action: Click Accept Invite.
What you should see: The invitee lands on the workspace dashboard as a Tester: the sidebar shows Dashboard, Chat, Skill sets, A/B tests, Helpdesk, Analytics and Settings, without Voice, Products or Sharing. The workspace is now listed in their workspace switcher.
Action: Back as the owner, open the Members tab again.
What you should see: The new member has a row with their role in a selector you can change at any time; the change applies the next time they load a page. The invitation has left the Invites tab.
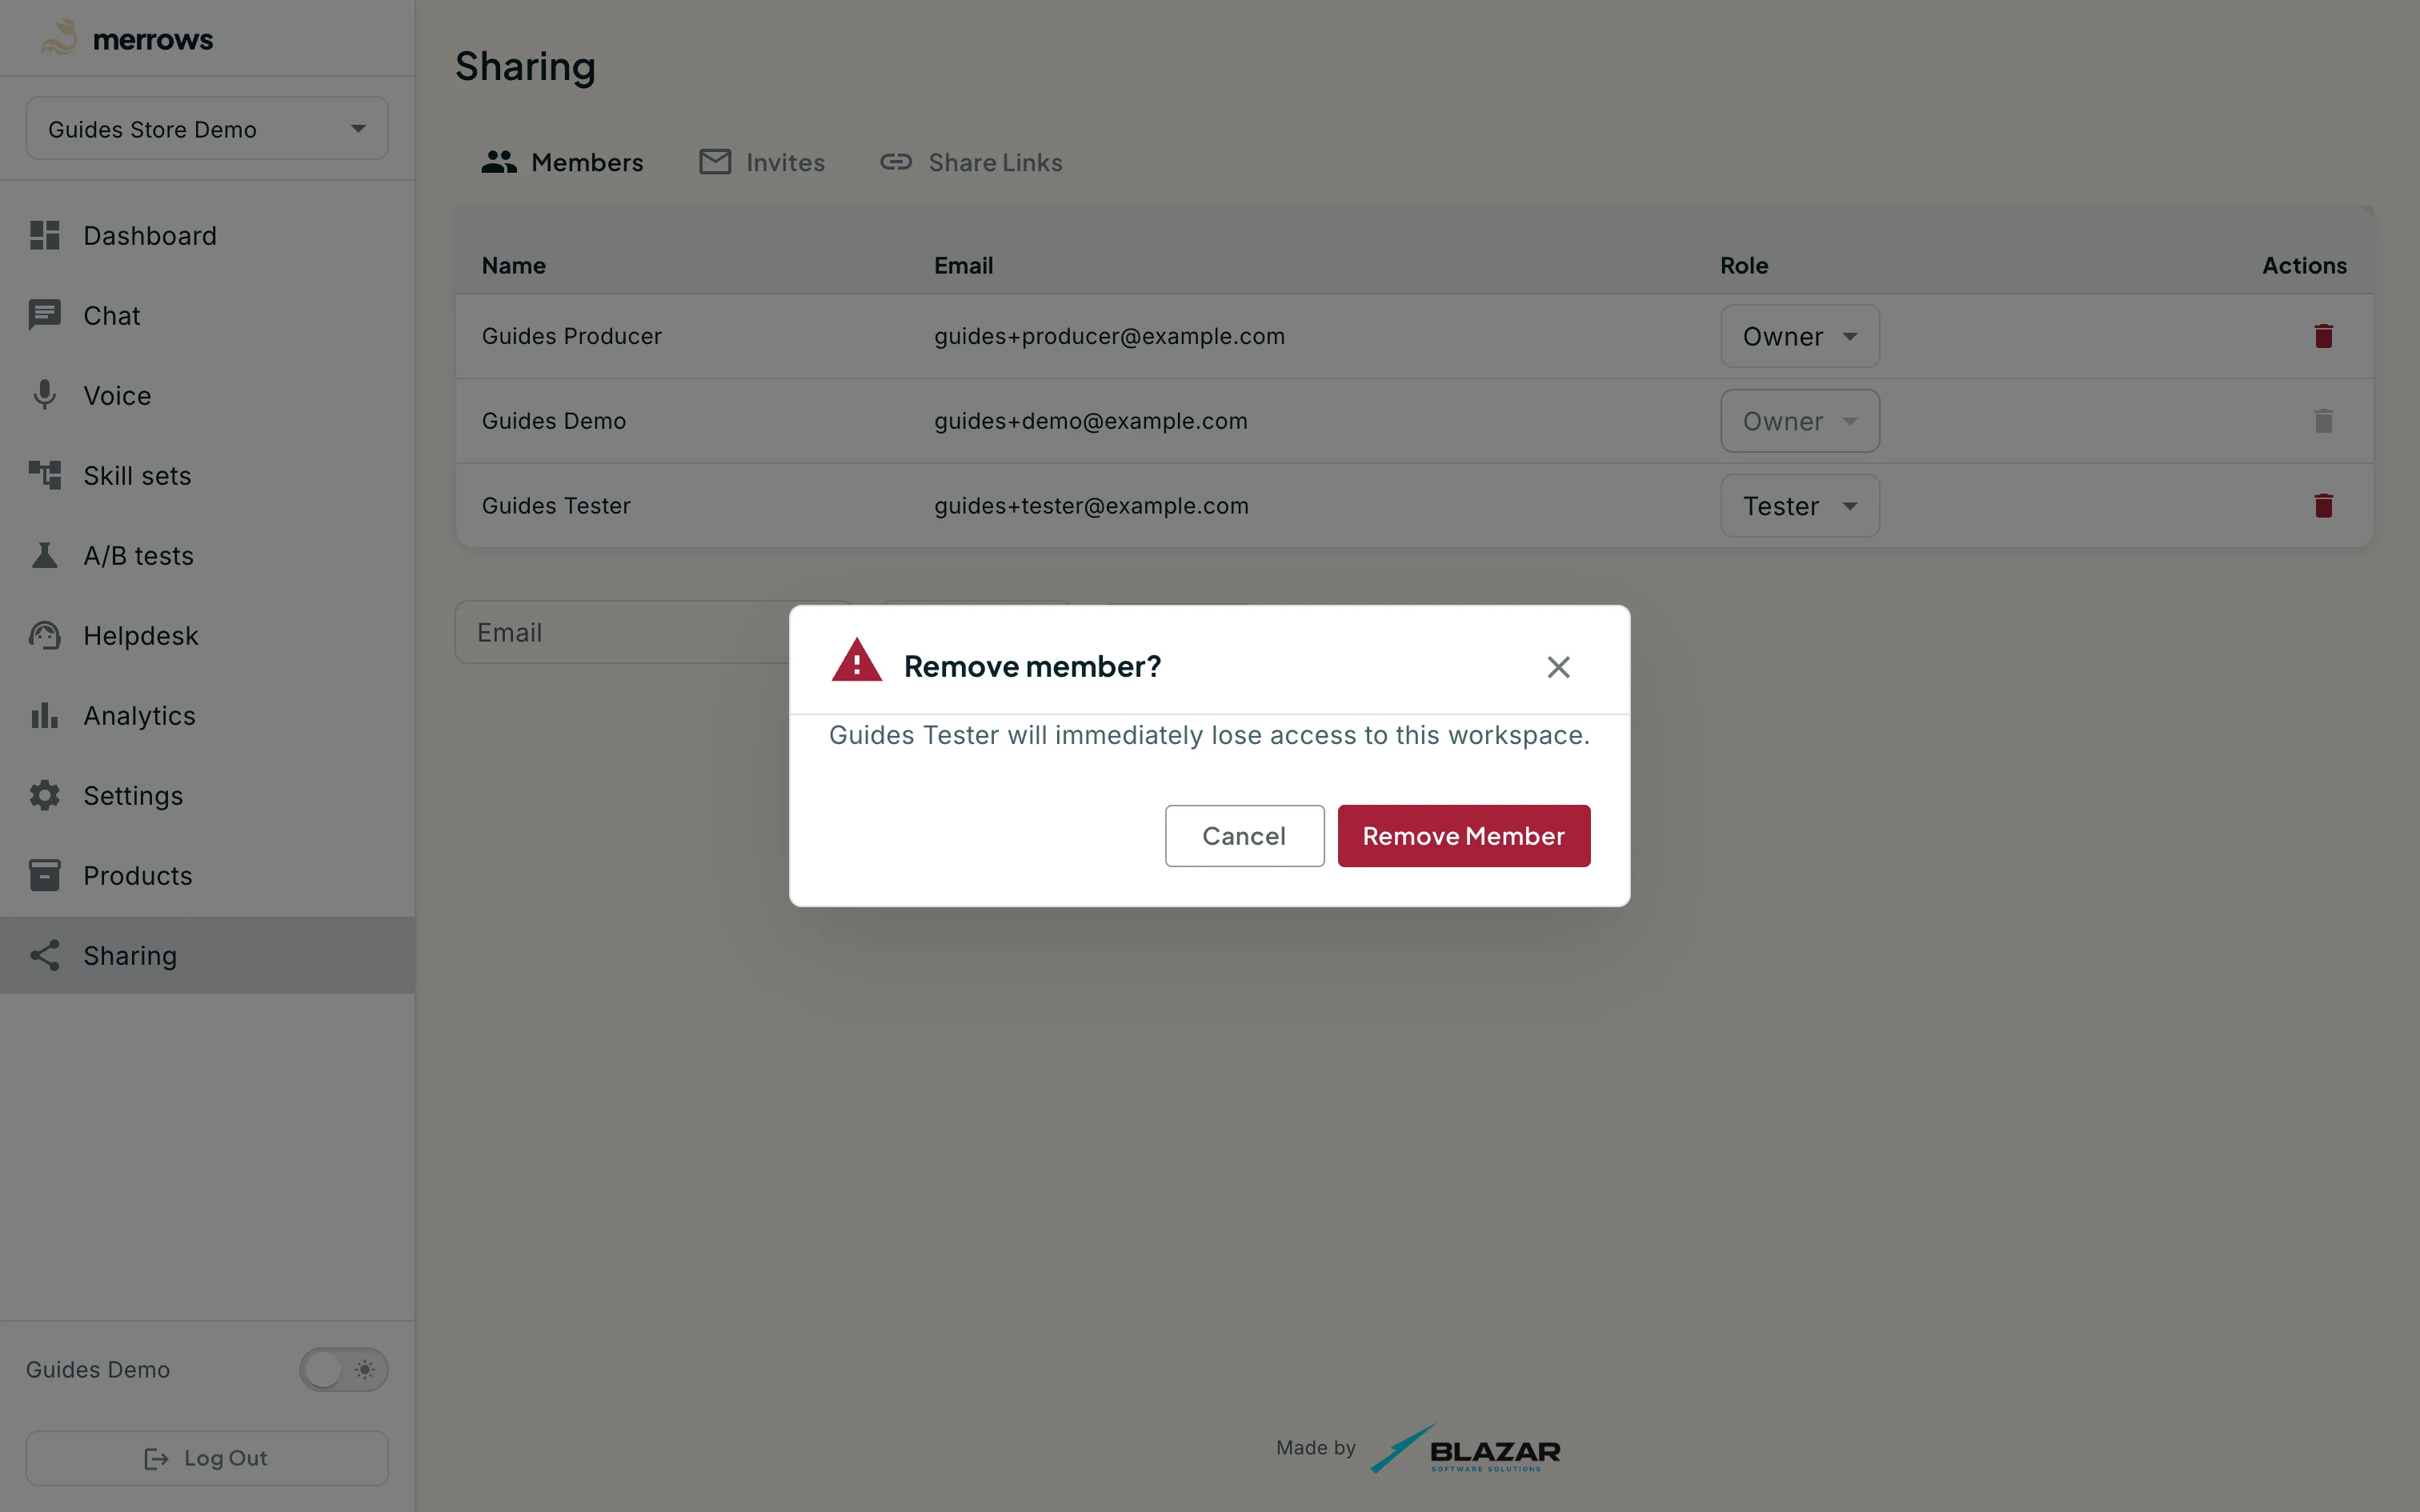
Action: Click Remove on the new member’s row.
What you should see: A “Remove member?” dialog warns that they will immediately lose access to the workspace. Click Cancel to keep them. A removed member can be invited again later.
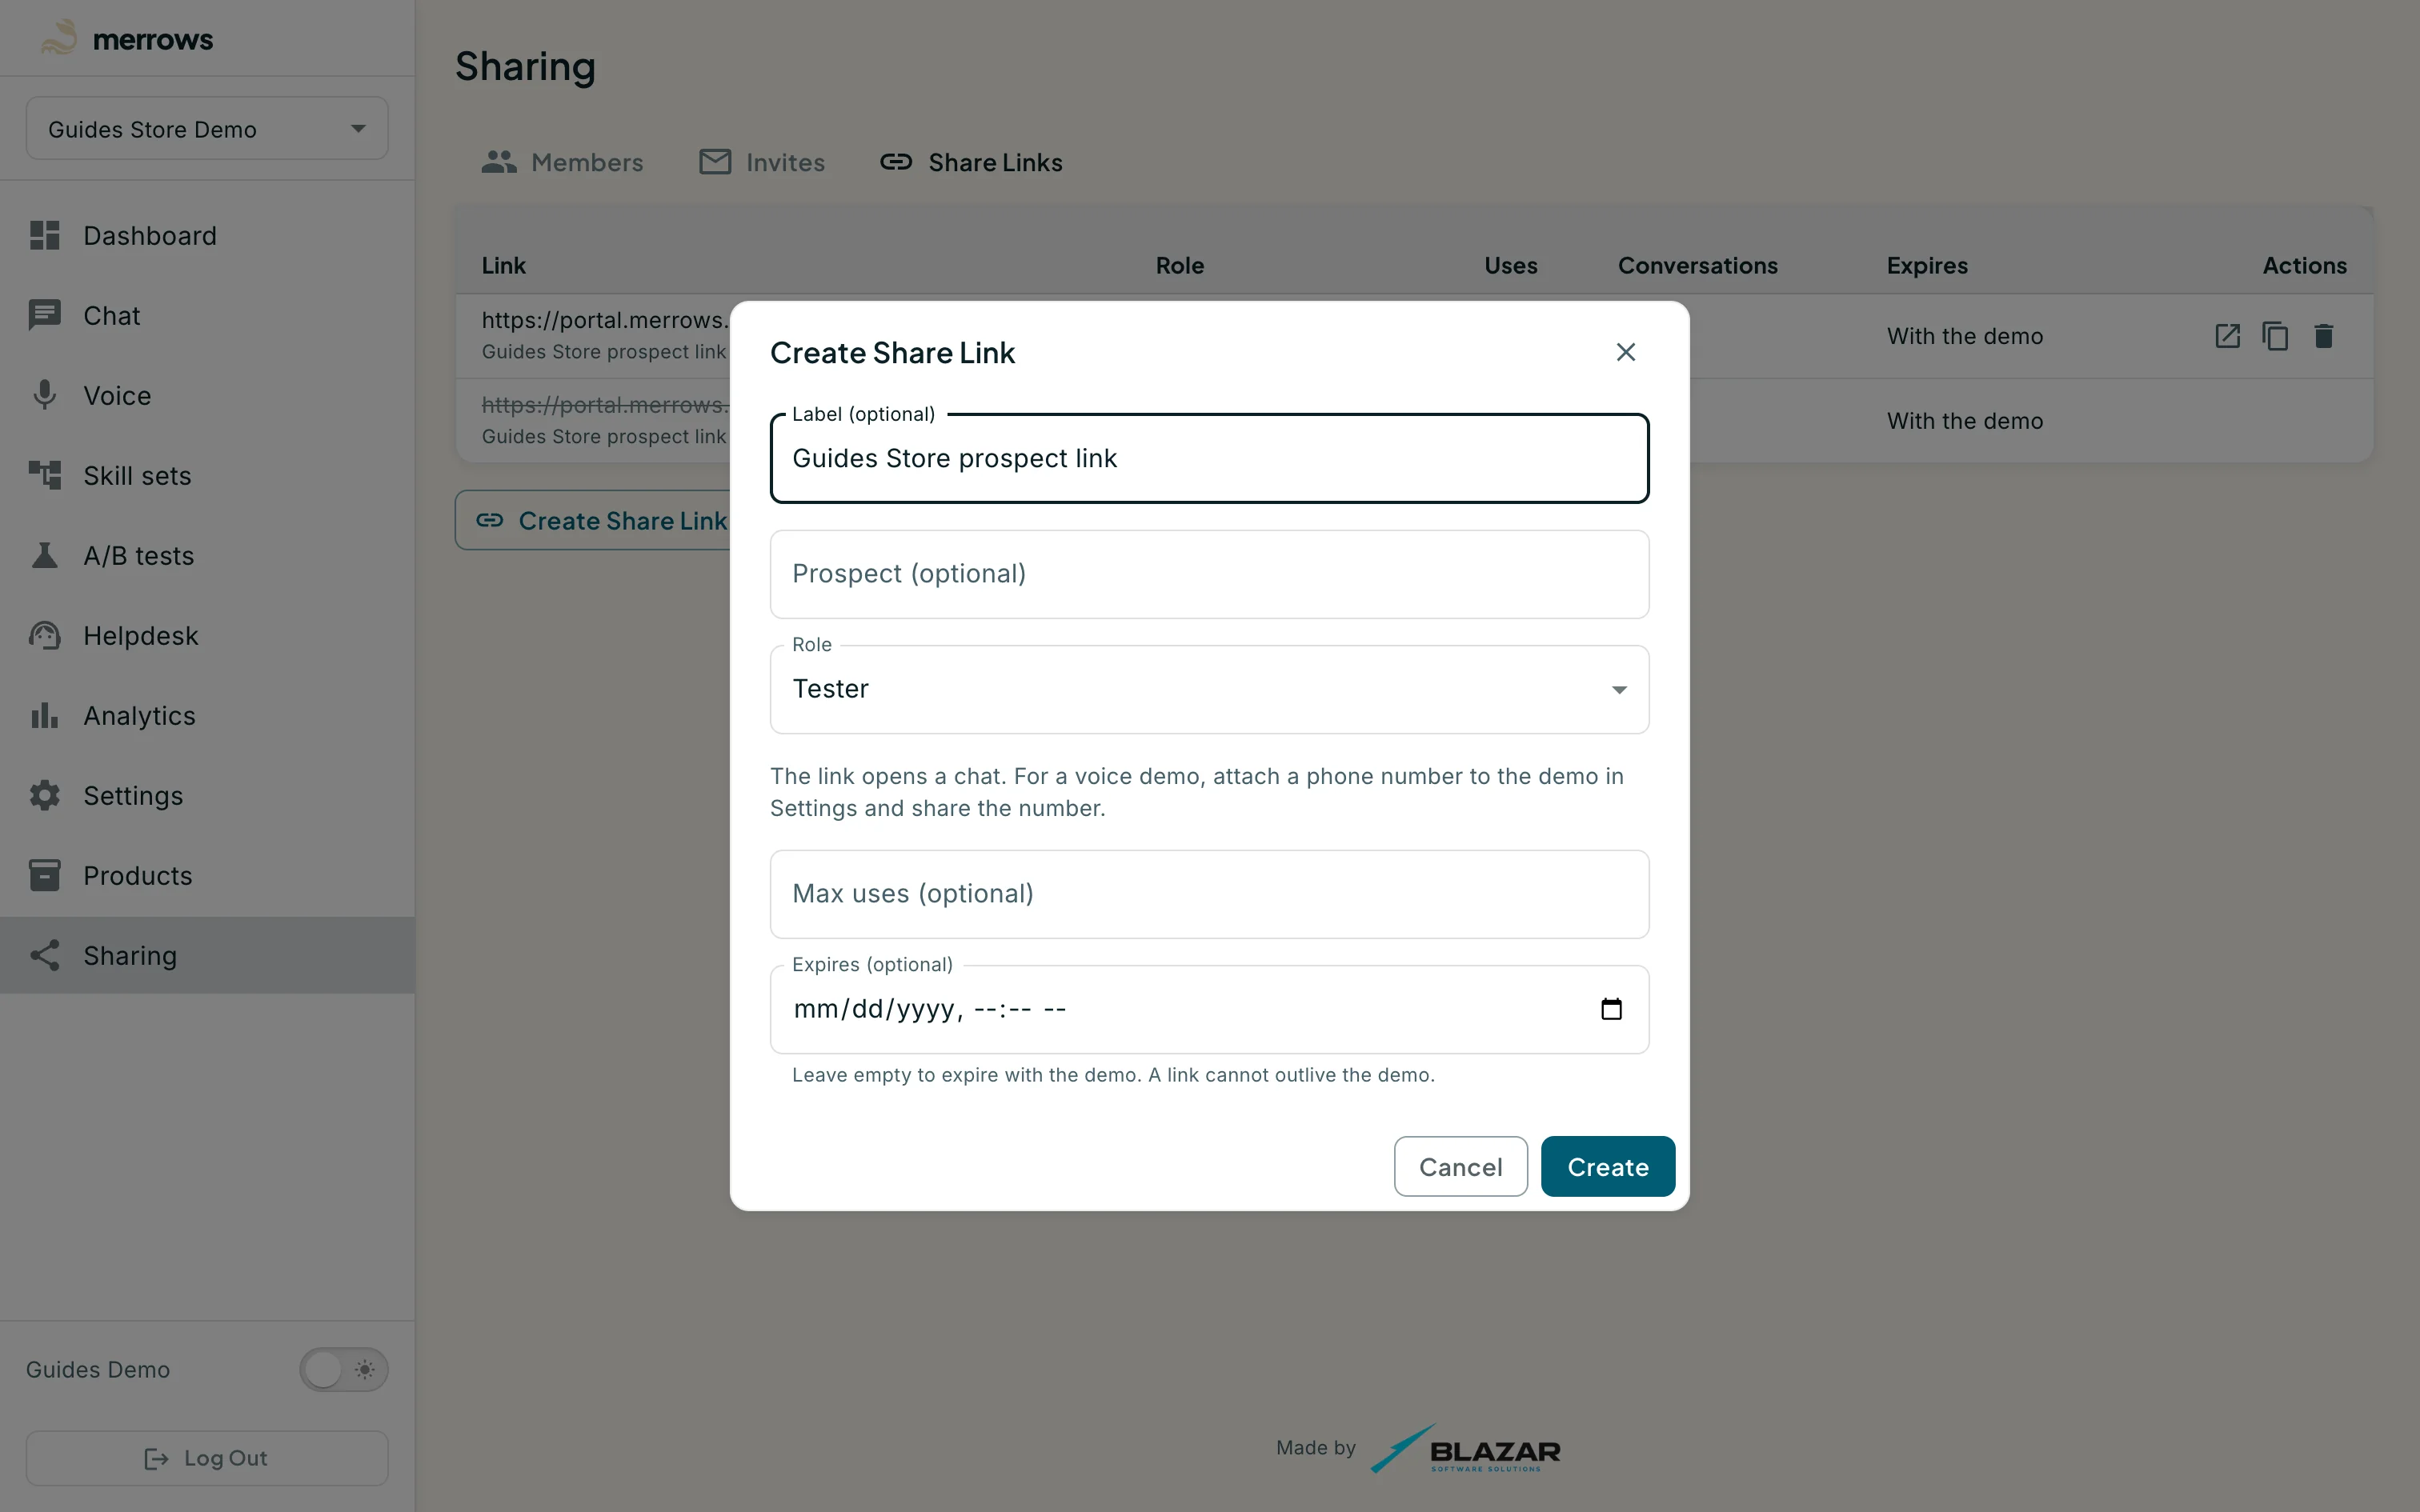
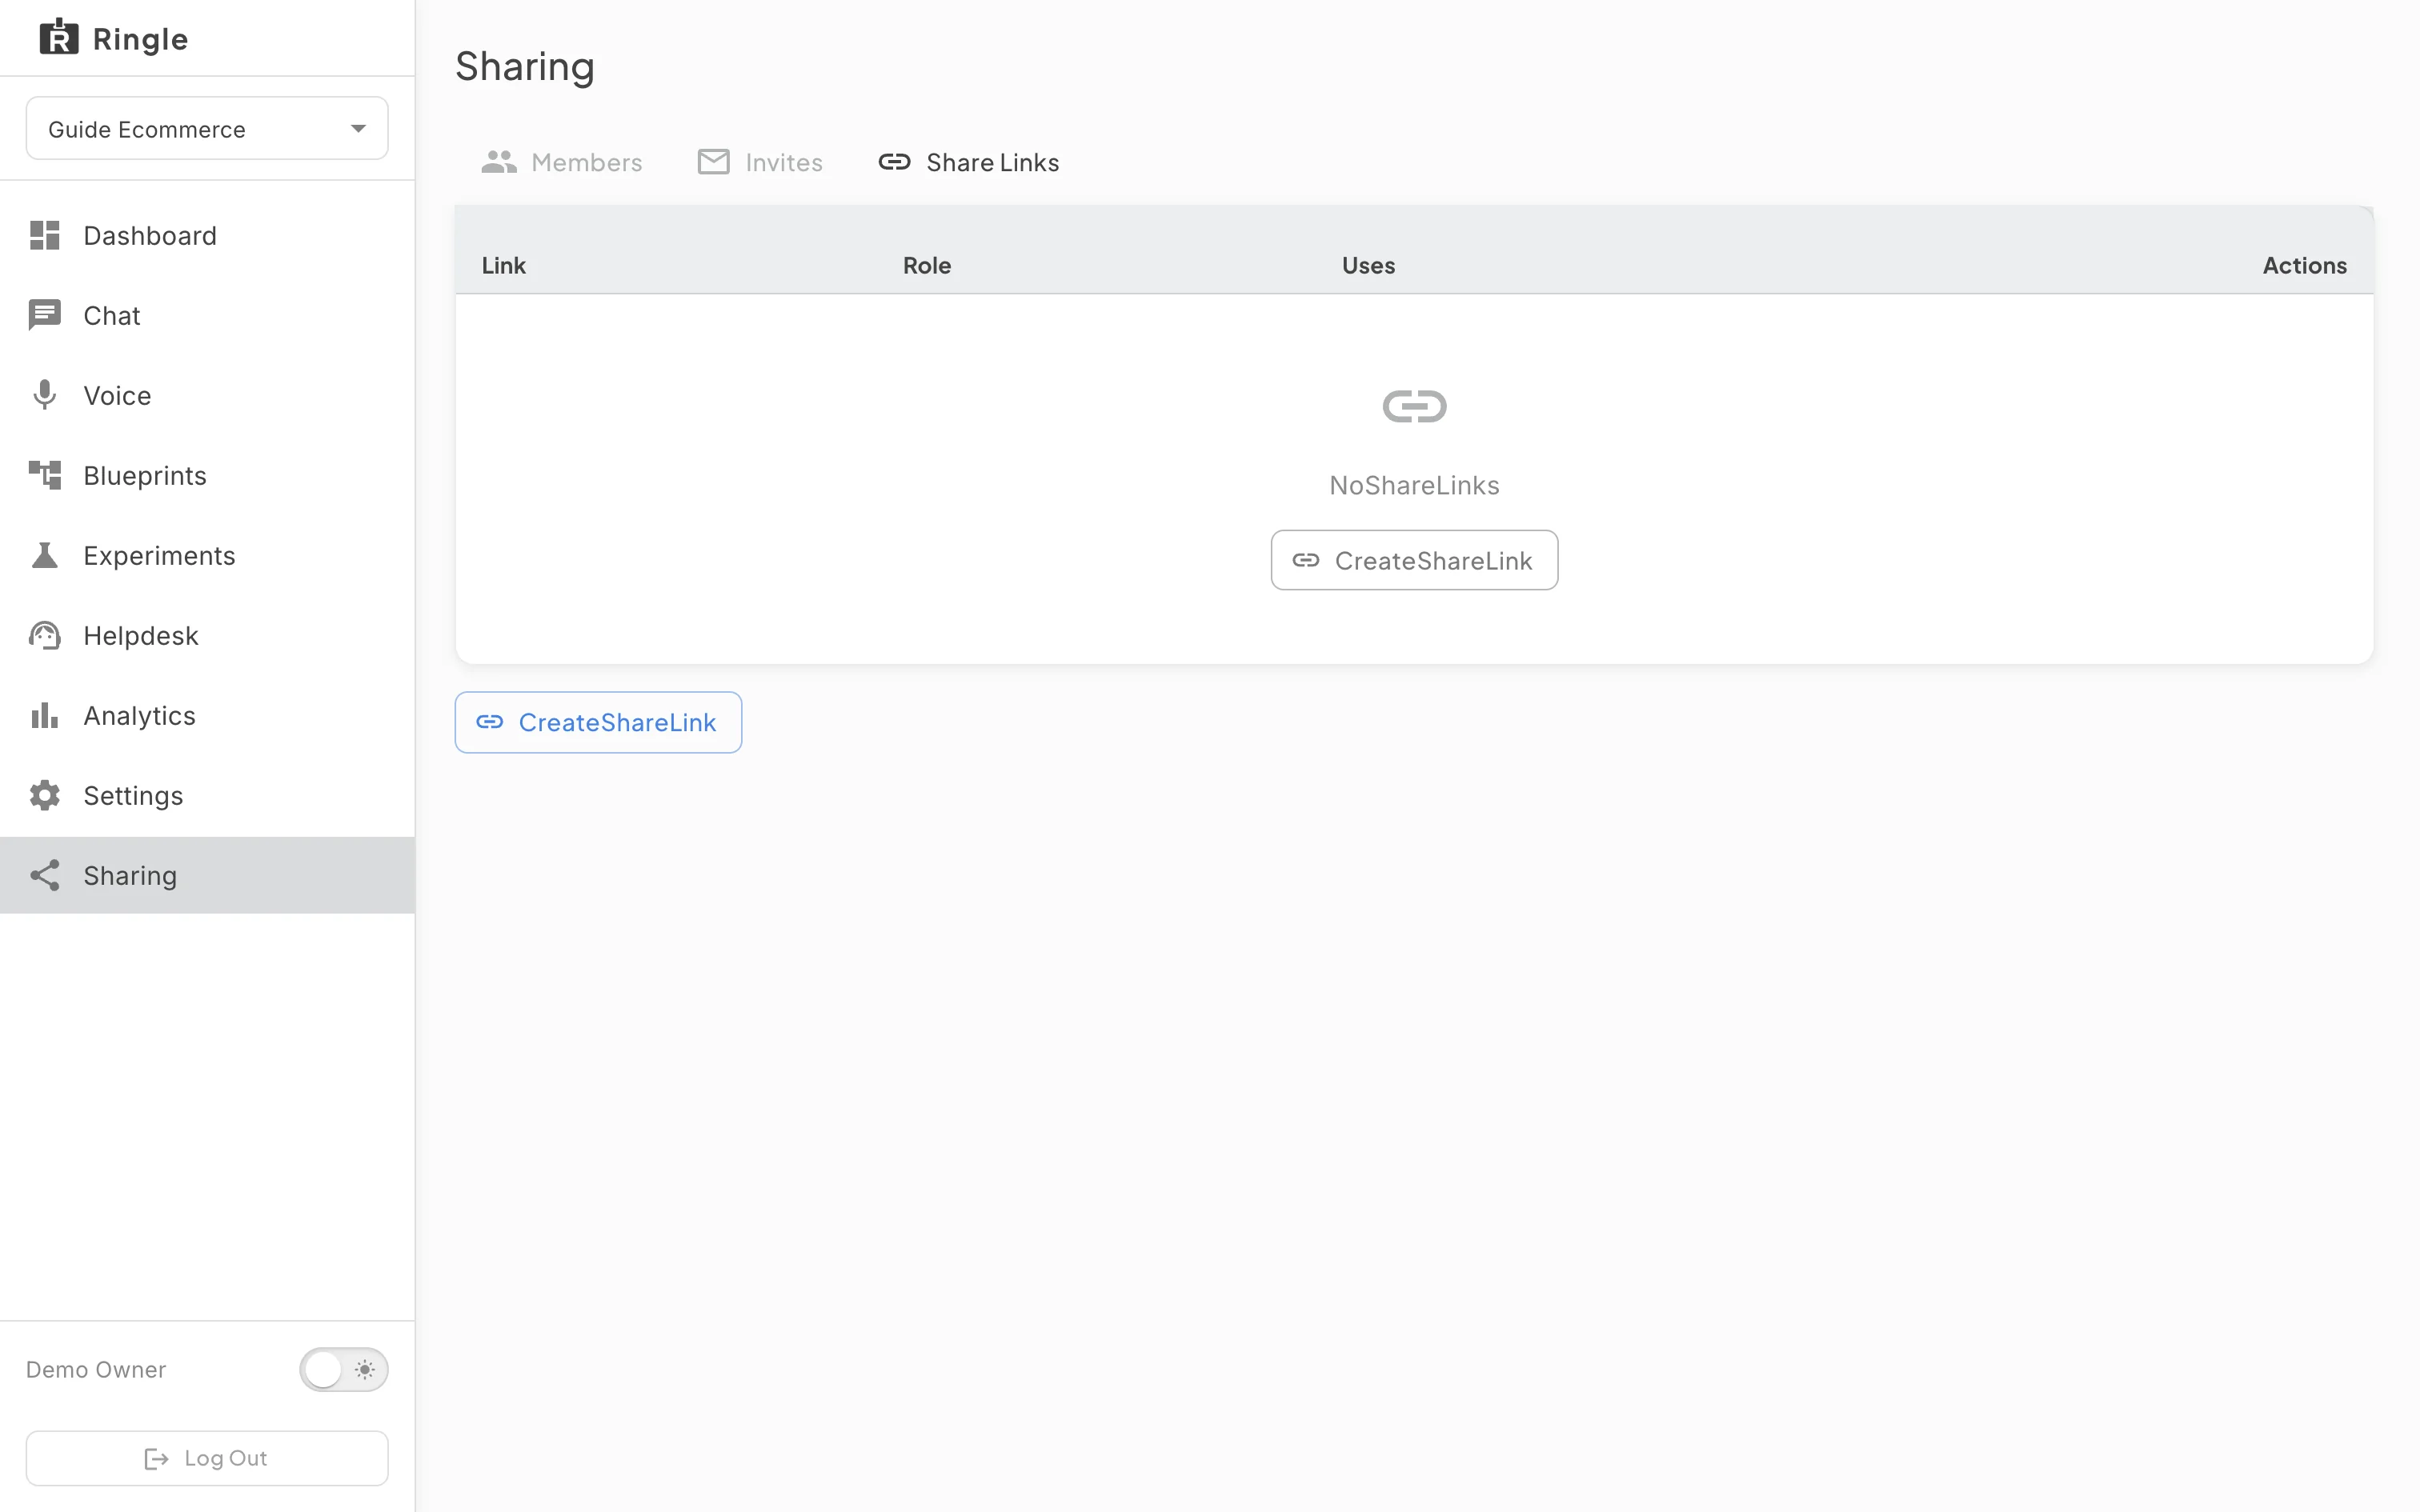
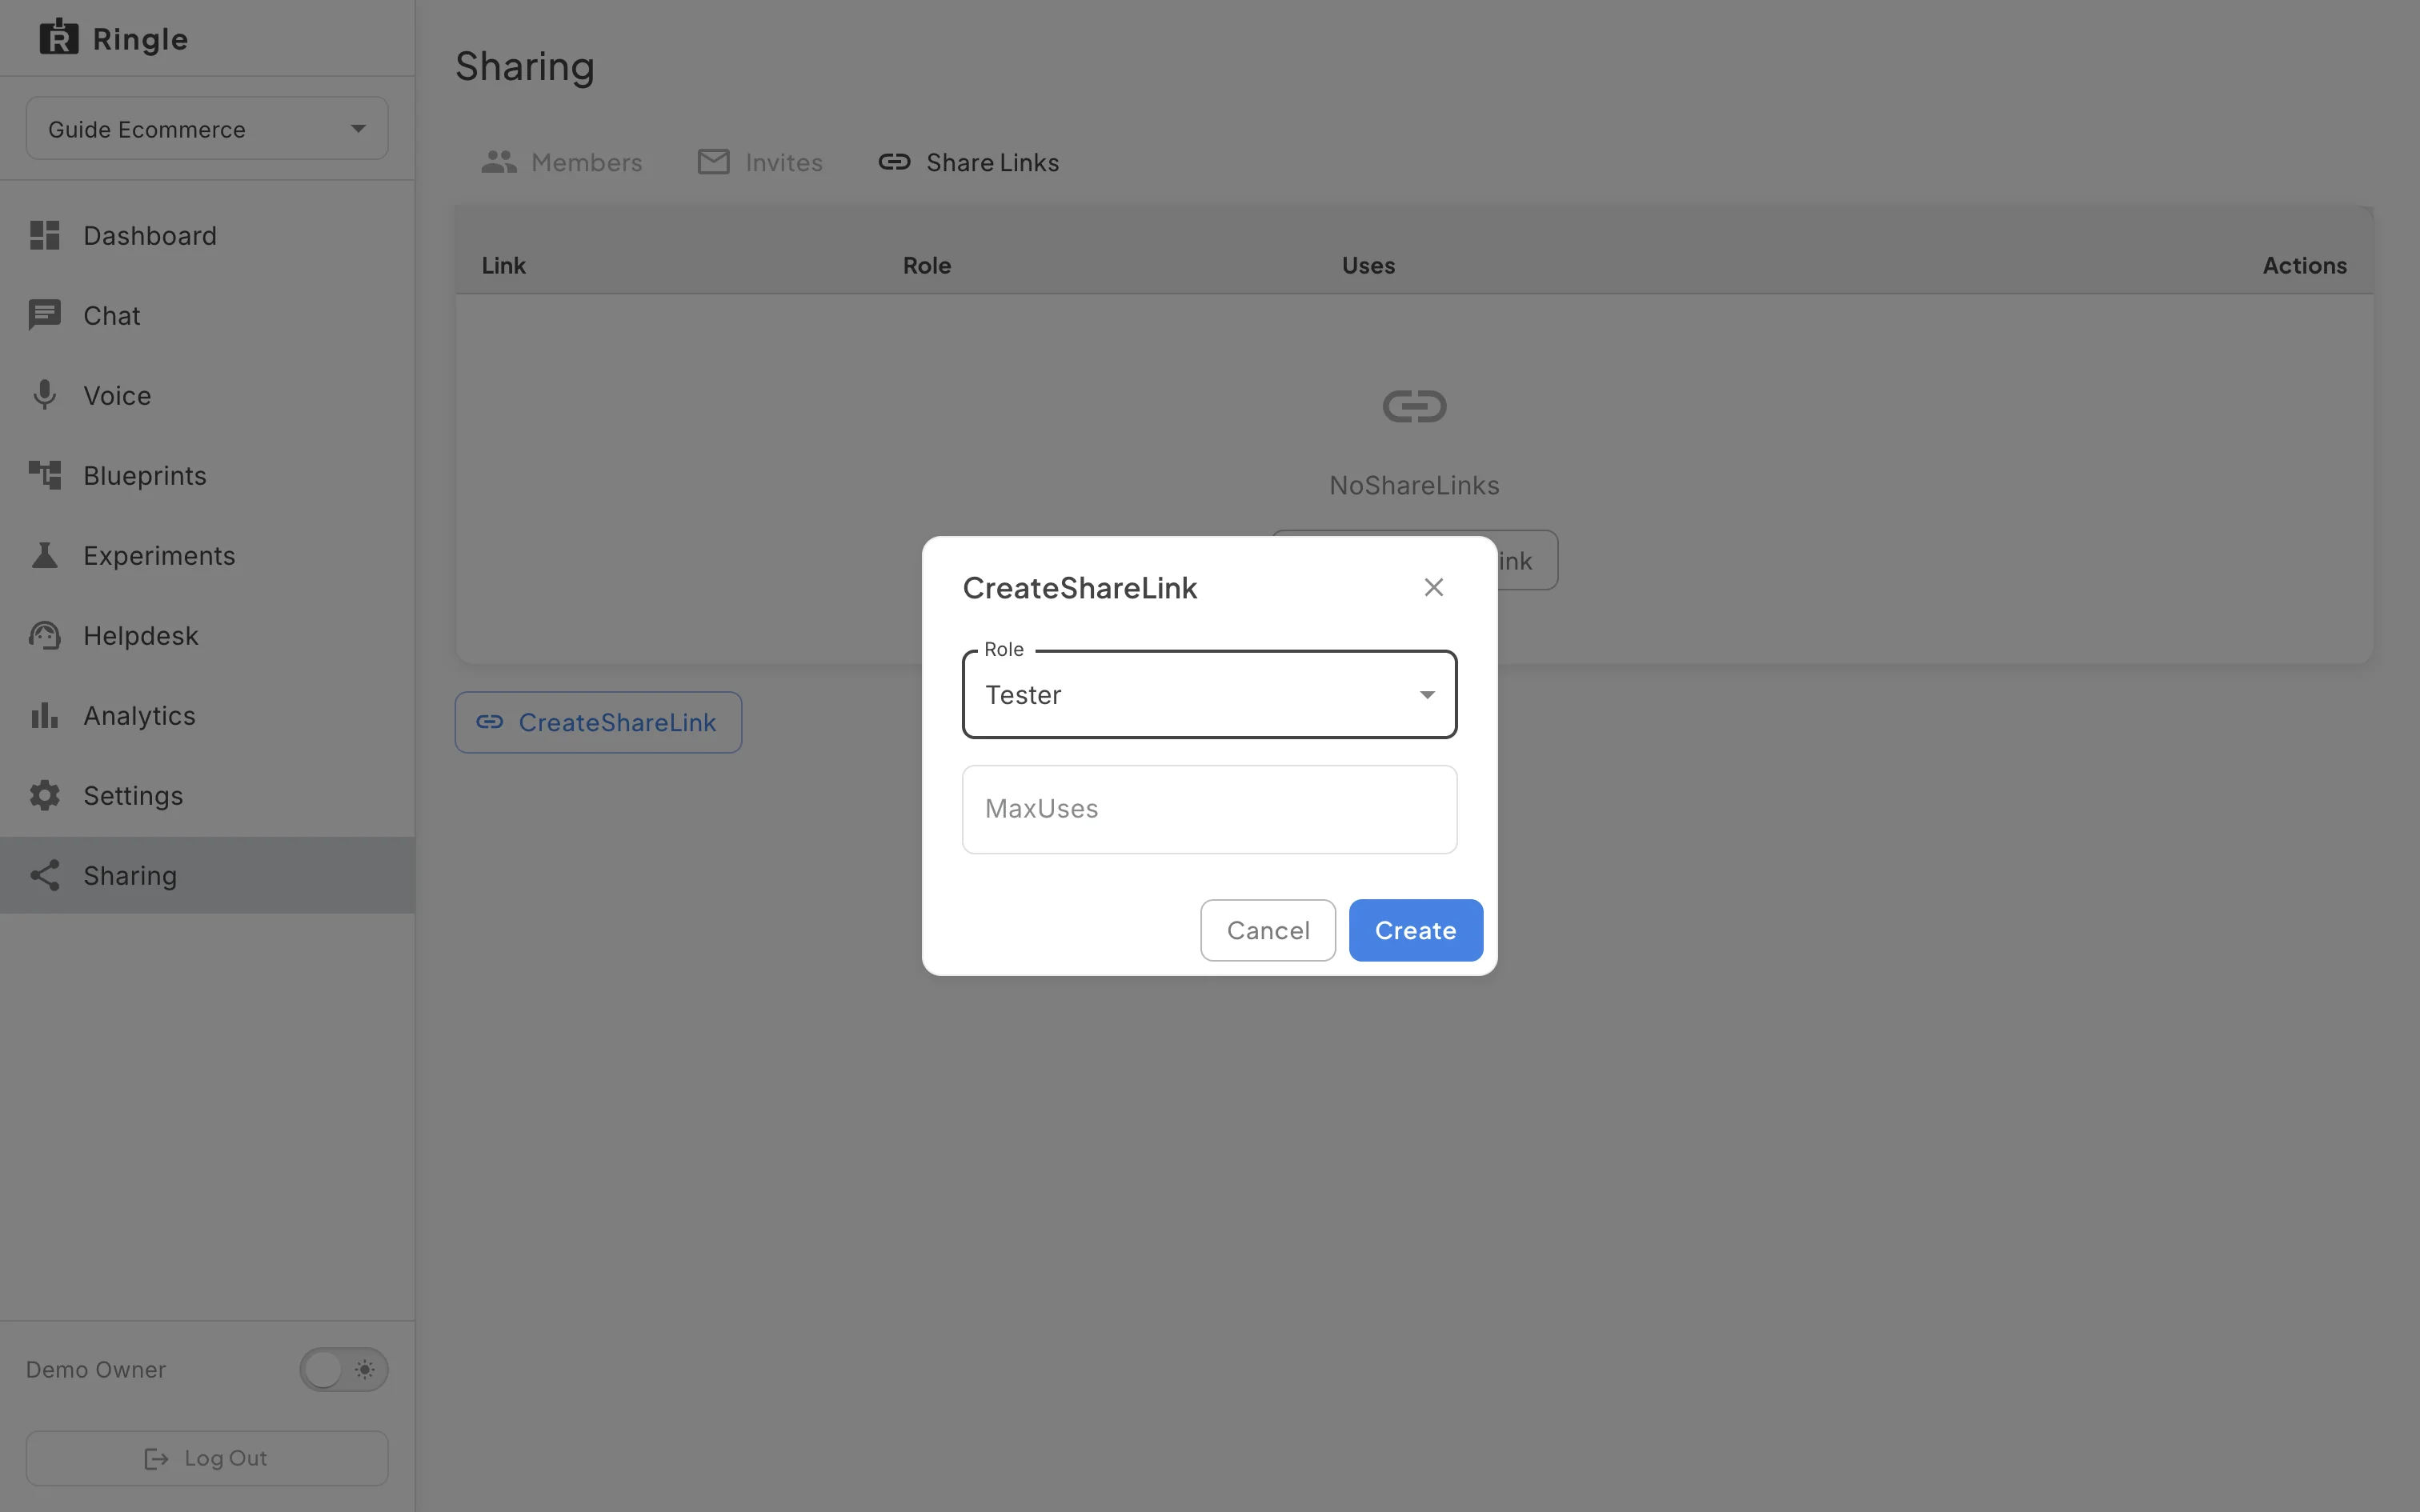
Action: Open the Share Links tab and click Create Share Link. Type a label and keep the other fields as they are.
What you should see: The dialog asks for an optional Label and Prospect name, the Role a guest acts with, an optional maximum number of uses and an optional expiry. A line under the role says the link opens a chat; for a voice demo you attach a phone number in Settings and share the number. A link cannot outlive the demo: leave Expires empty and it expires with the workspace. Click Create.
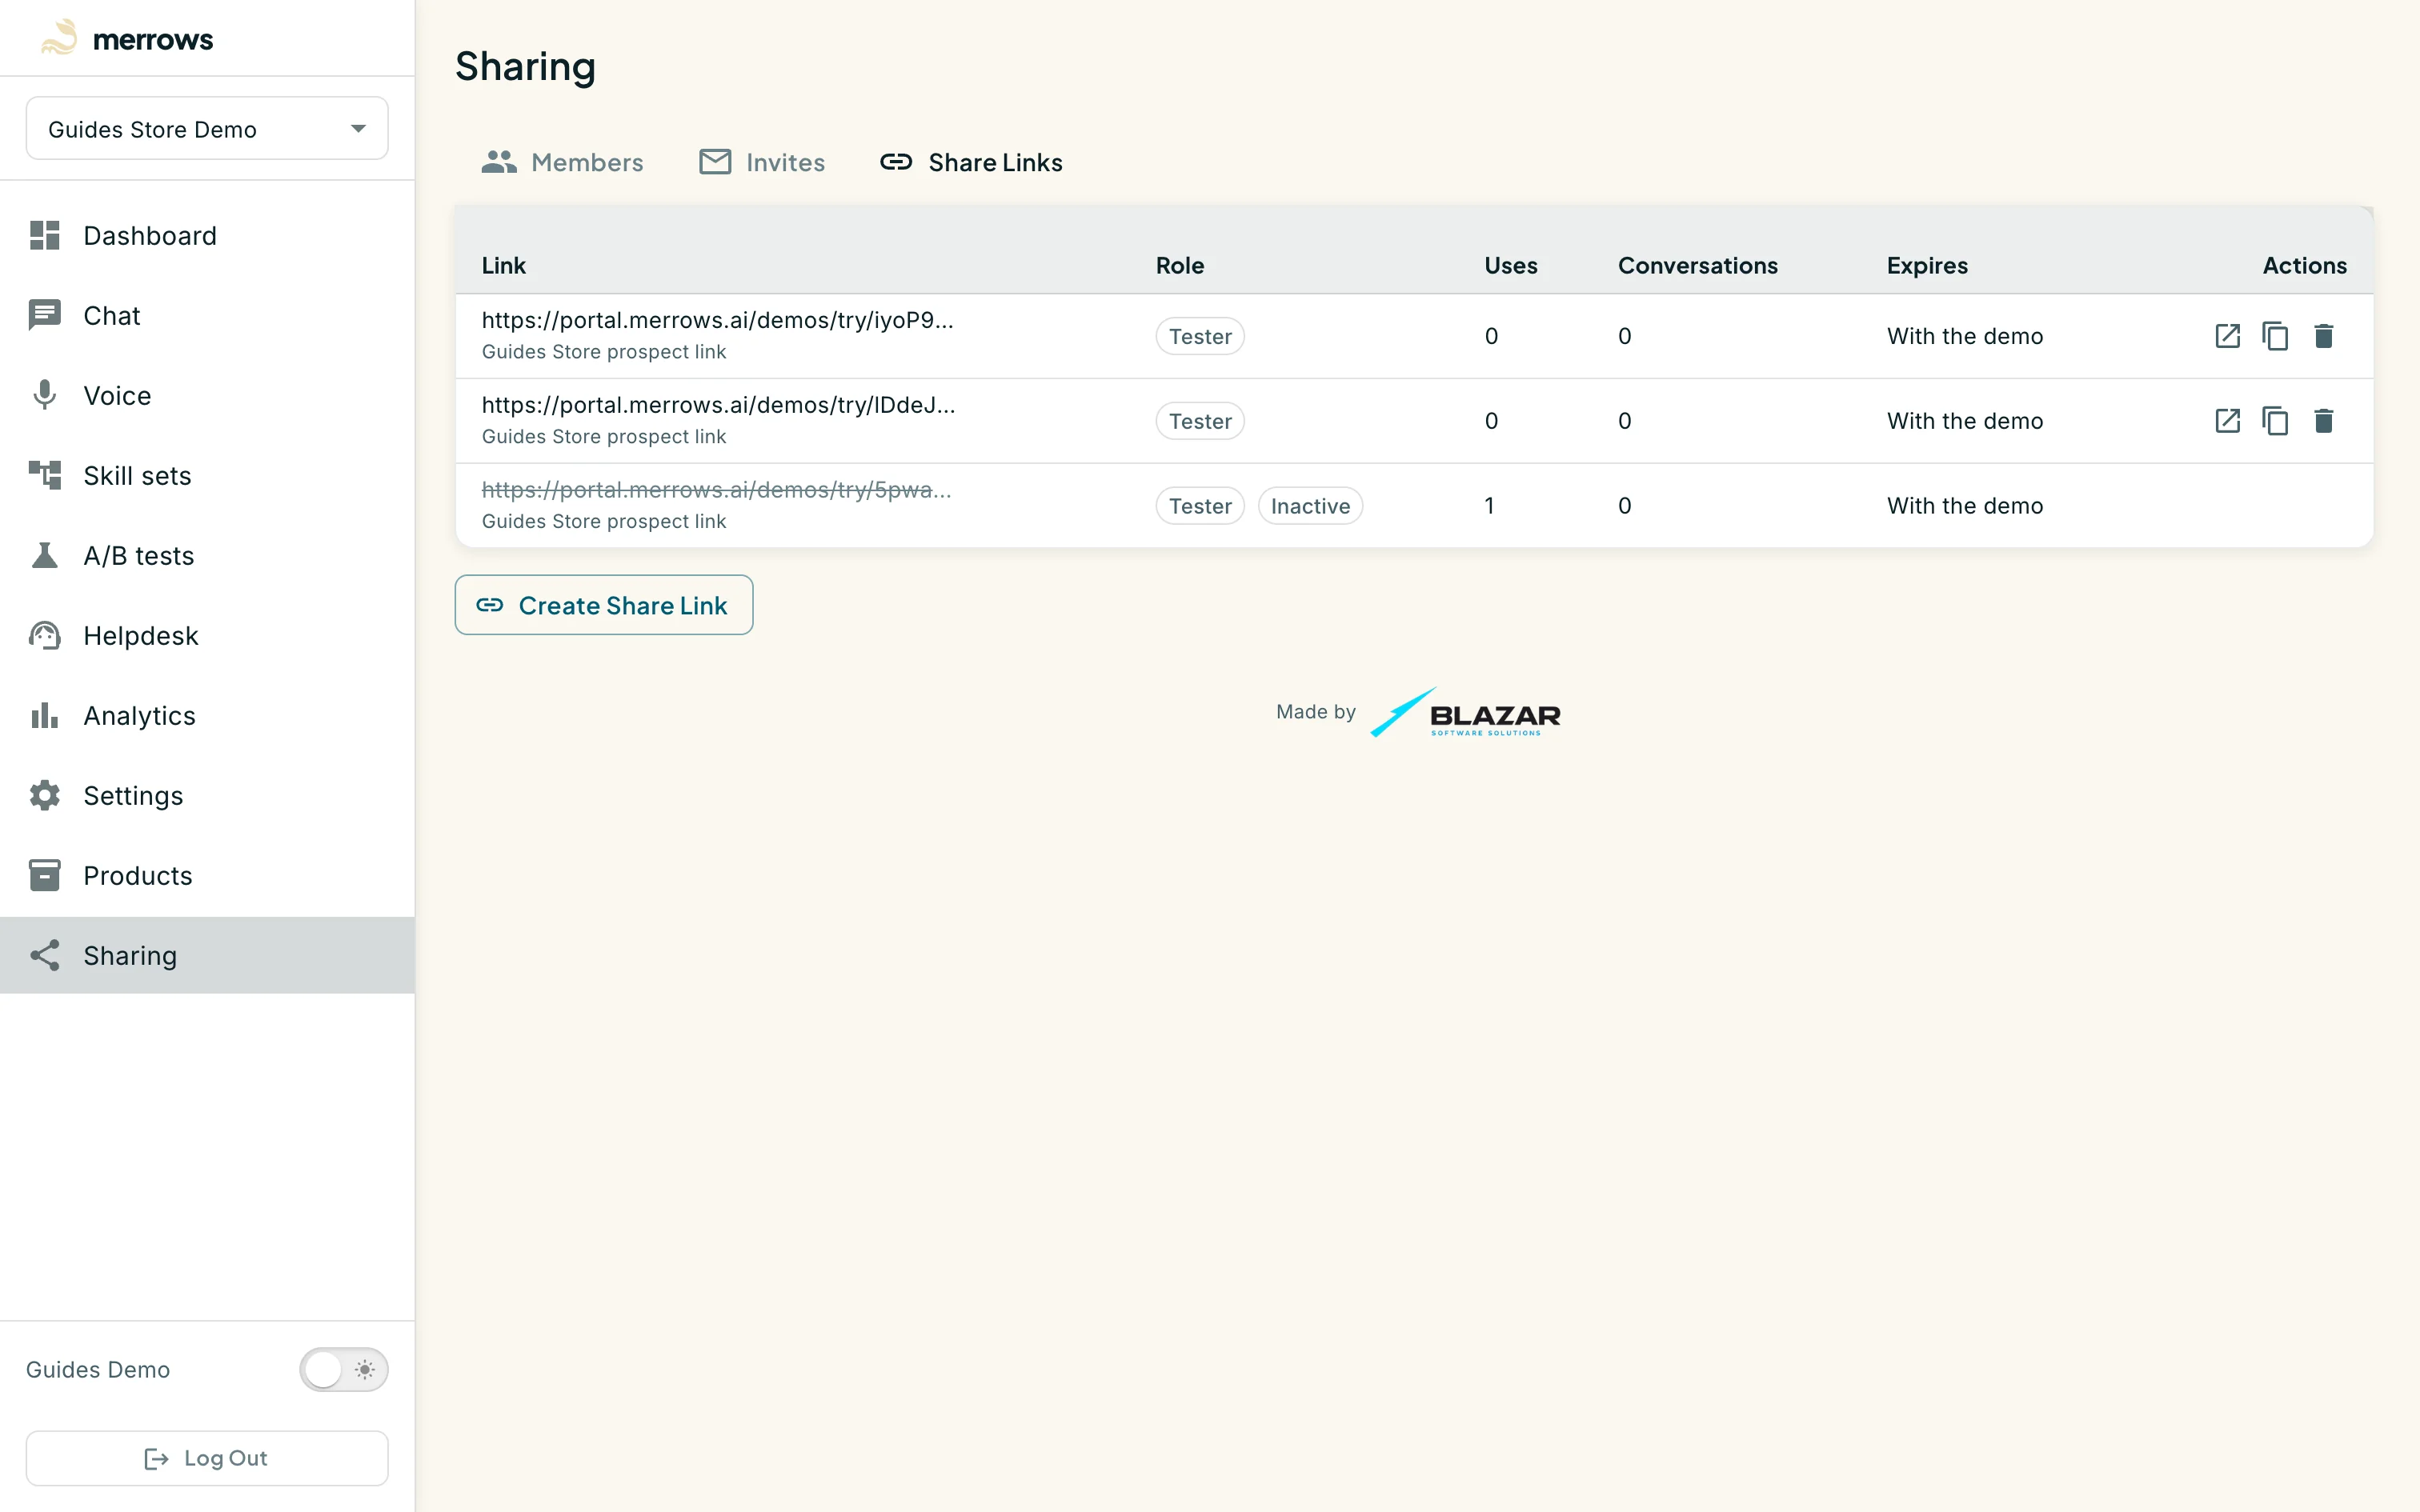
Action: Review the new row.
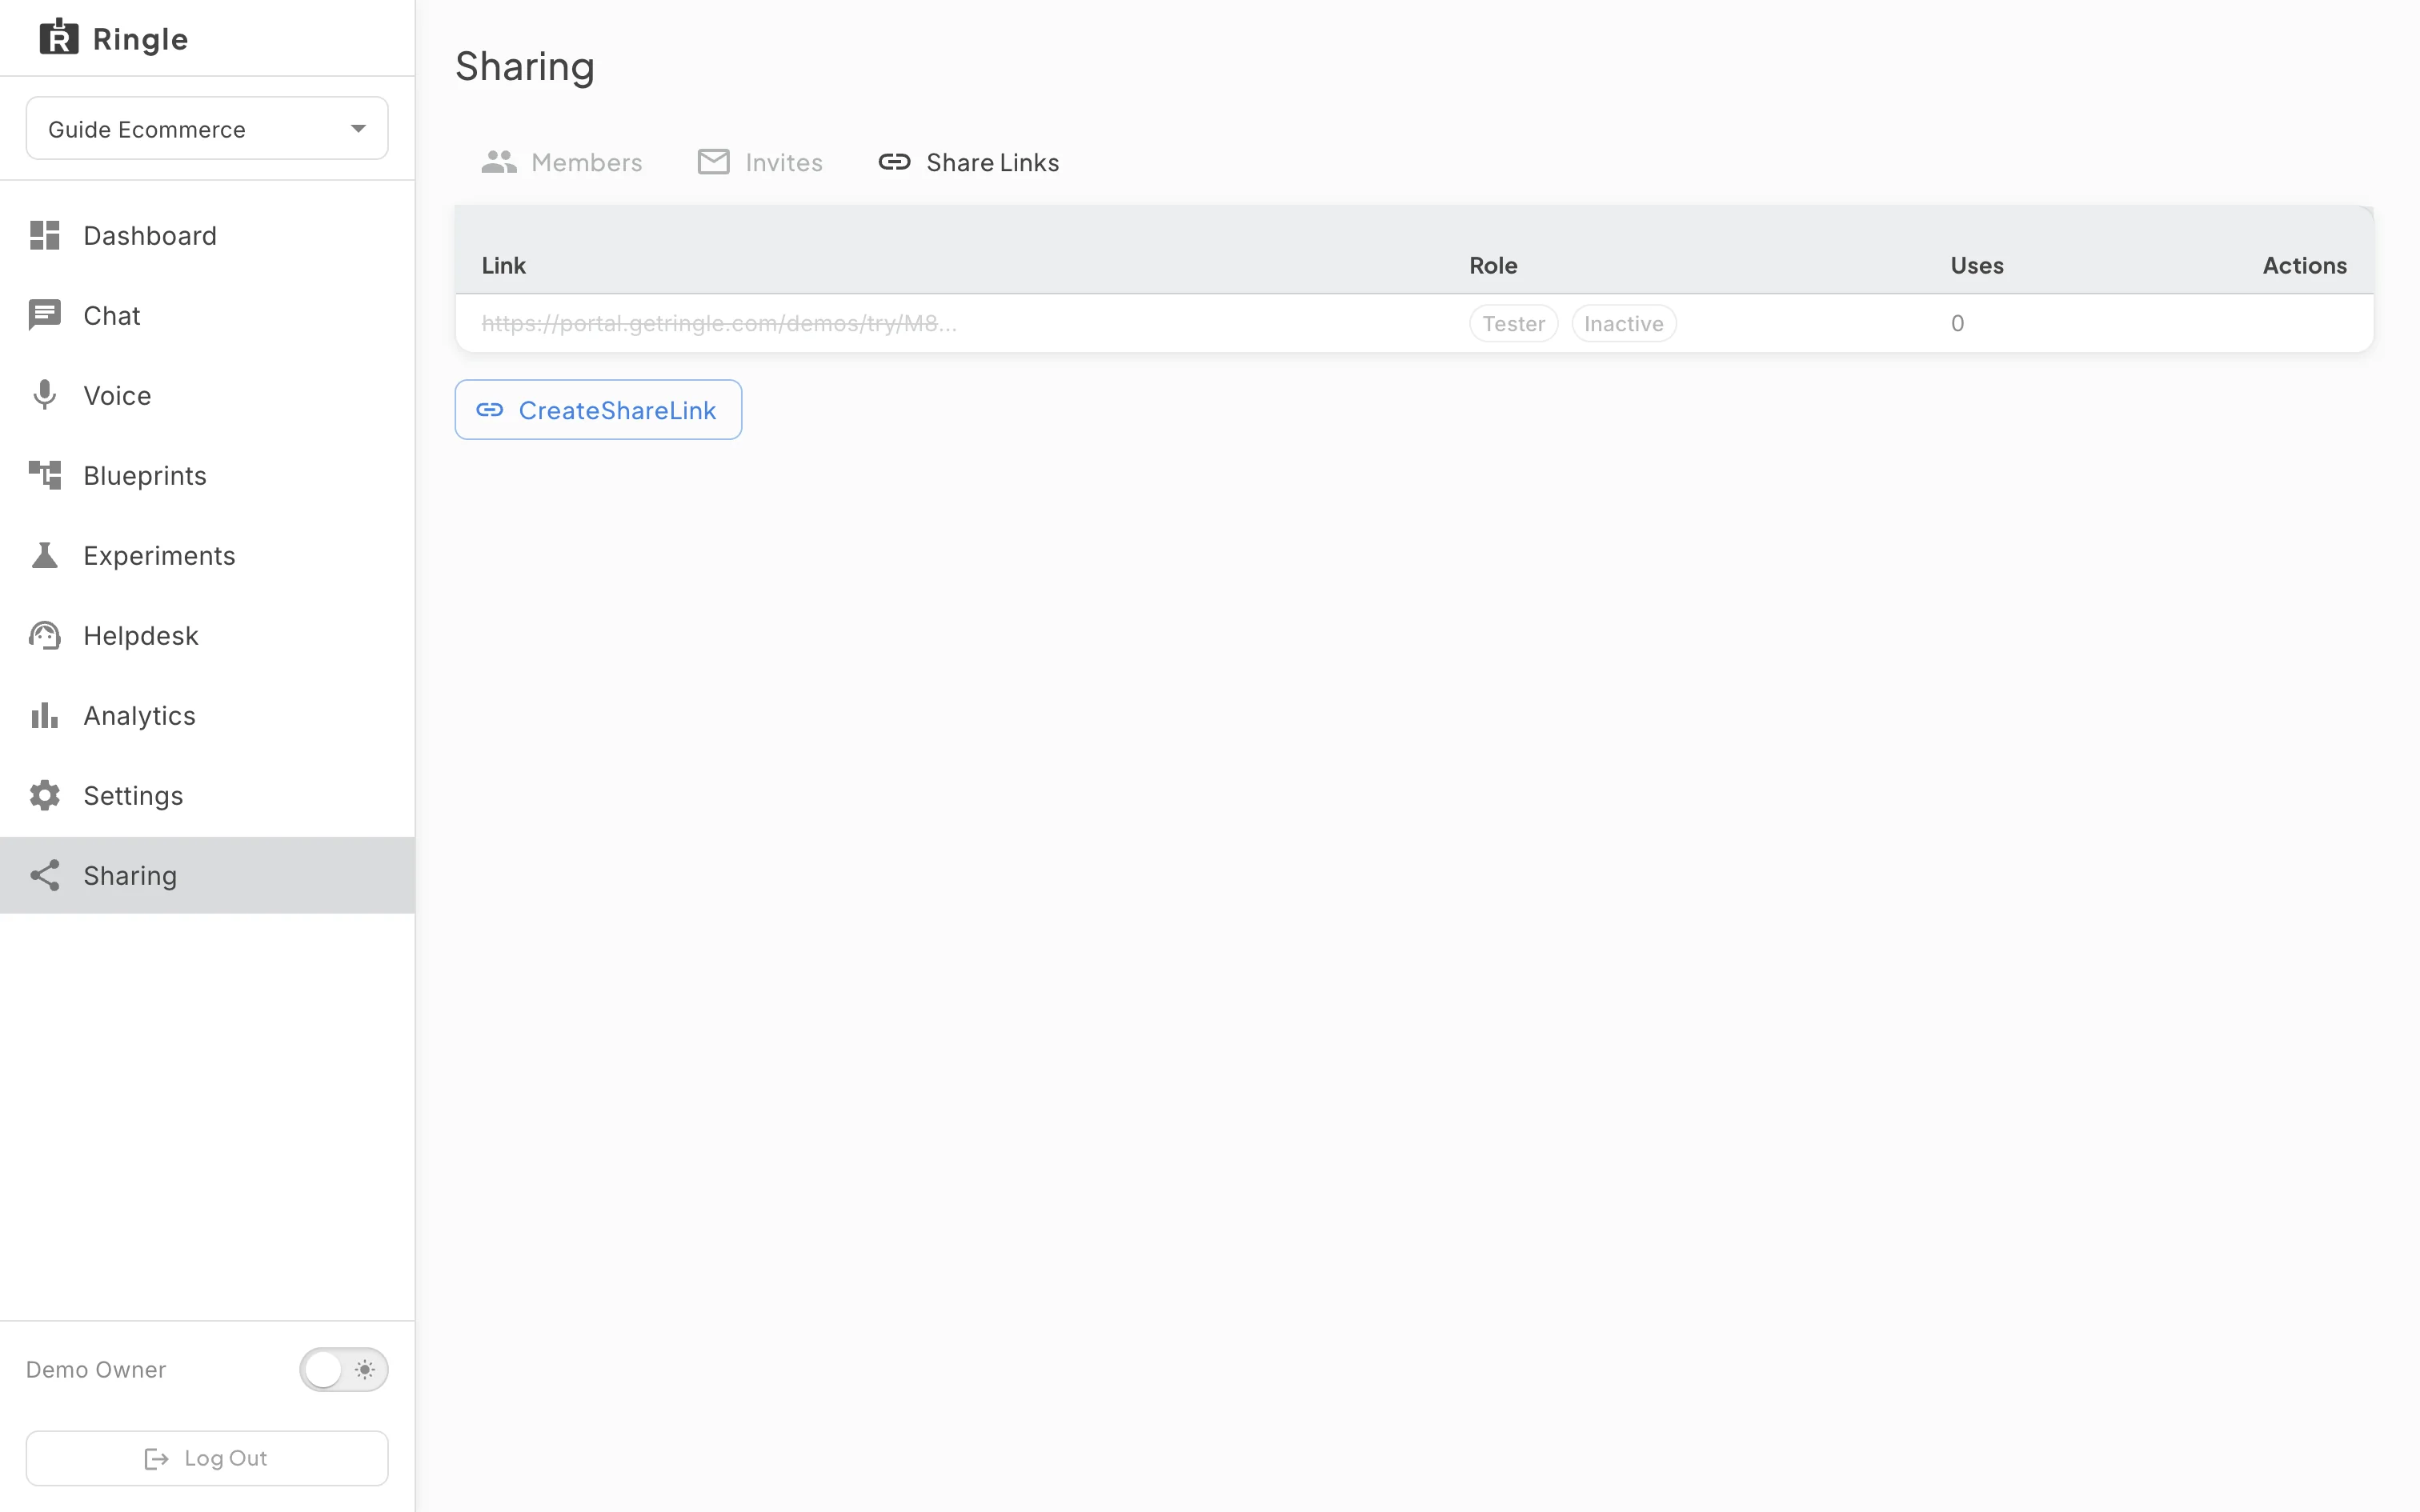
What you should see: The table shows the link’s address, its label, the role, how many times it has been used, how many conversations ran through it and when it expires, with three actions: an open-in-new icon that previews the link as a guest, a copy icon that puts the address on the clipboard for a mail or a message, and a bin icon that deactivates the link.
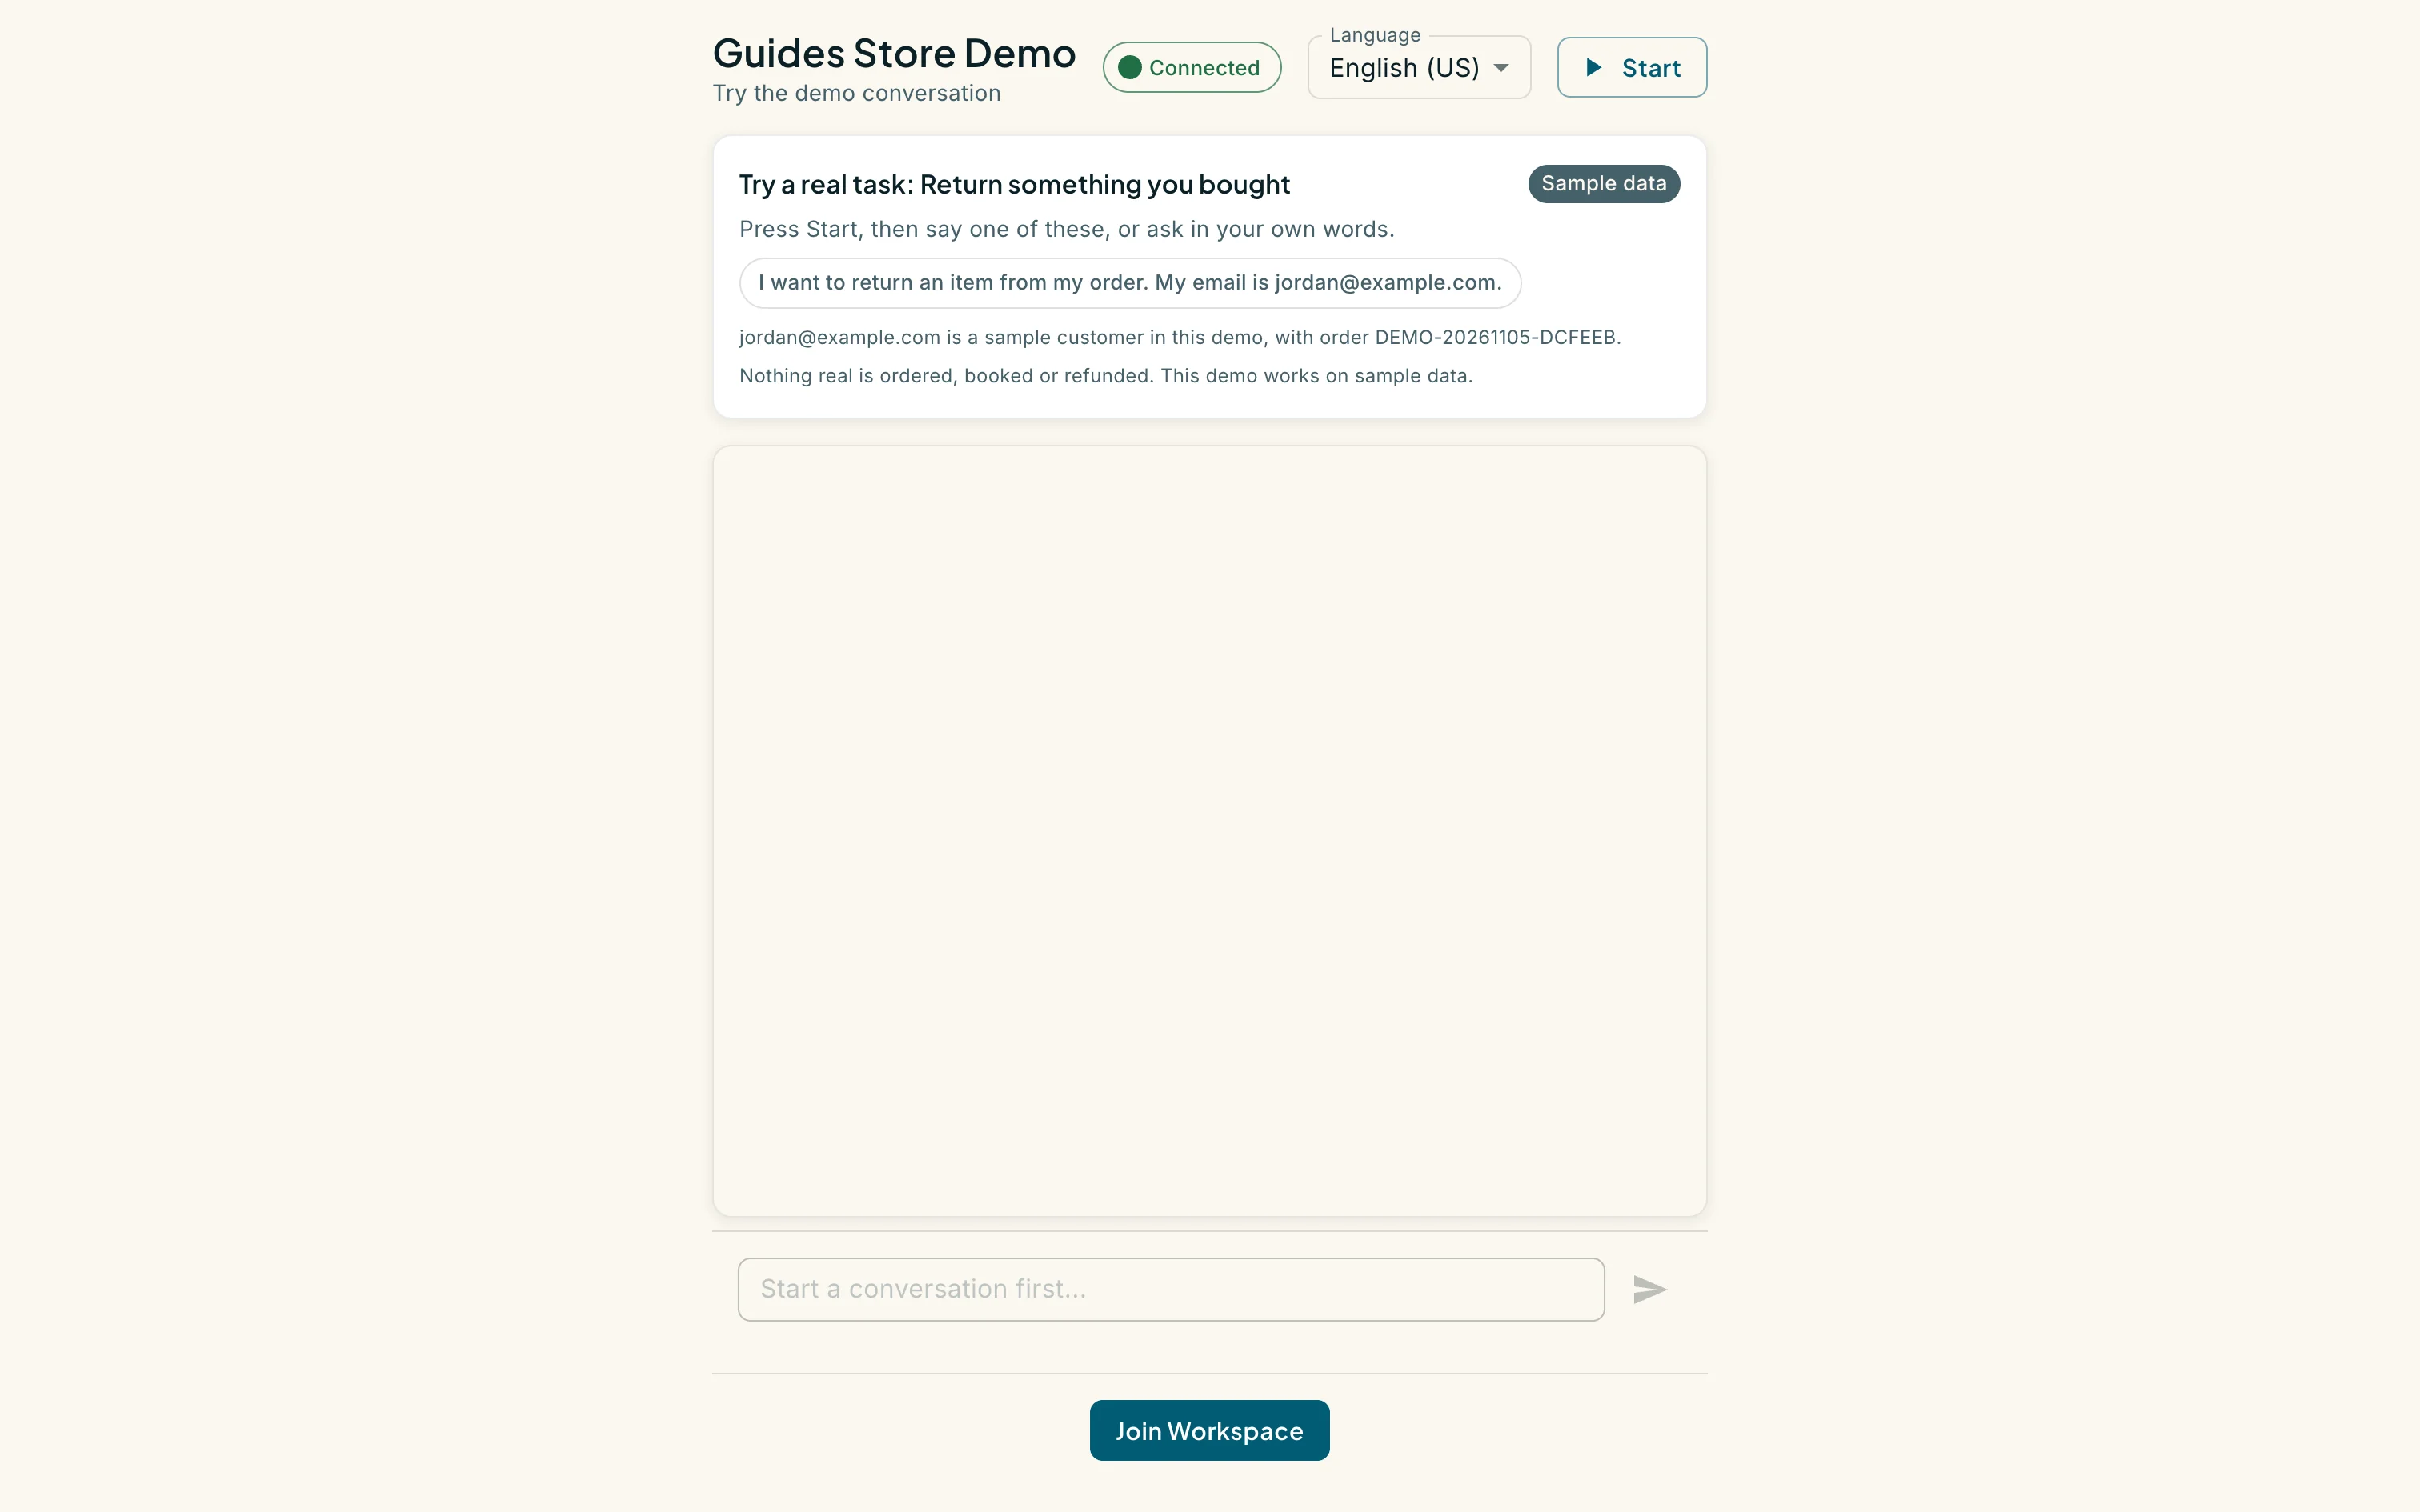
Action: Open the link in another browser, or click the preview icon on its row.
What you should see: The guest page shows the workspace name, “Try the demo conversation”, a Connected chip, a Language selector, a Start button and a message box. Above the chat, a “Try a real task” card suggests something to ask and names the sample customer it uses; the demo works on sample data only. The guest page is chat only; a prospect hears the assistant by calling the demo’s phone number. No sign-in is needed. A guest who wants to keep working in the workspace can click Join Workspace, which asks them to sign up or log in and then adds them with the link’s role. Guest conversations appear under Analytics.